¶ Billing
¶ Overview
The Billing Module ensures accurate charging for all patient services and treatments in Prudent Dental Software. It helps in:
- Accurate Service Charges – Ensuring every service and treatment is correctly billed.
- Reduced Waiting Time – Streamlined billing to minimize patient queue time.
- Workflow Efficiency – Improves overall operational workflow.
- Financial Records – Maintains proper and organised financial records.
- Payment Tracking – Tracks payments and pending dues effectively.
- Reports – Generates reports for accounting and audit purposes.
- System Integration – Integrates with EMR, Lab, and Radiology requests seamlessly.
Billing is automatically generated for treatments and services once they are created in the system, ensuring a smooth patient flow and reduced queues.
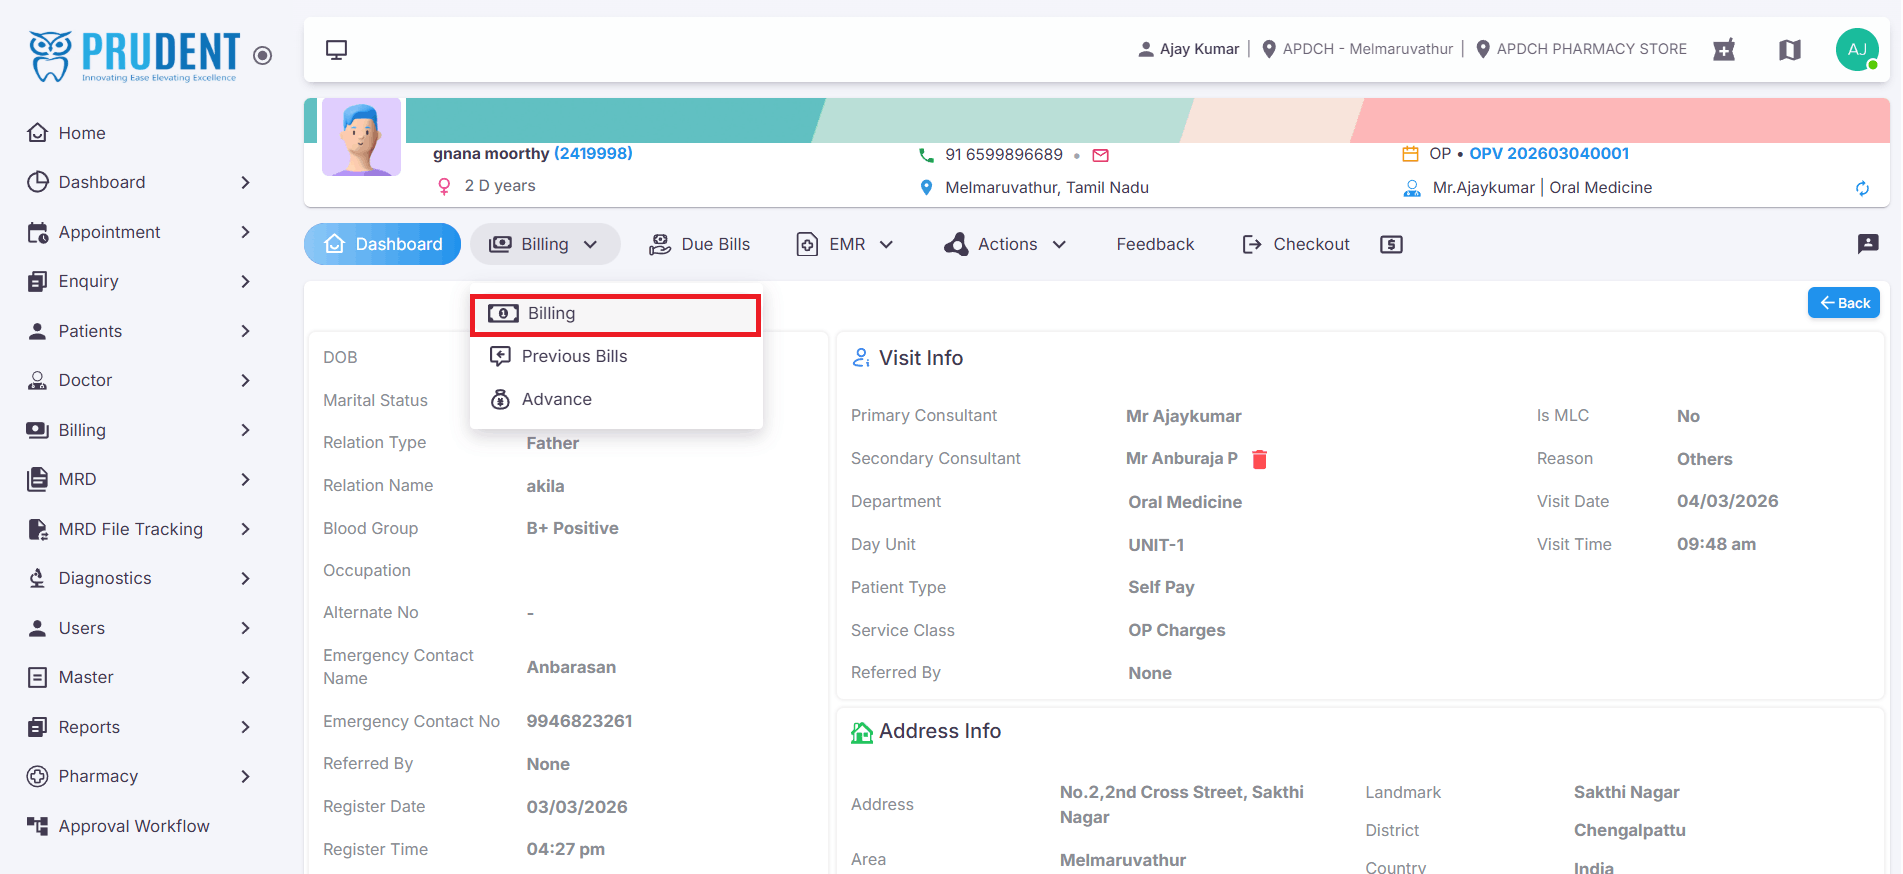
¶ How to Access the Billing Screen
Follow the steps below to navigate to the Billing page:
- Log in and go to the Patient List.
- Click the View (Eye) Icon on the selected patient's row.
- The Patient Overview Screen will open.
- Click the Billing menu next to the Dashboard.
- From the submenu, select Billing to open the Billing screen.
¶ Service and Lab Billing Process
Once a Service Request or Lab Request is created, the case automatically moves to the Billing section. Let's go through the complete billing process step by step.
¶ Open the Billing Screen
After navigating to the Billing section, the Billing Screen will open displaying all services and treatments linked to the patient.

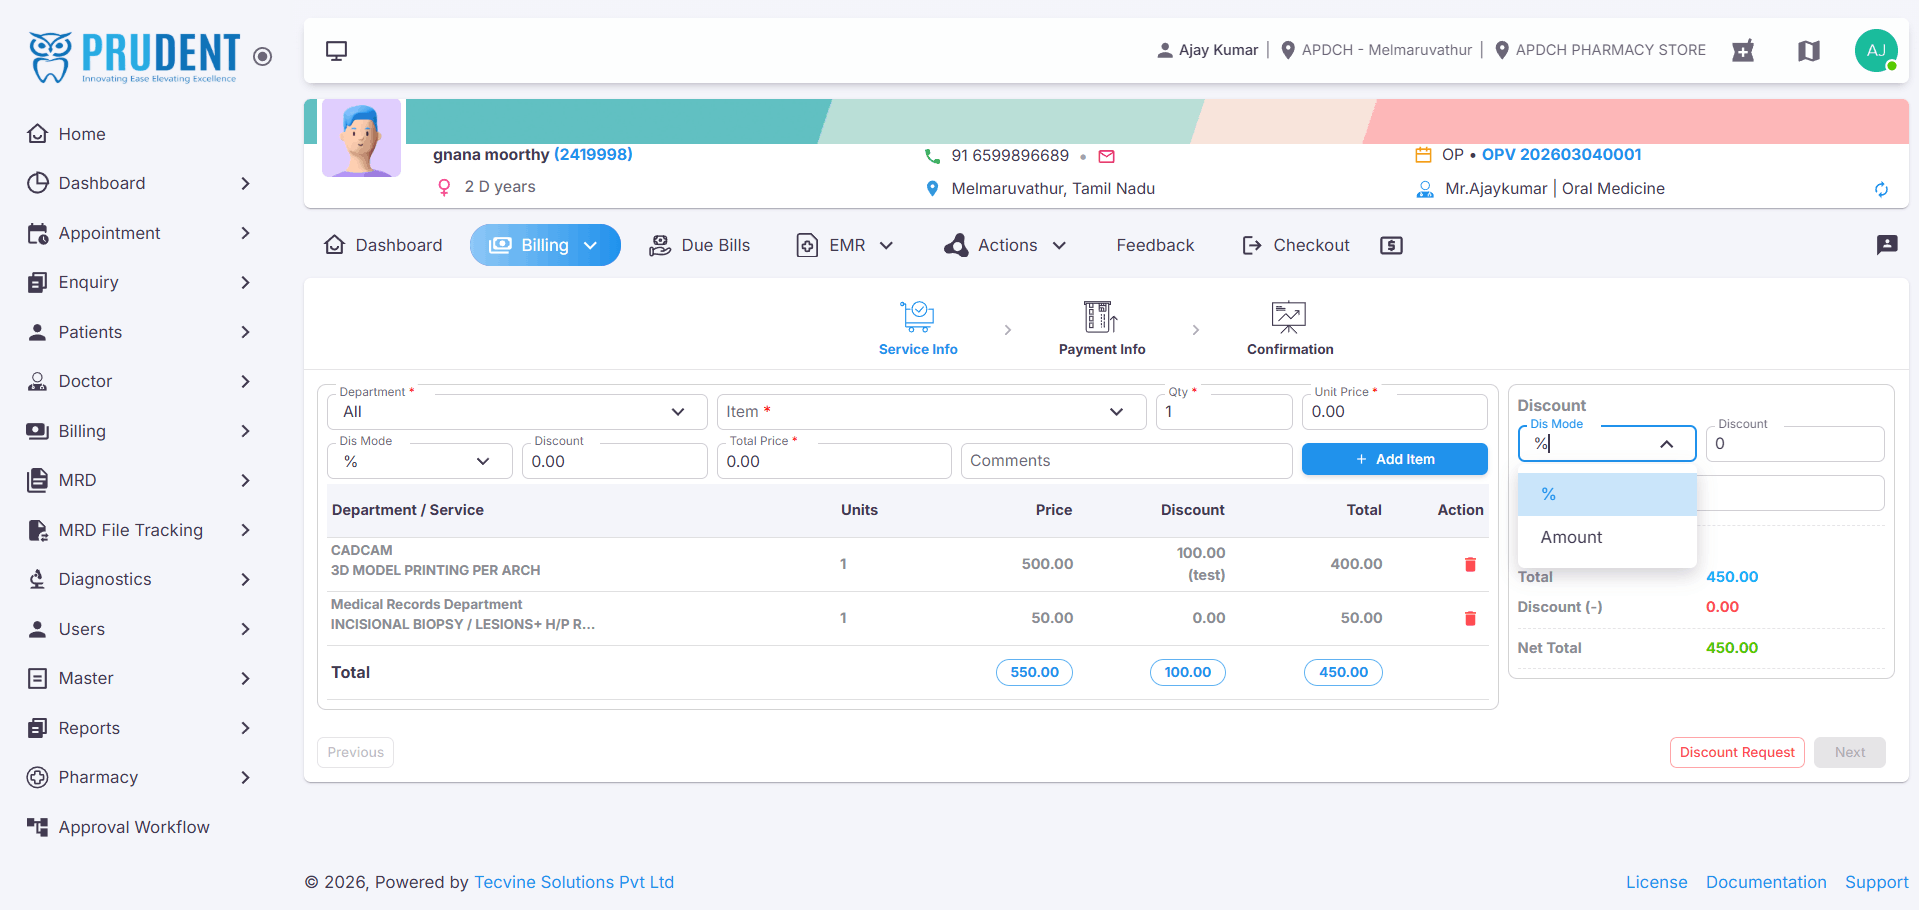
¶ Apply an Overall Discount (Optional)
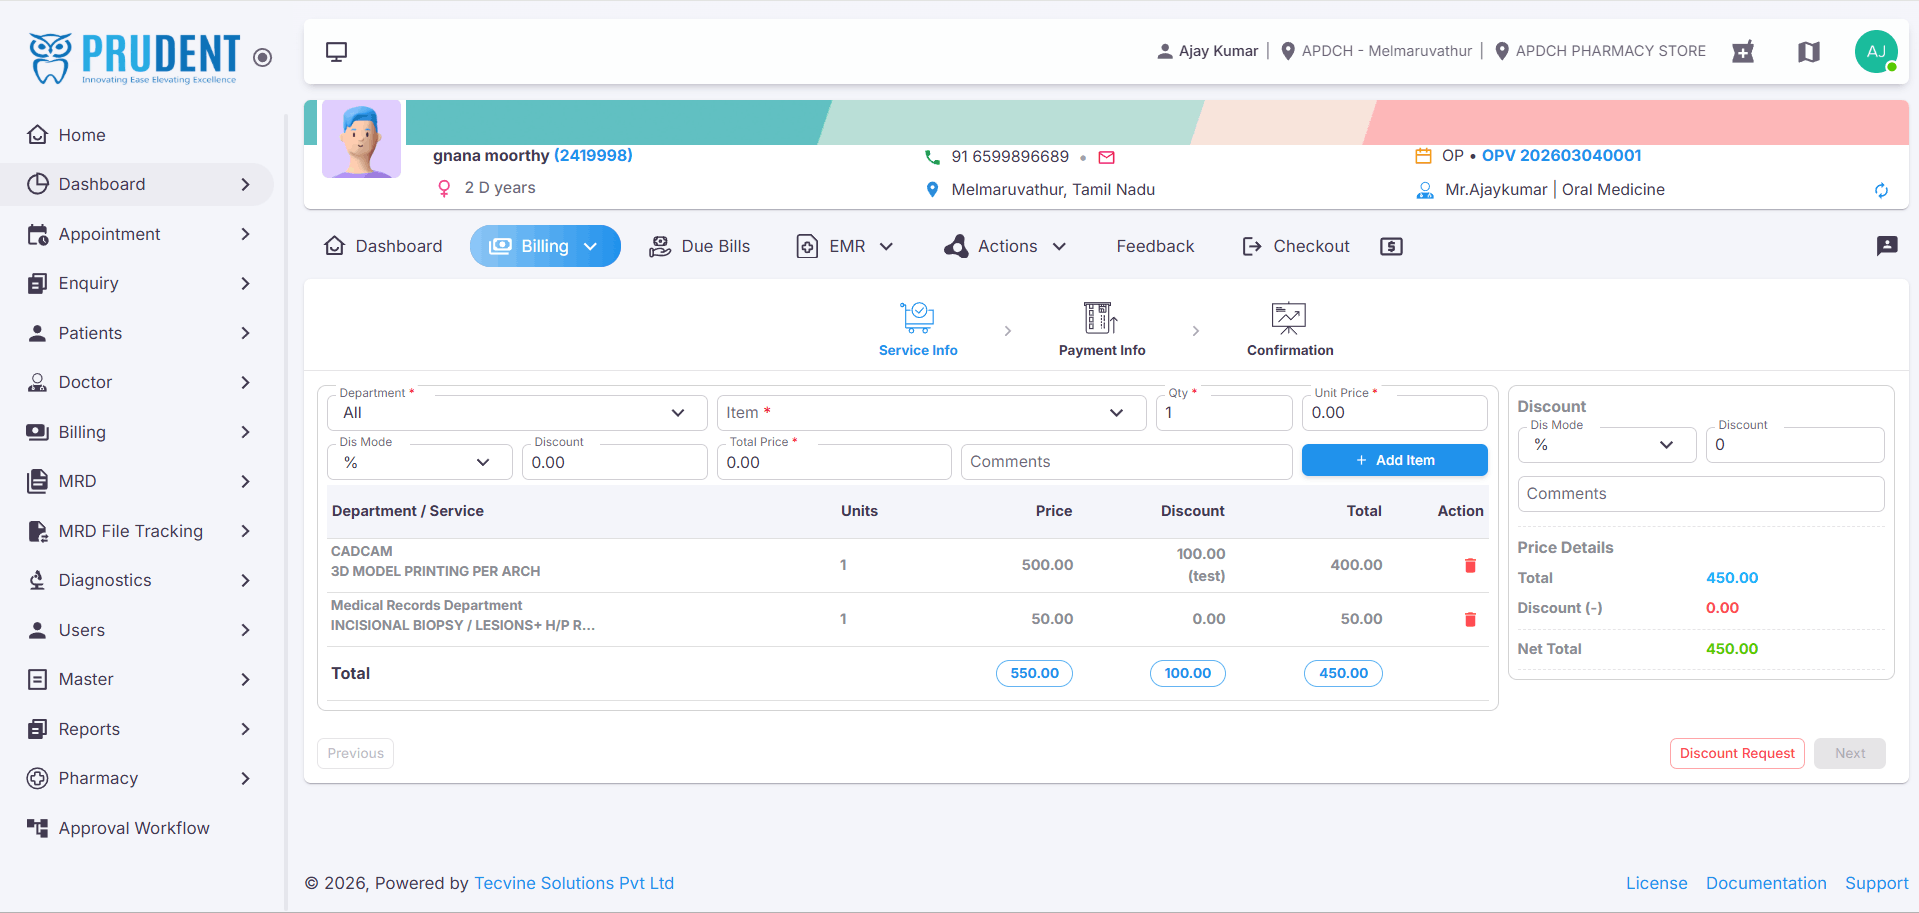
If you want to provide an overall discount on the bill, follow the steps below. If no discount is required, skip to Step 3.
- Select the Discount Type.
- Enter the Discount Amount.
- Add Comments (mandatory for approval).
- Click the Discount Request button.

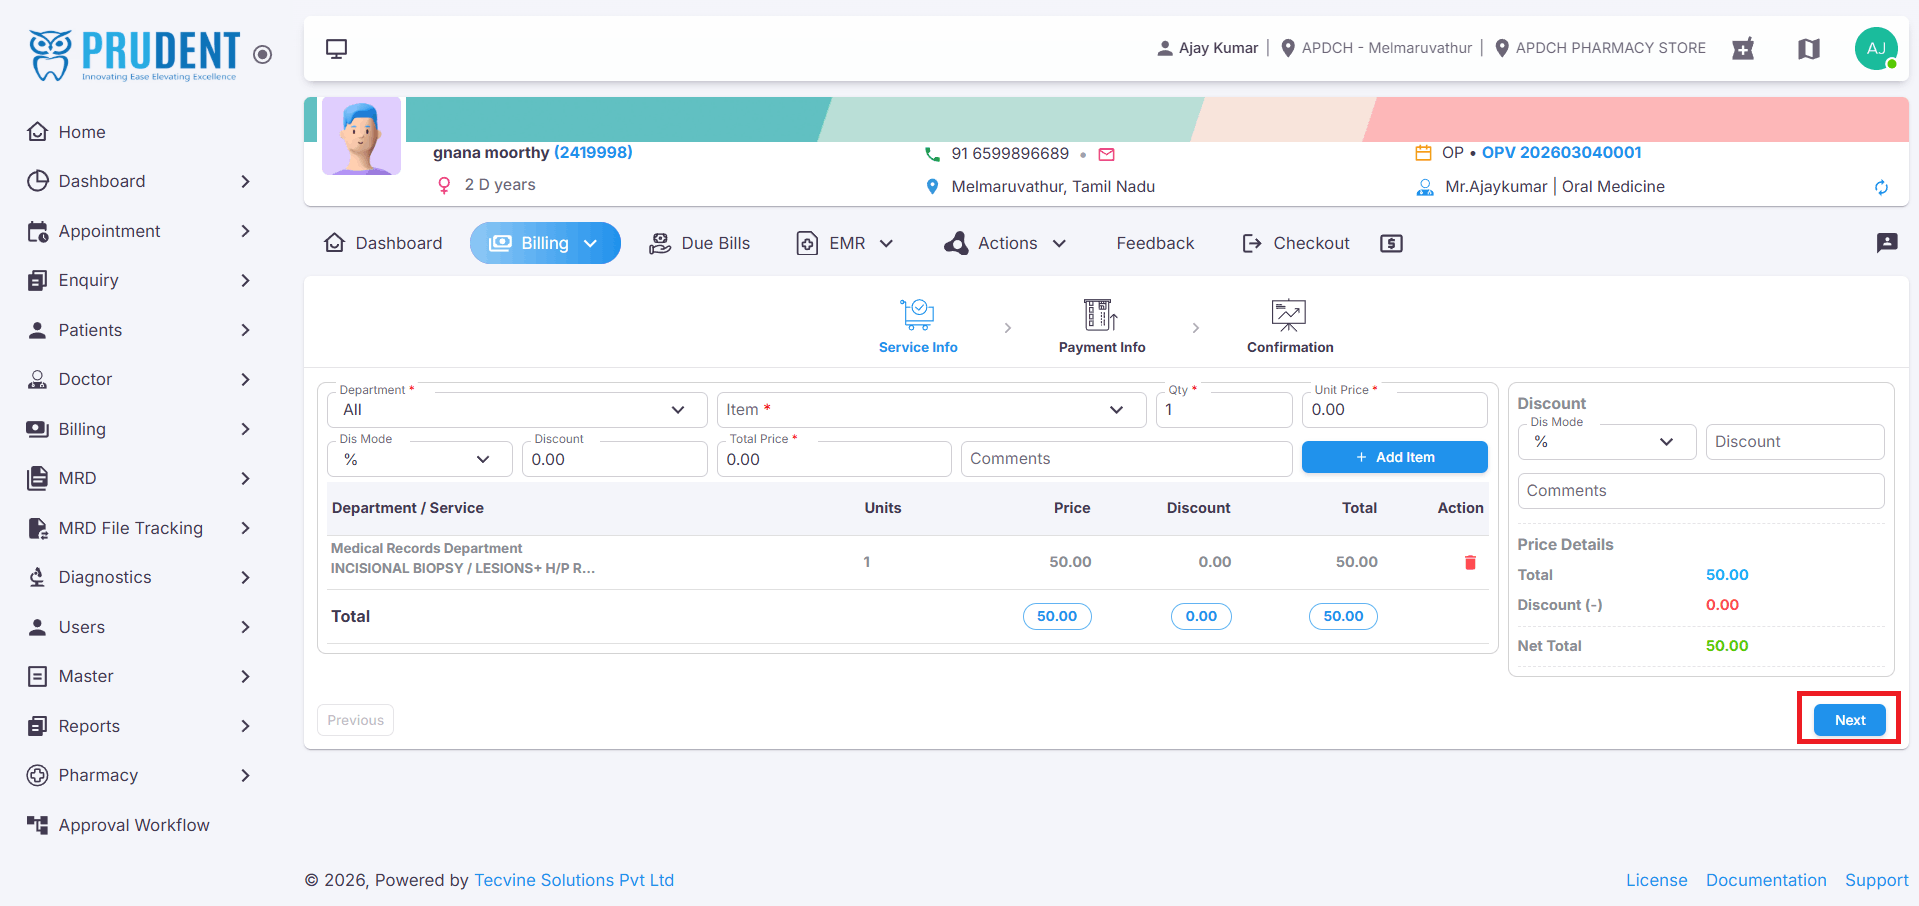
¶ Proceed to Payment – Click Next
If no discount is required, click the Next button to proceed directly to the Payment Screen.
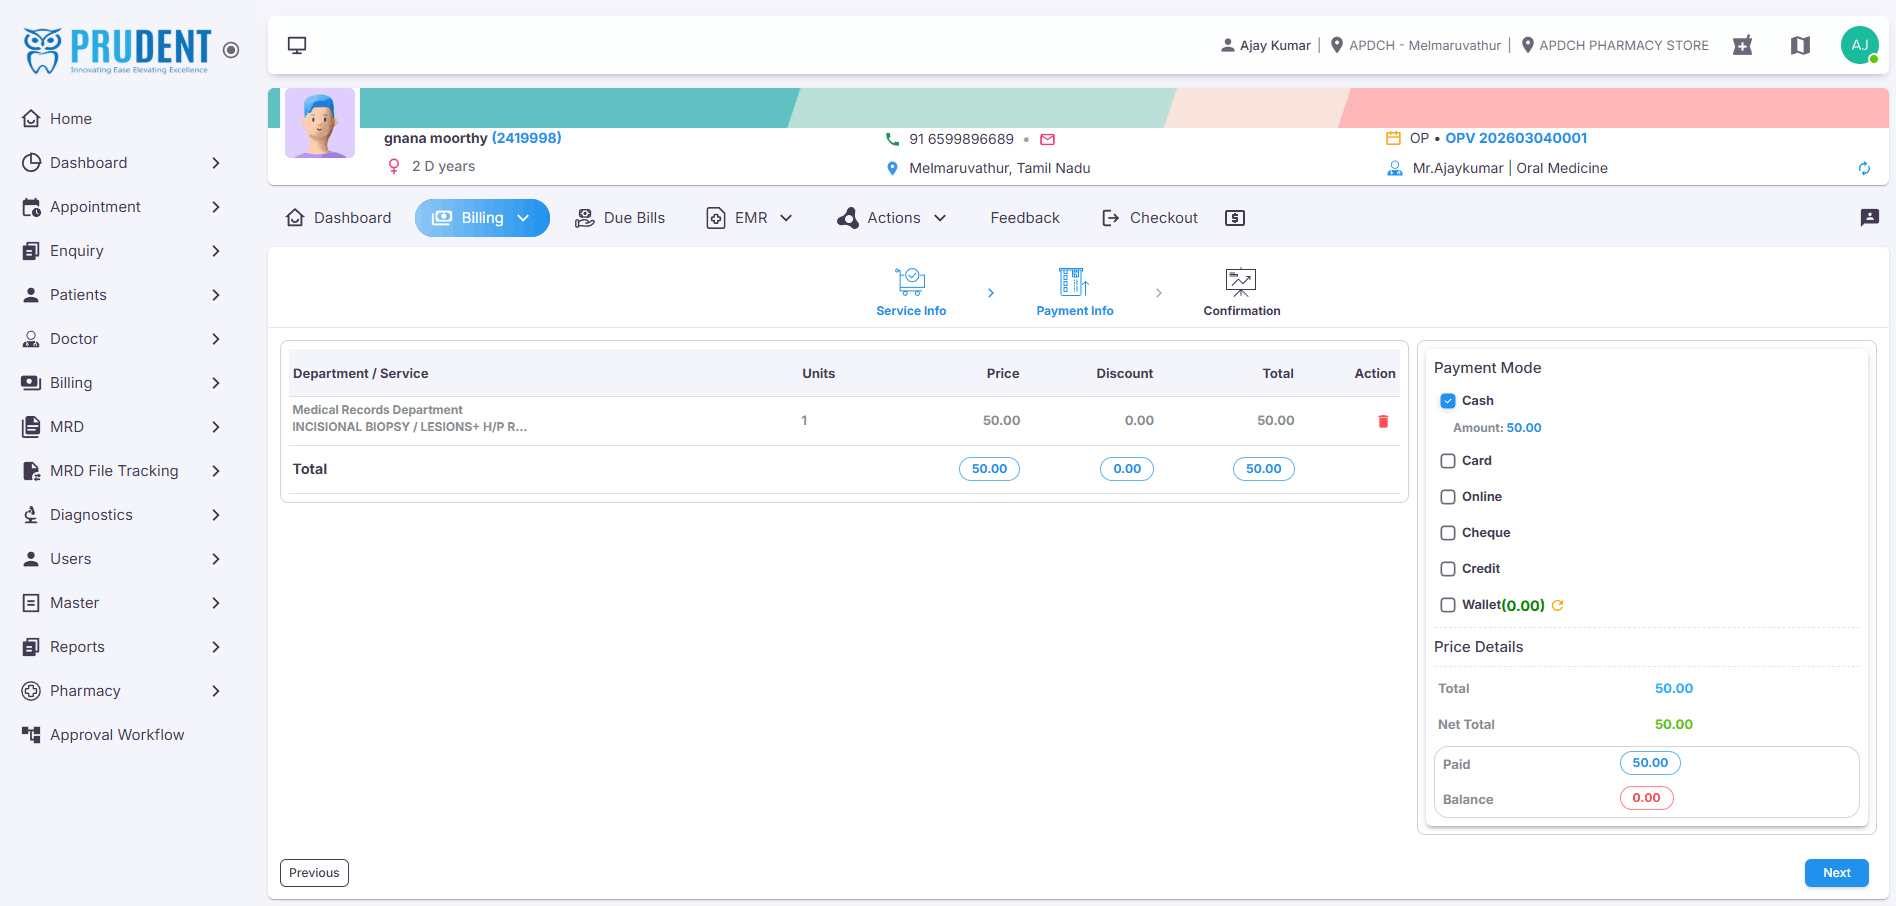
¶ Select Payment Mode
On the Payment screen, choose the appropriate Payment Mode:
- Cash – Patient pays using cash.
- Card – Payment via debit or credit card.
- Online – Payment through UPI apps like GPay or PhonePe.
- Cheque – Payment via cheque.
- Credit – Used when the patient does not pay the full amount. The remaining balance will be collected later. Remarks must be entered.
- Wallet – Payment using available stored wallet balance.
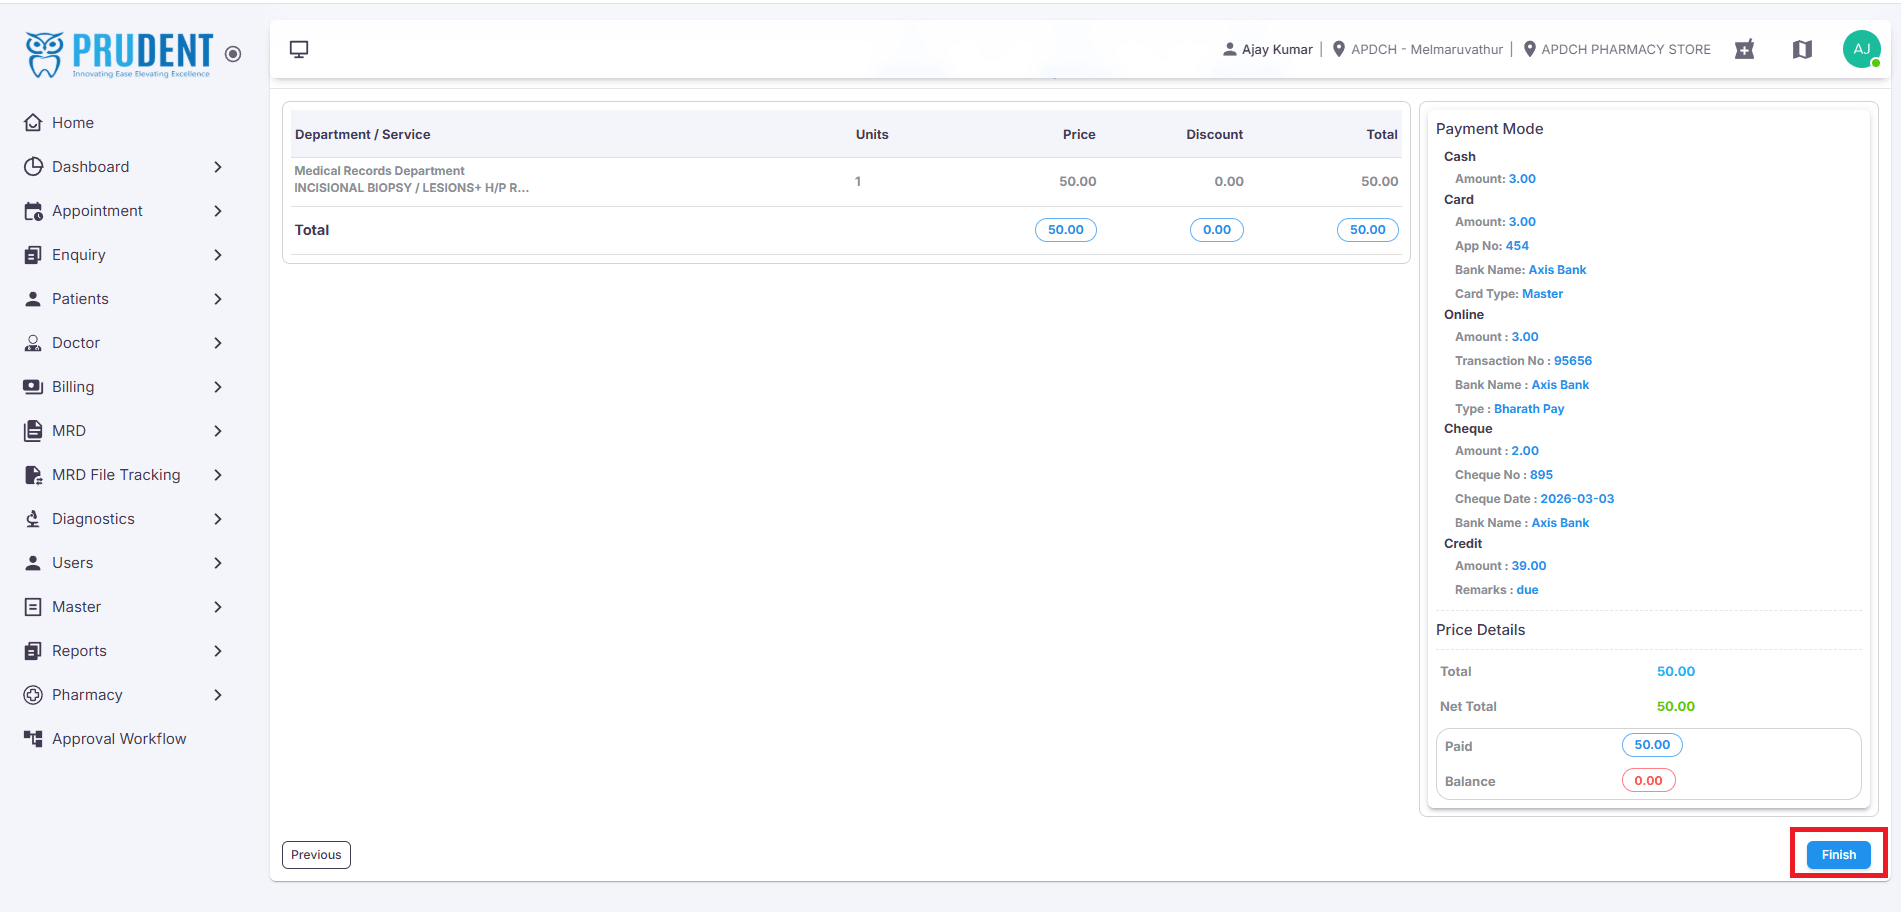
¶ Finish the Payment
After selecting the payment mode, complete the billing process:
- Click Next to review the payment details.
- Verify the payment details on the screen.
- Click Finish.
- A confirmation popup will appear – click Yes.
- A "Bill Created Successfully" message will be displayed.
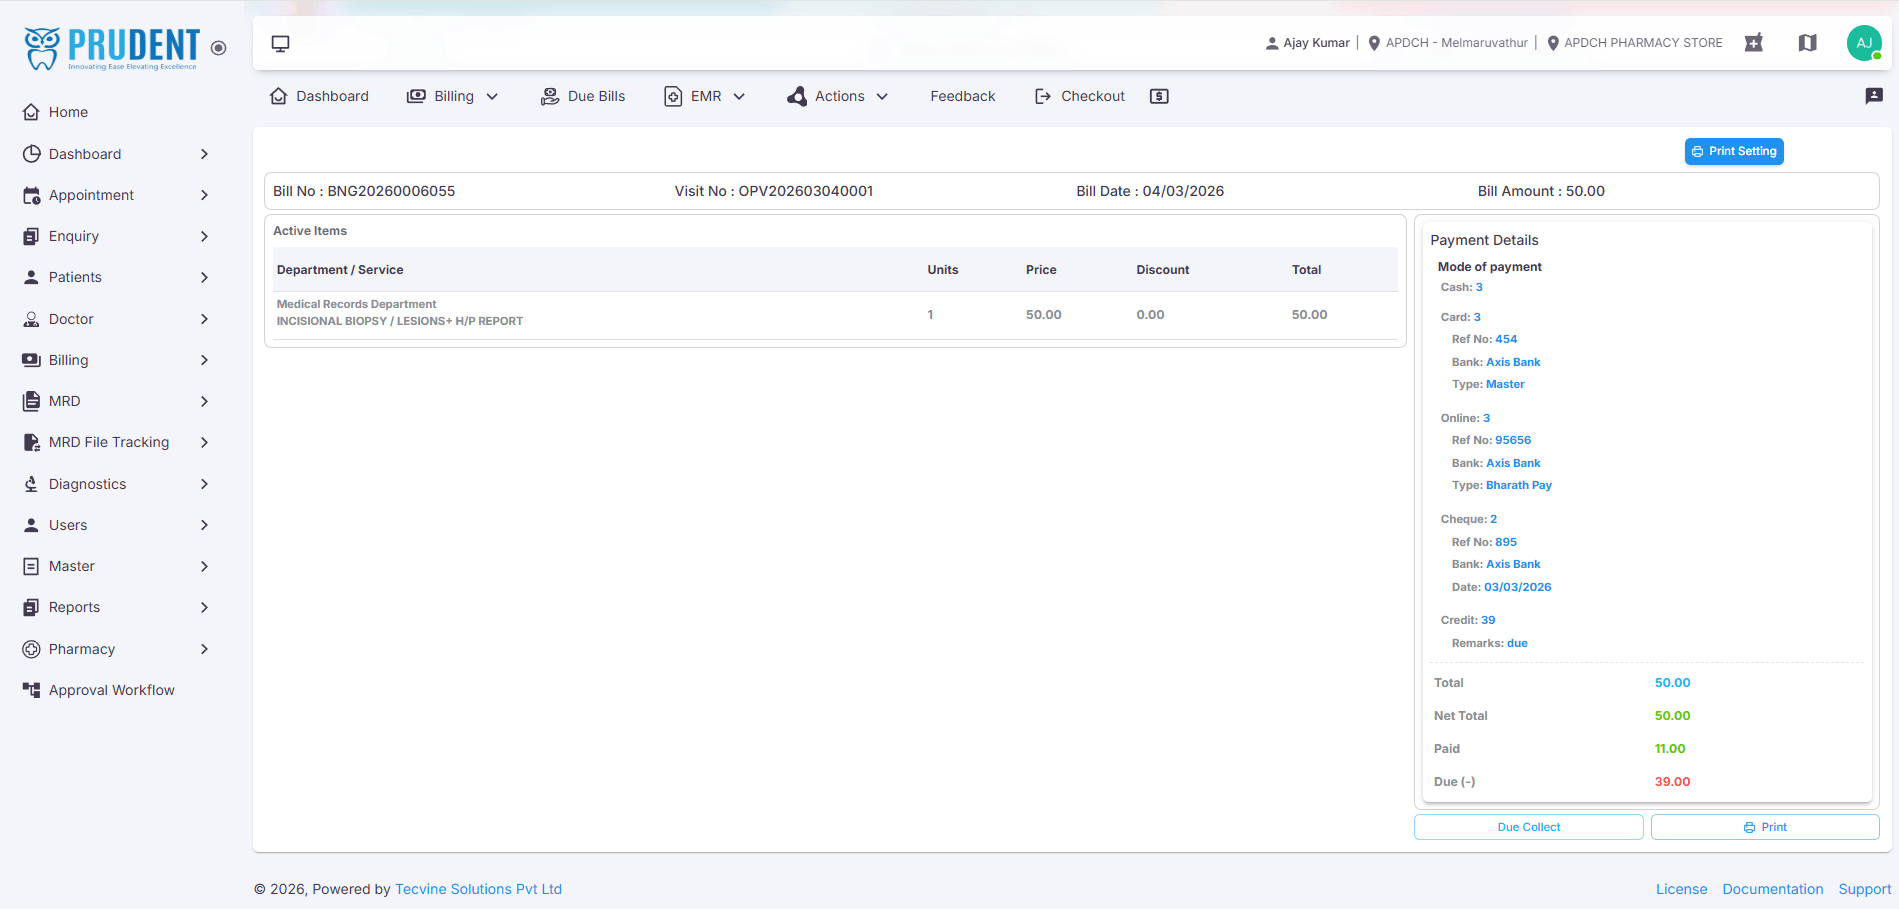
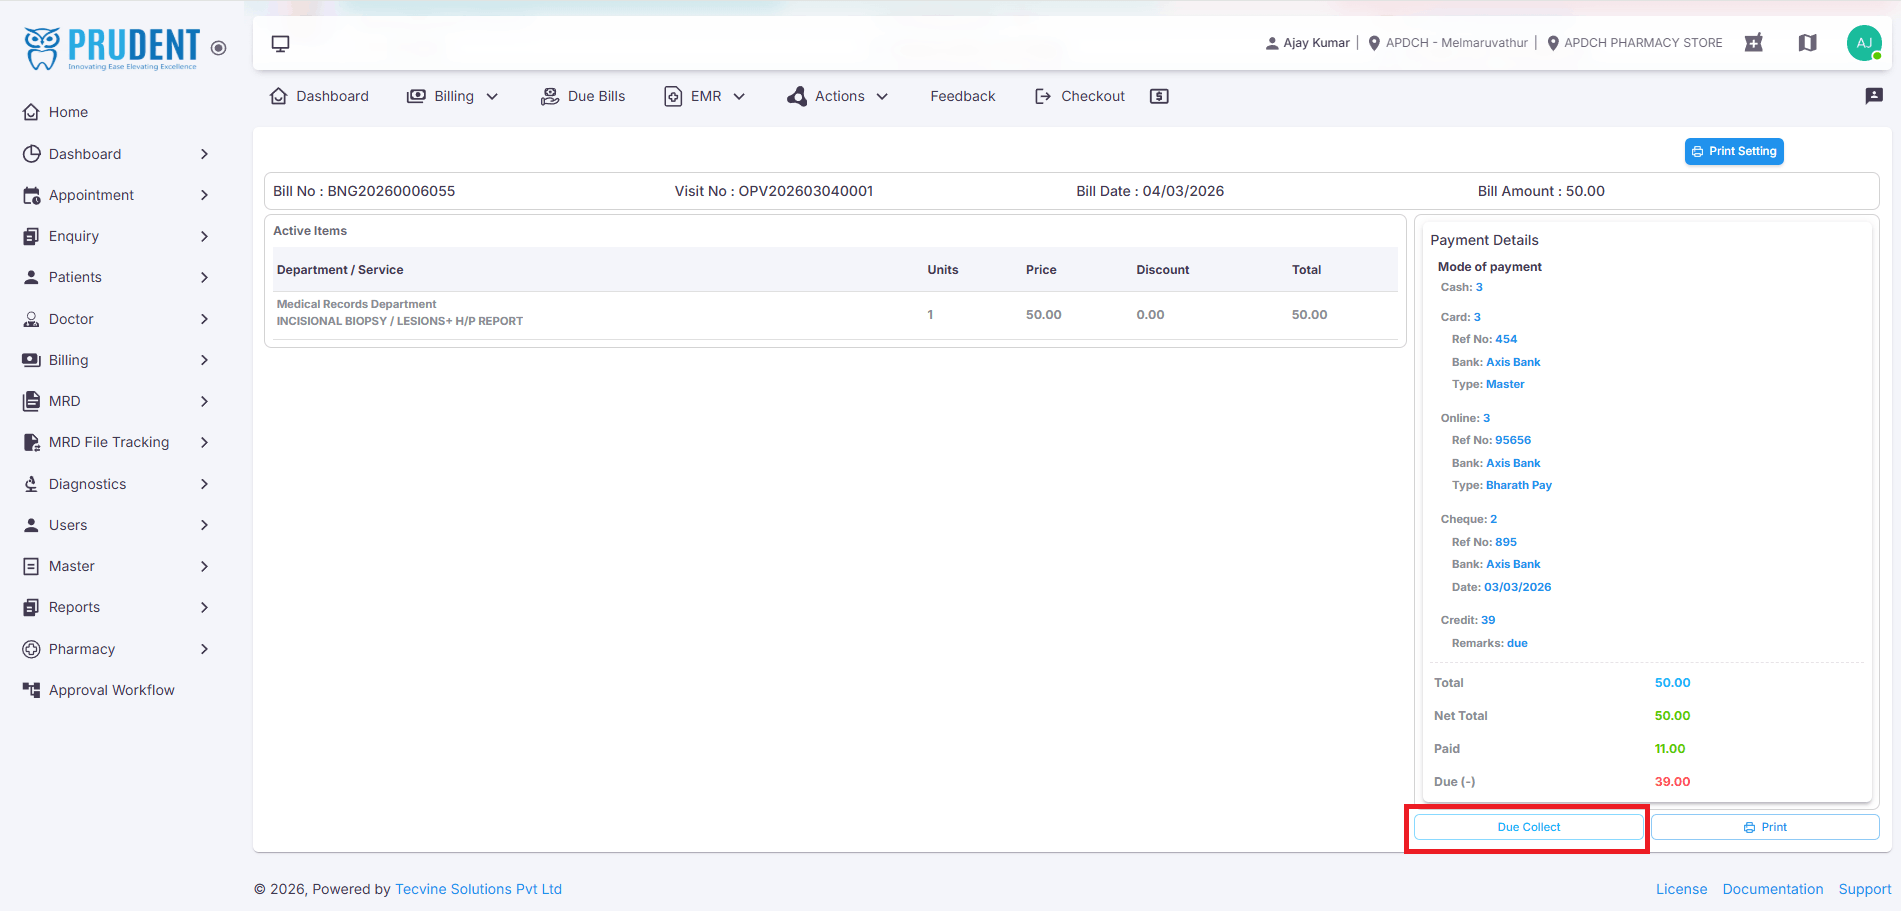
¶ Due Collection (For Credit Payments)
If the Credit payment mode was selected, the remaining due amount can be collected later through the steps below.
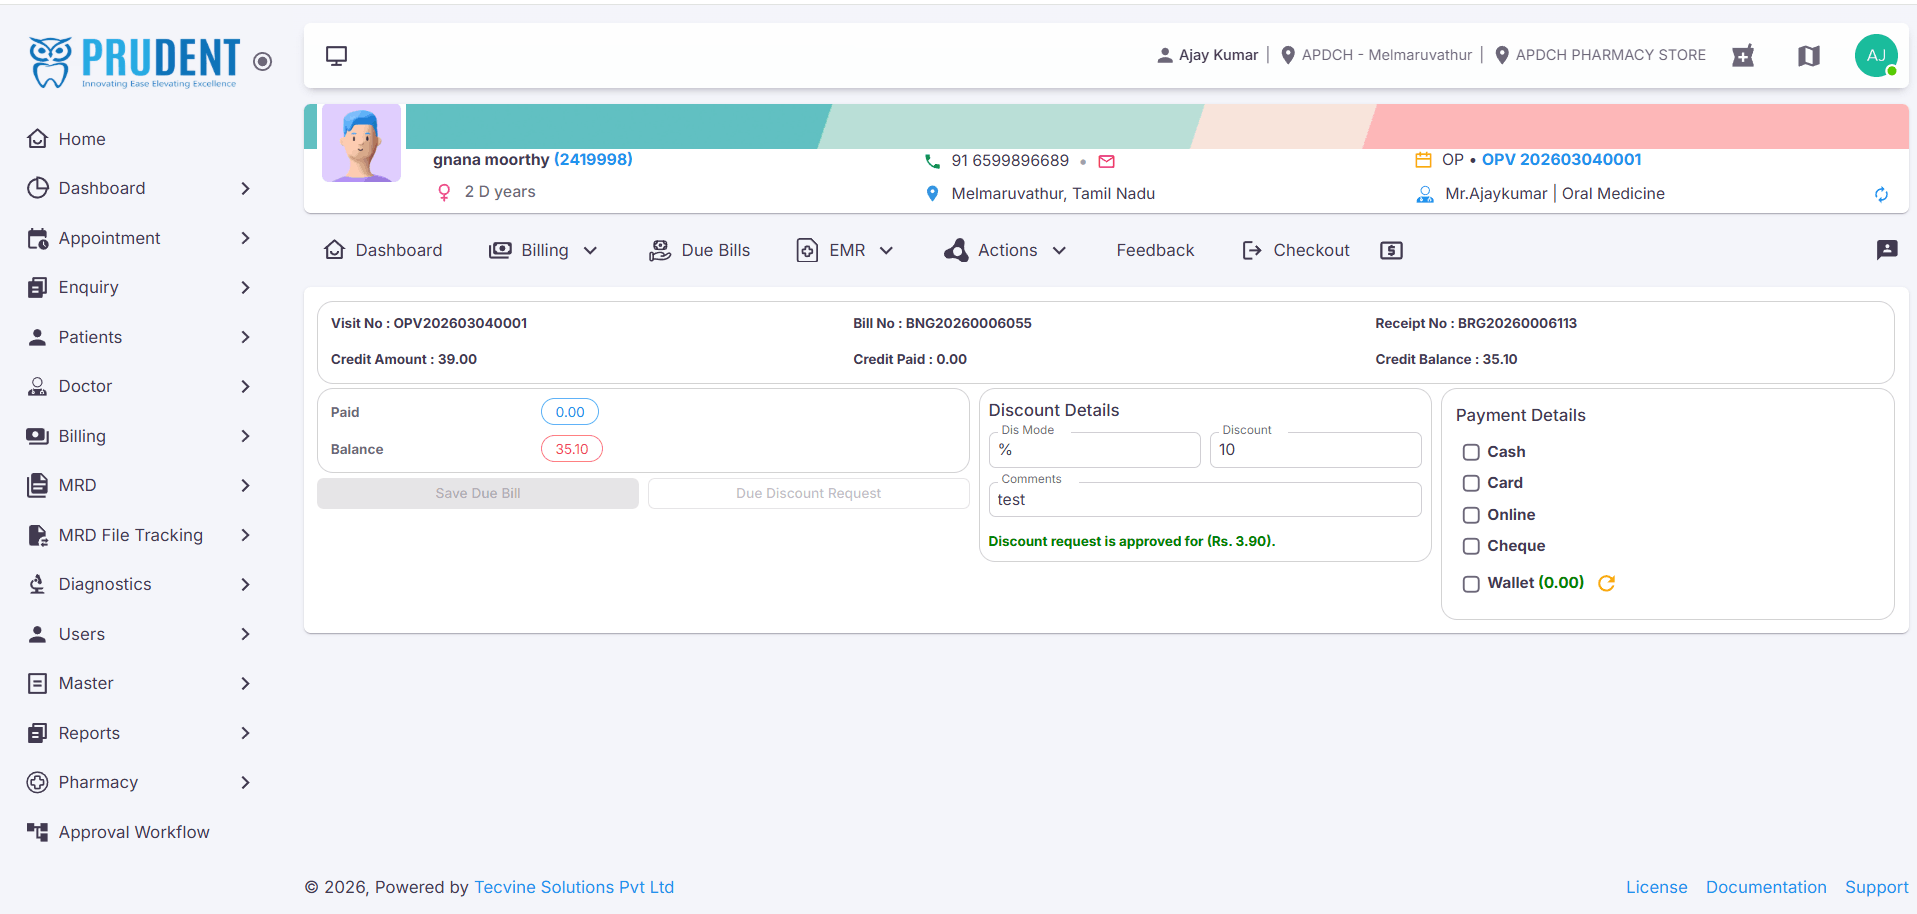
¶ Access Due Details and Collect Due
In Bill Details Screen and click the Due Collect option to begin the due collection process.
Due Details Screen
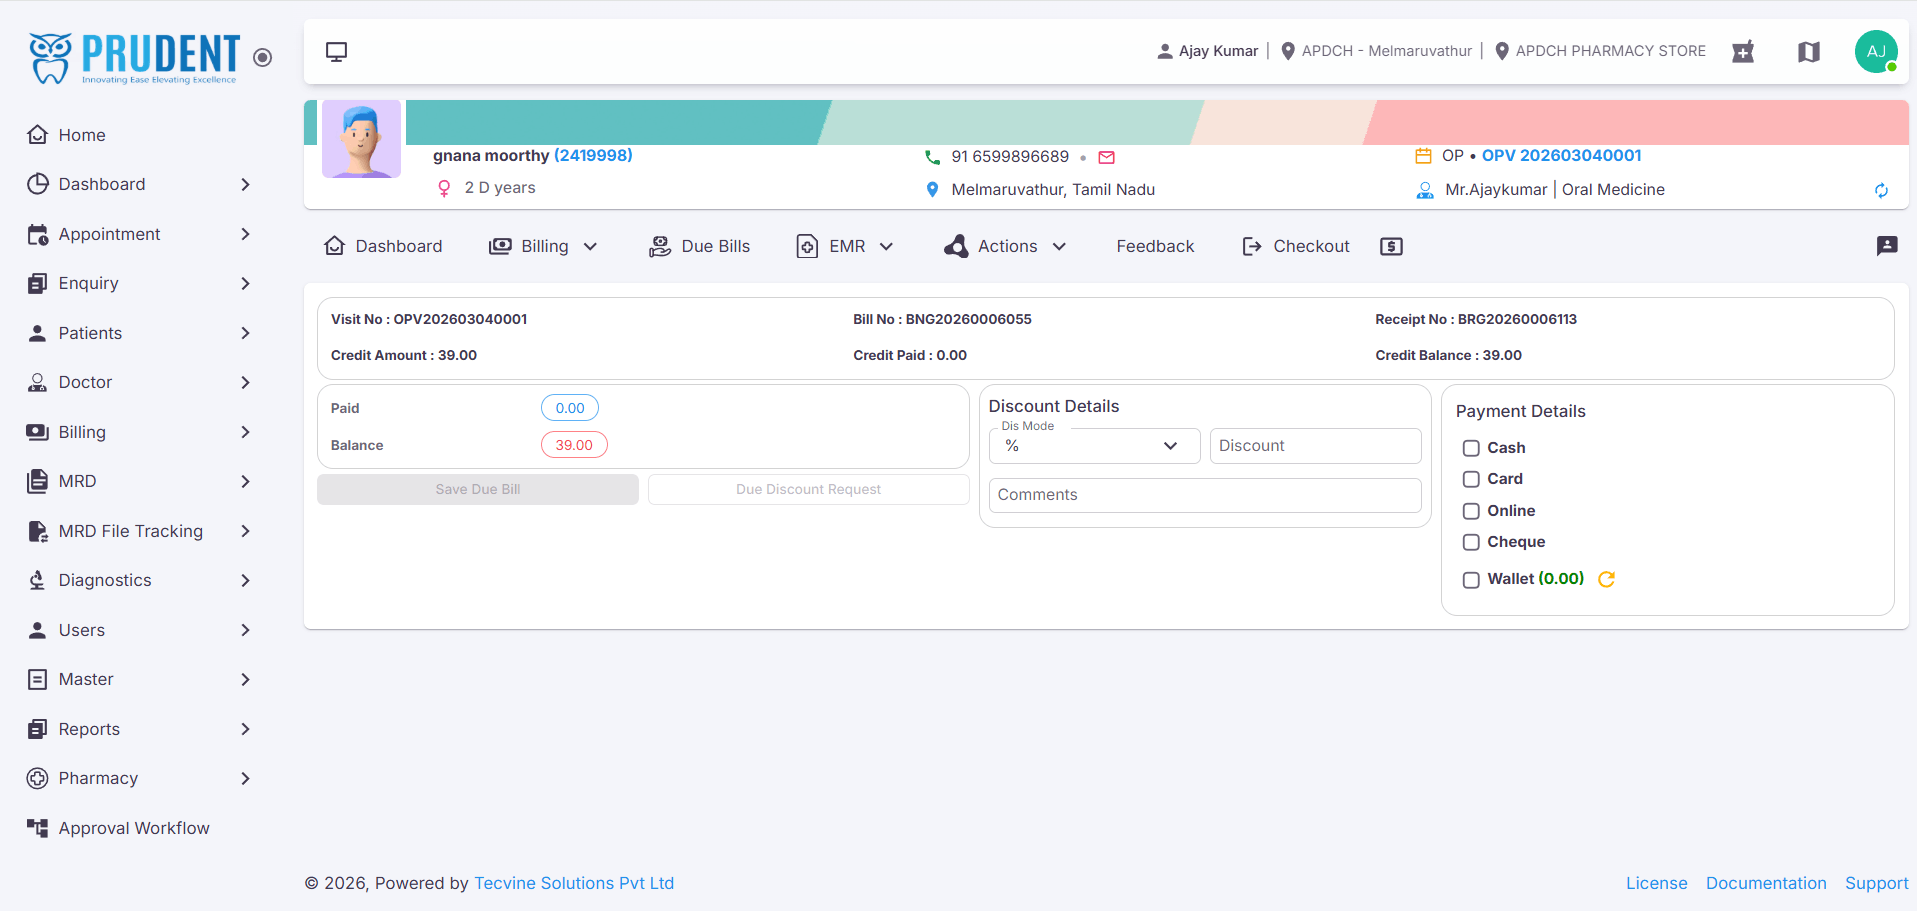
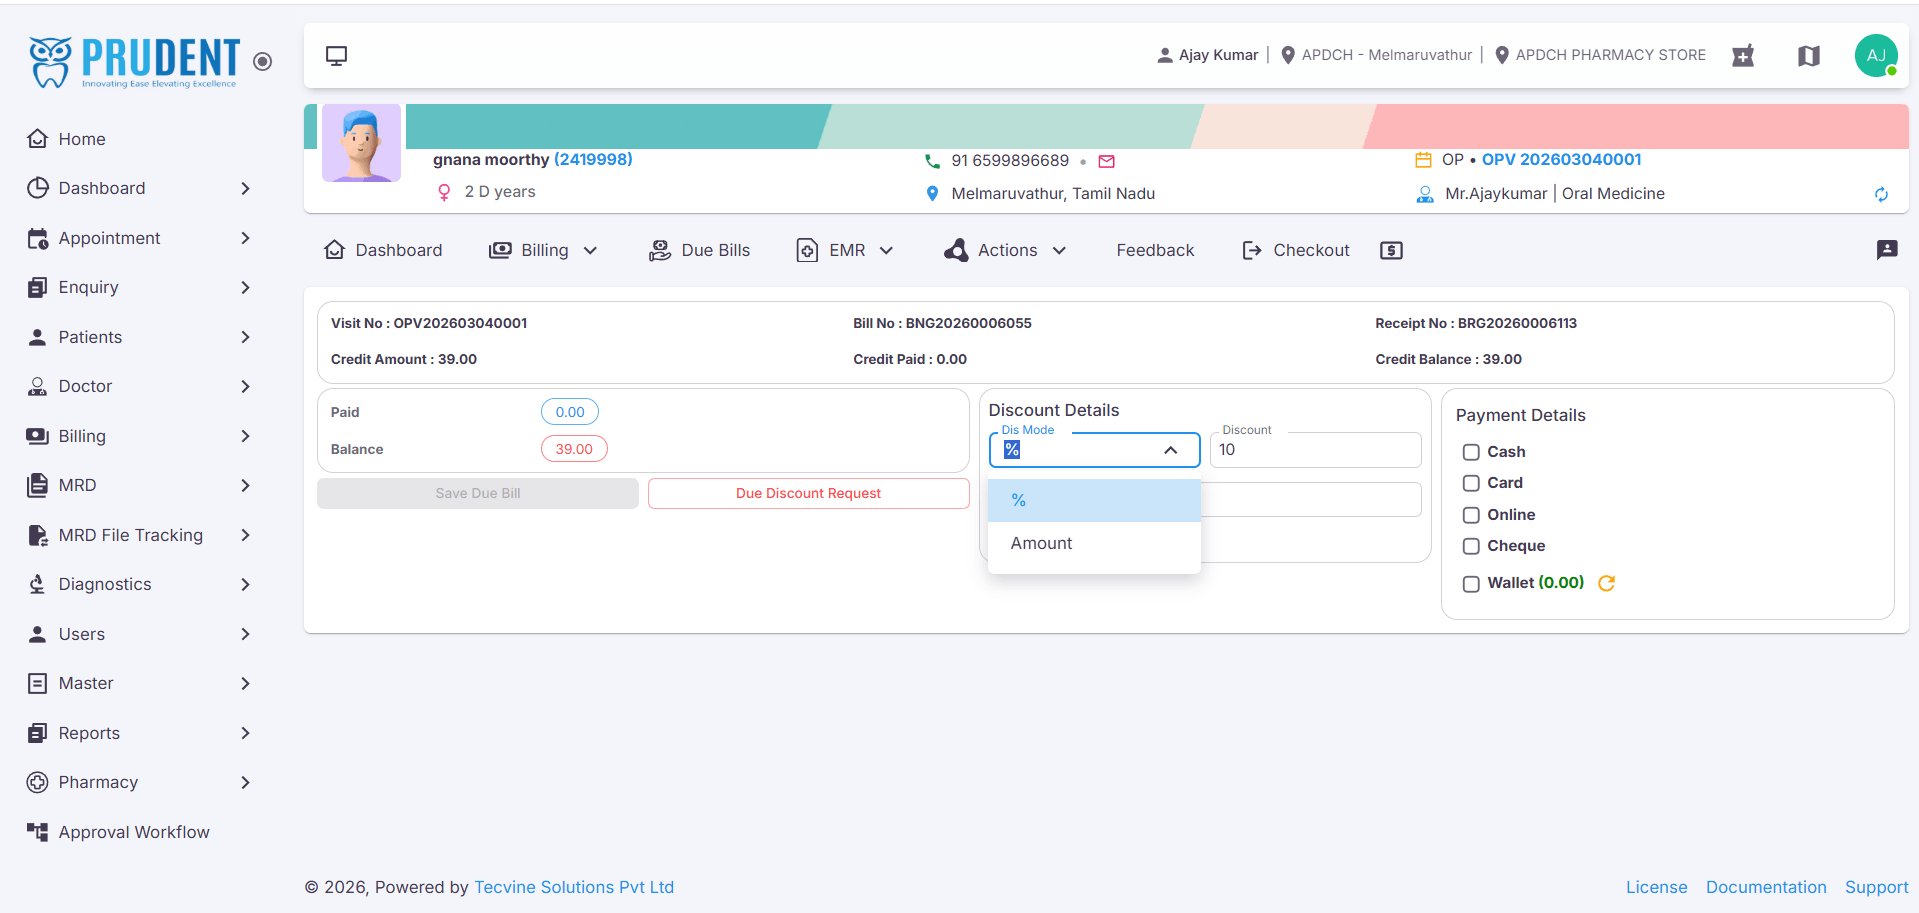
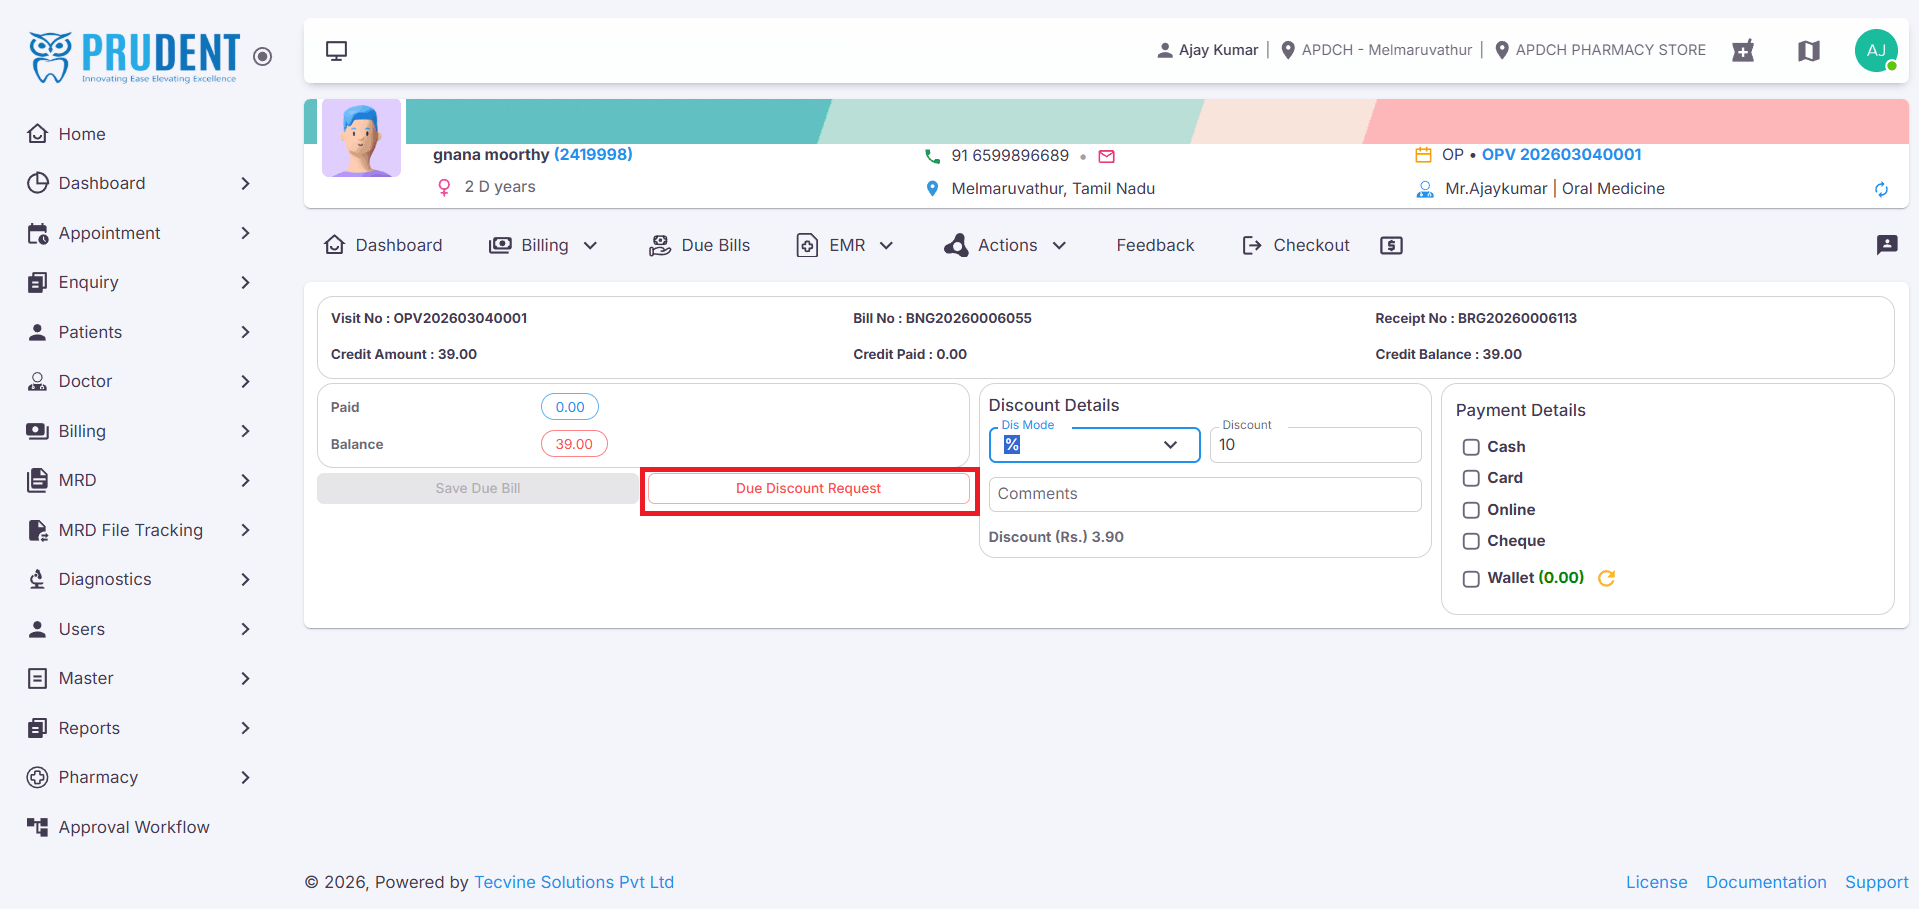
¶ Apply Discount on Due Amount
If you wish to apply a discount on the due amount, follow these steps:
- Select the Discount Type.
- Enter the Discount Amount.
- Add Comments.
- Click Due Discount Request.
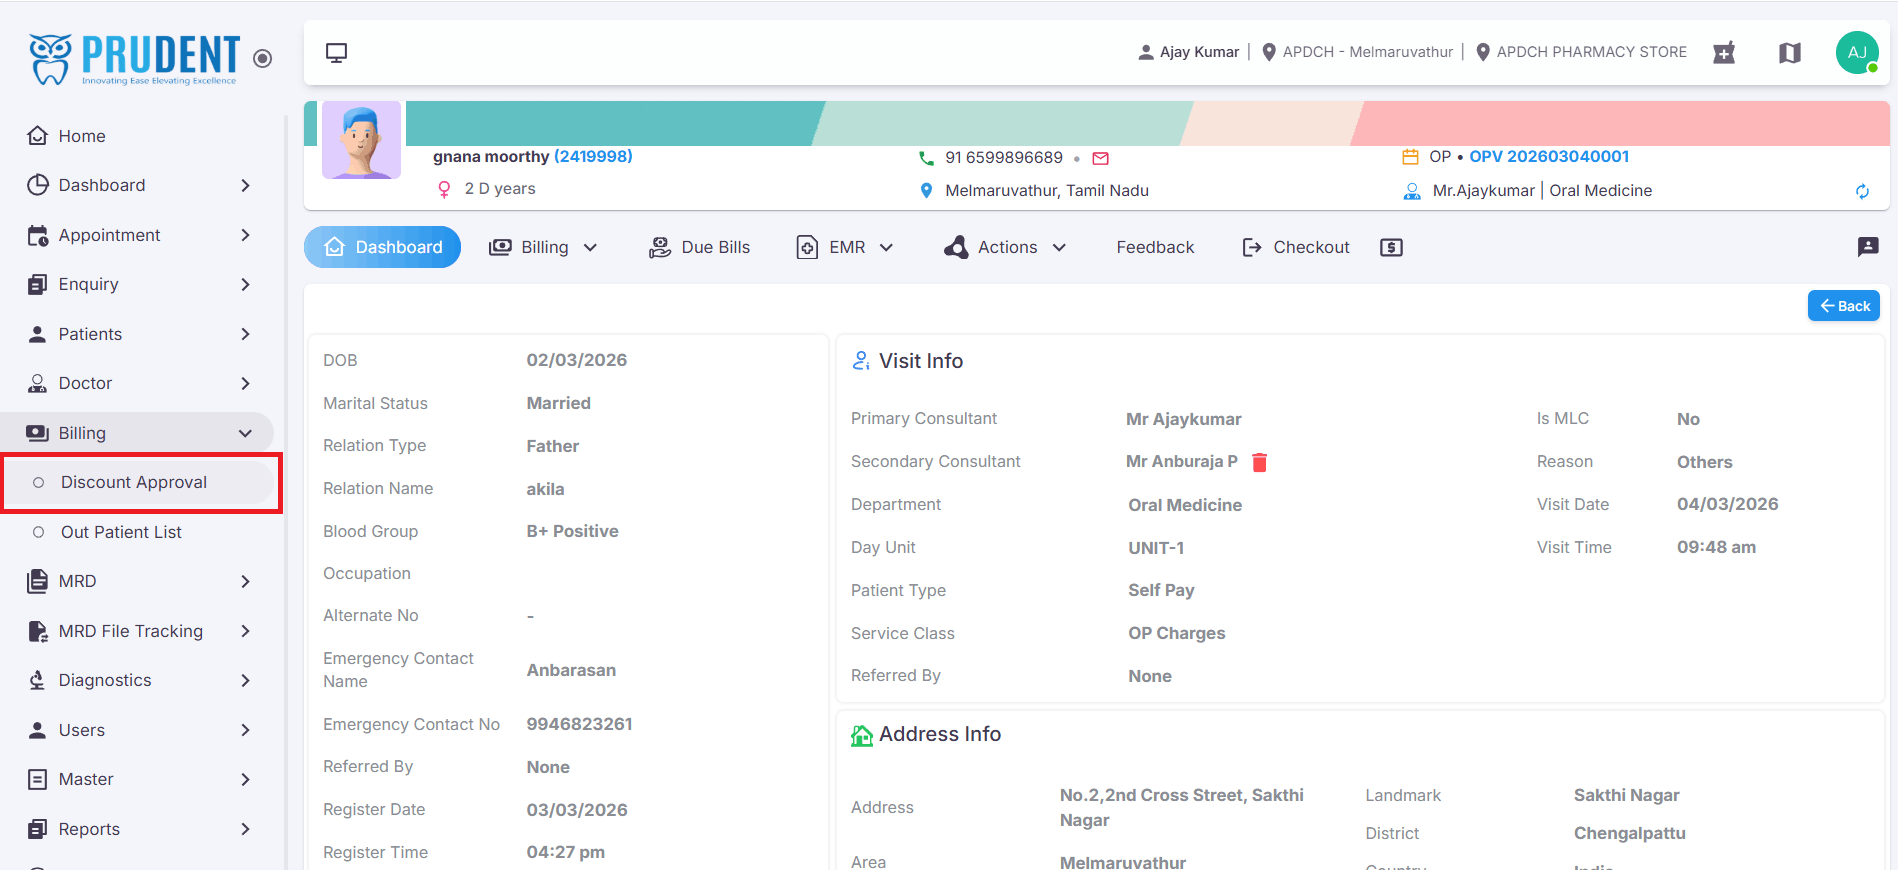
¶ Discount Approval Process
Once a discount request is submitted, it must be approved by an authorized user. Follow the steps below to approve a discount.
¶ Navigate to Discount Approval
To access the Discount Approval screen:
- Go to the Sidebar.
- Select the Billing Menu.
- Click on the Discount Approval submenu.
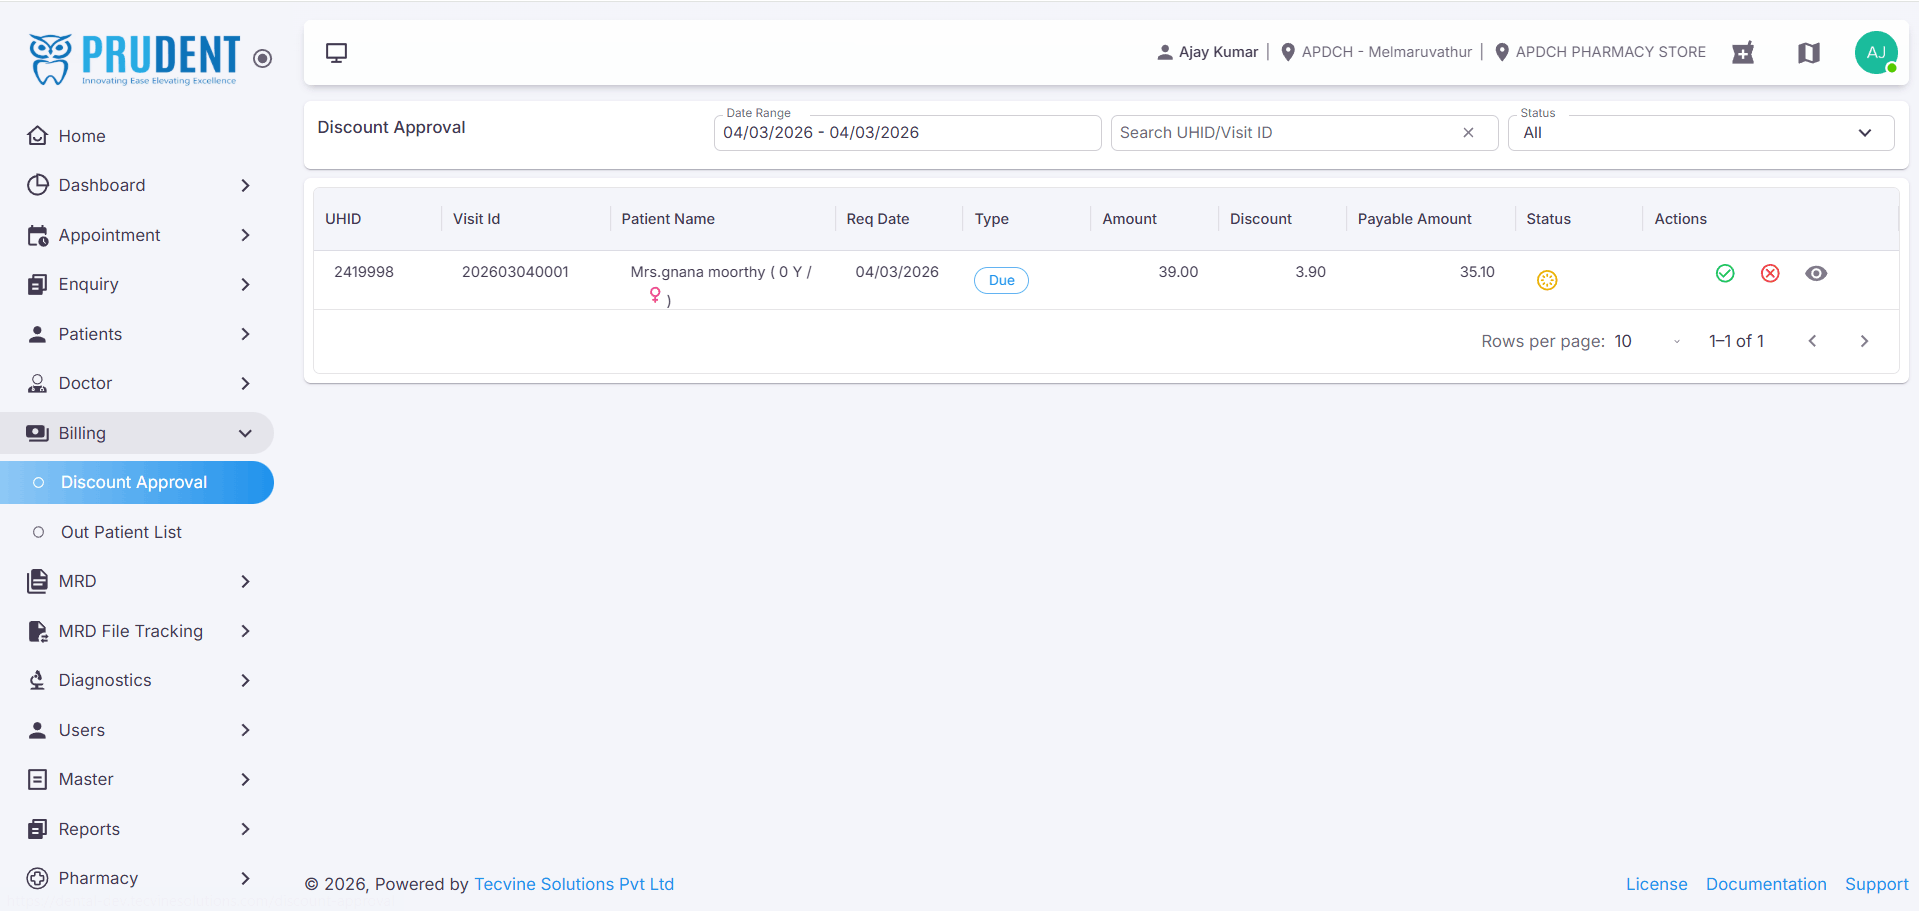
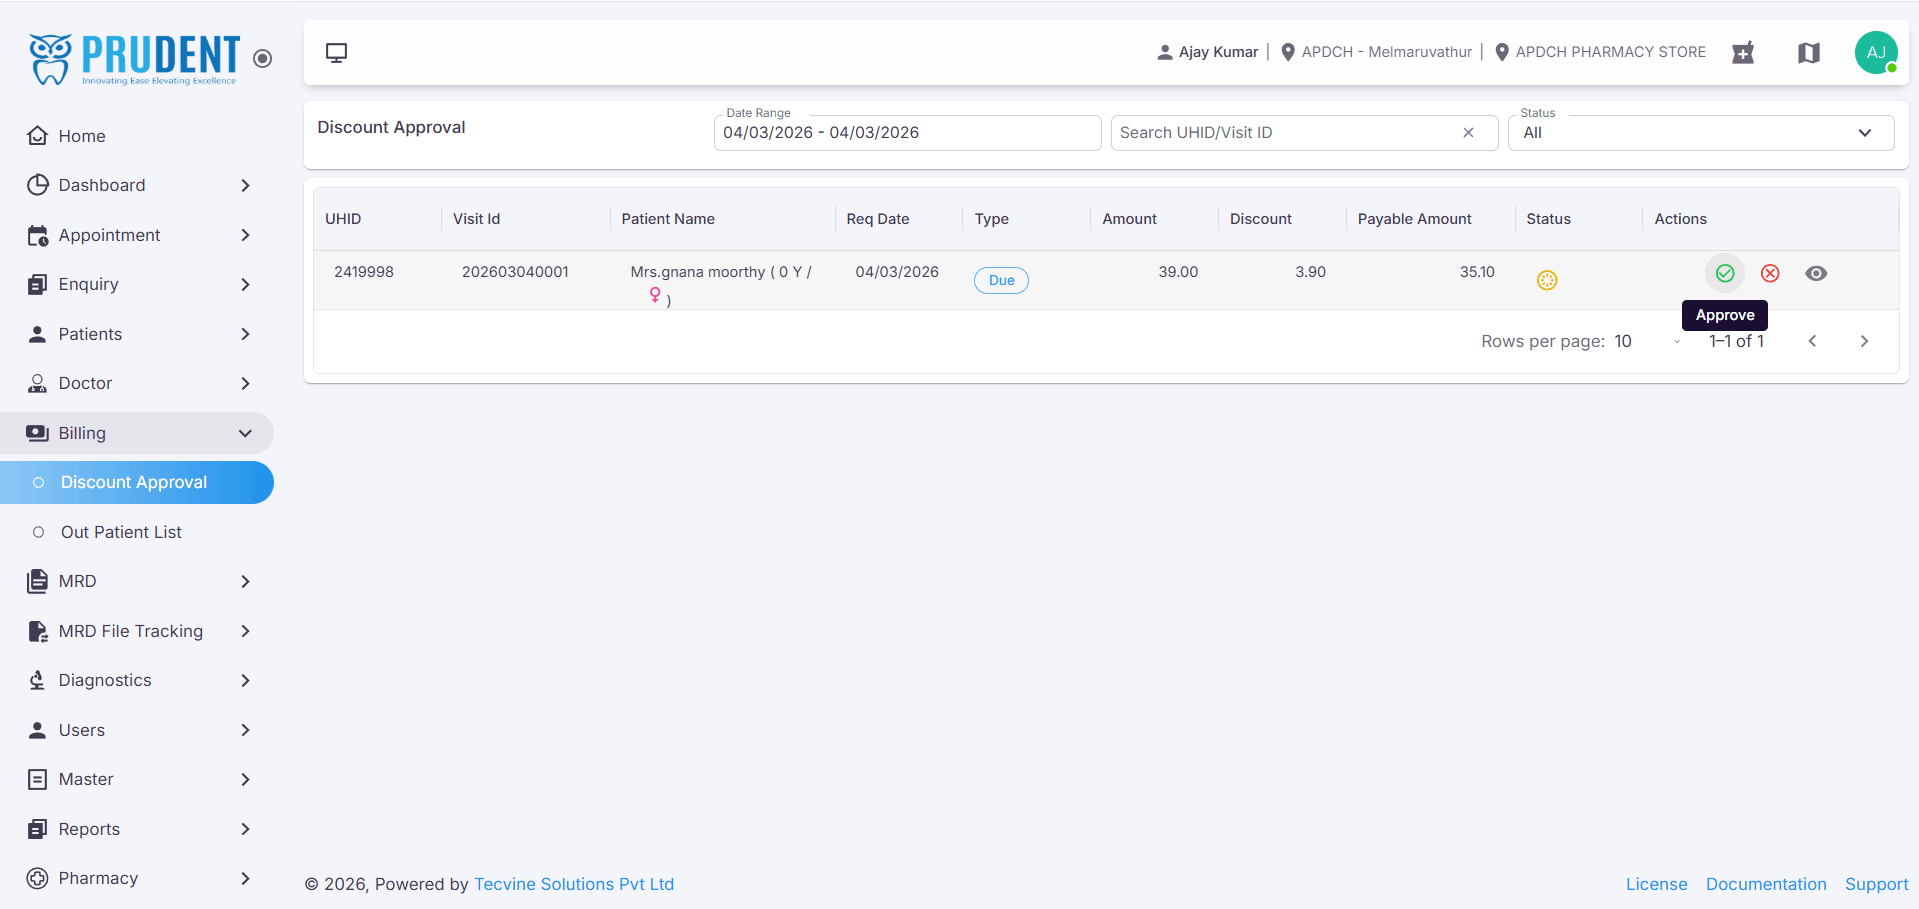
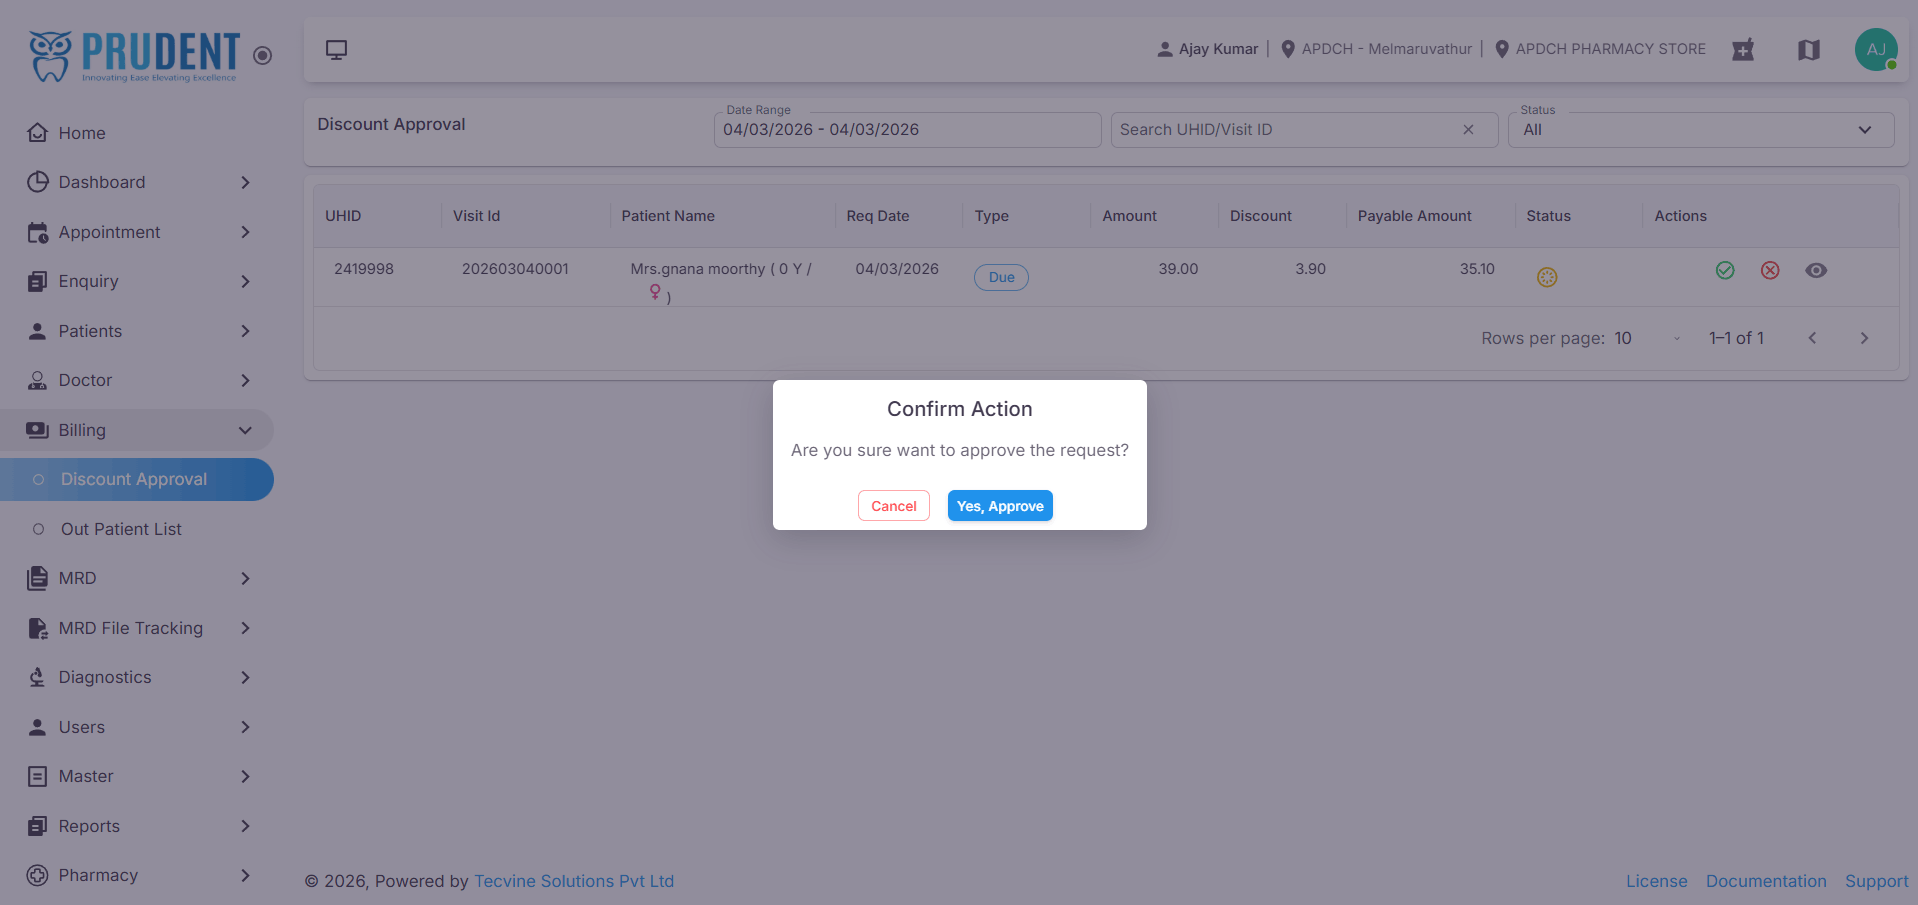
¶ Approve the Discount
On the Discount Approval screen:
- Click the Approve option.
- A confirmation popup will appear – click Yes.
- The discount will be approved successfully.
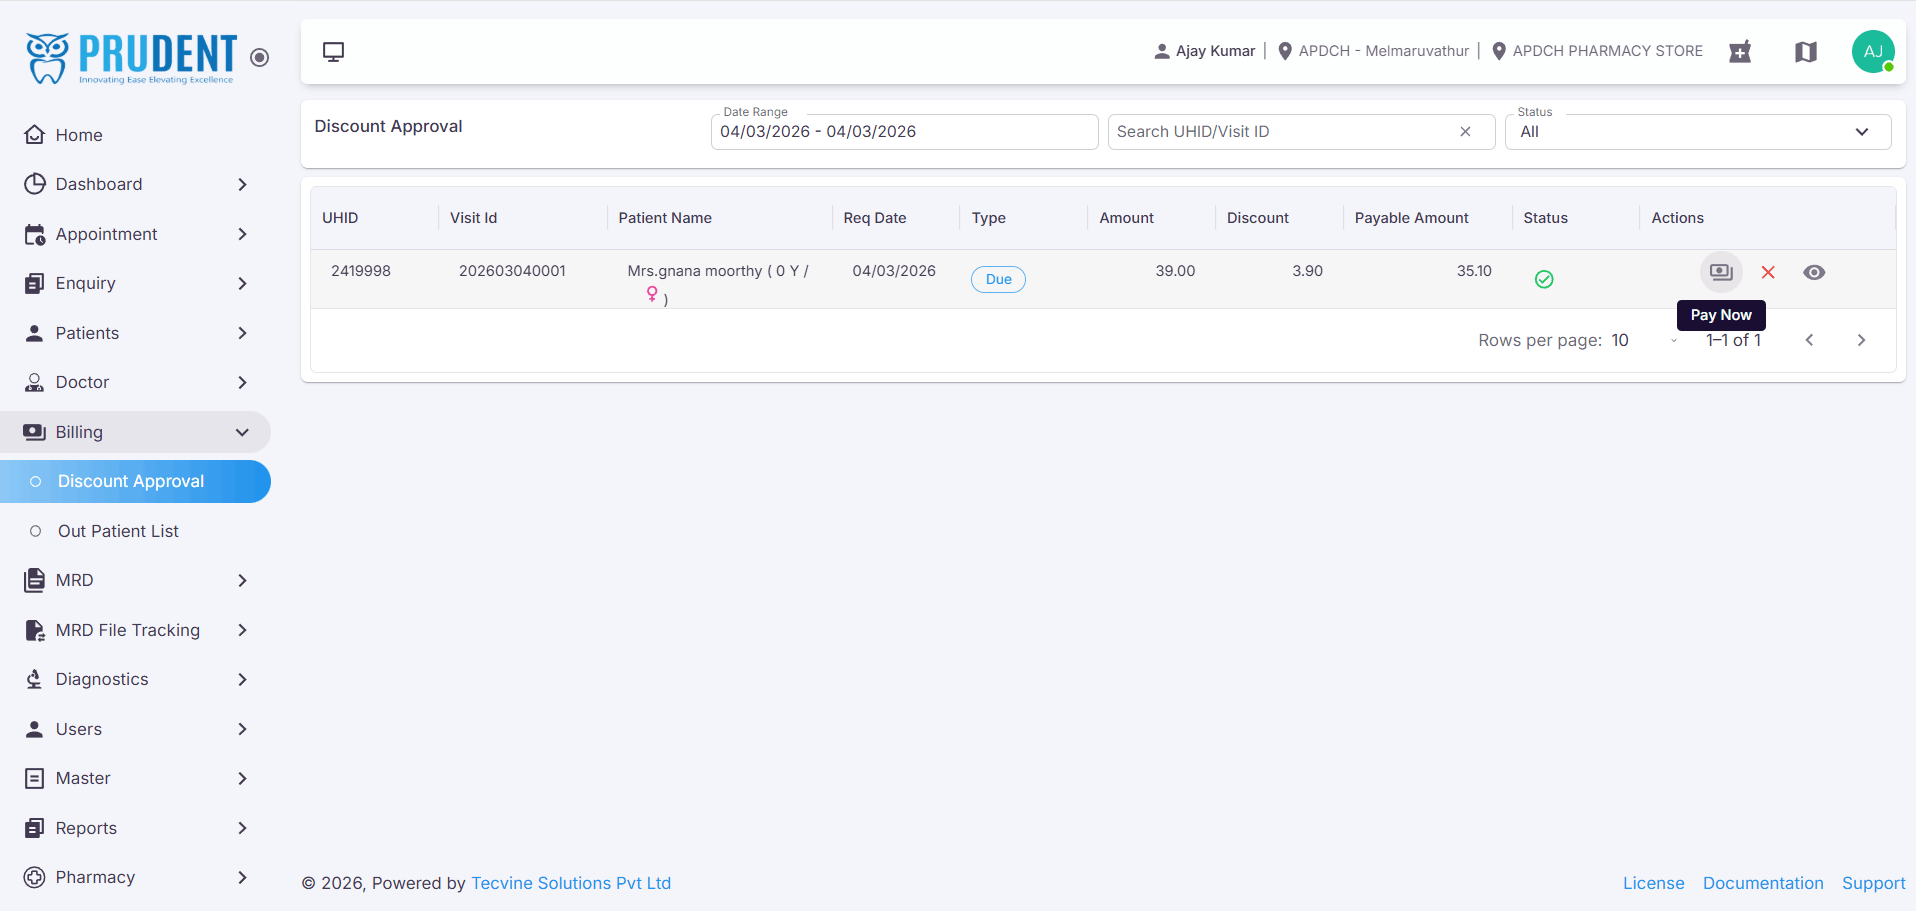
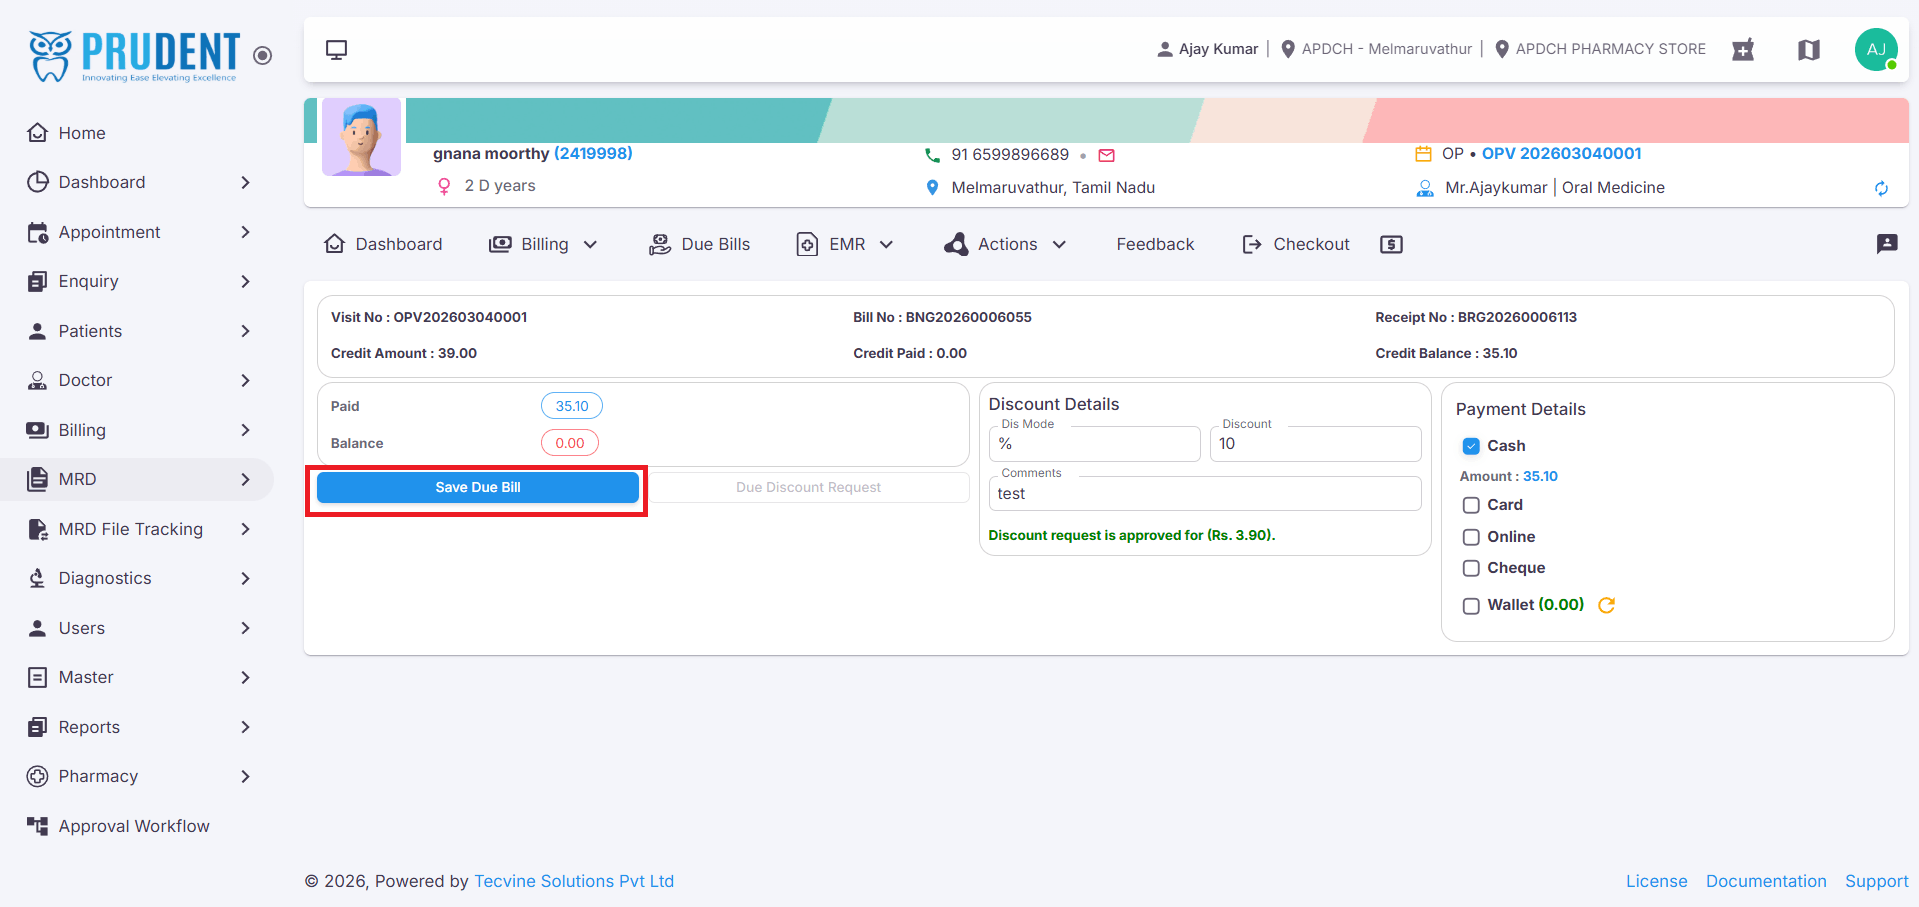
¶ Complete Payment After Approval
After the discount is approved, complete the payment:
- Click the Pay Now button in the action column.
- It will navigate to the Patient Dashboard → Billing Screen.
- Choose the Payment Mode.
- The Save Due Bill option will be enabled – click it to complete payment.
- A "Due Collected Successfully" message will be displayed.
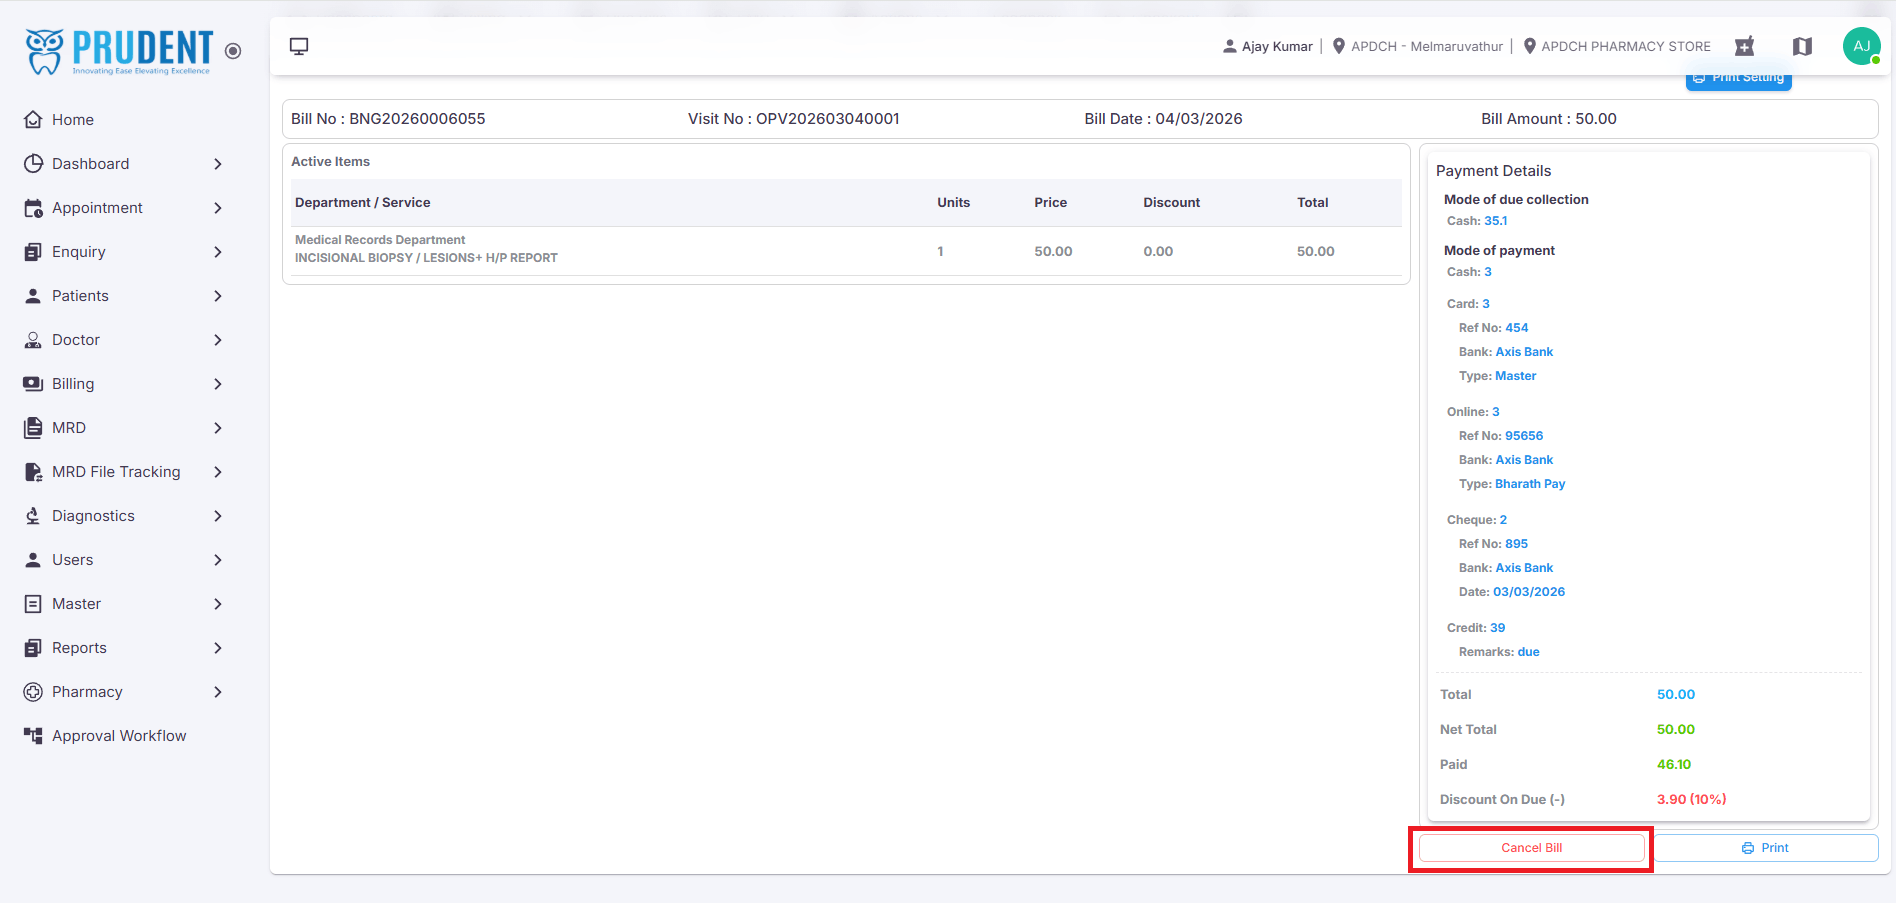
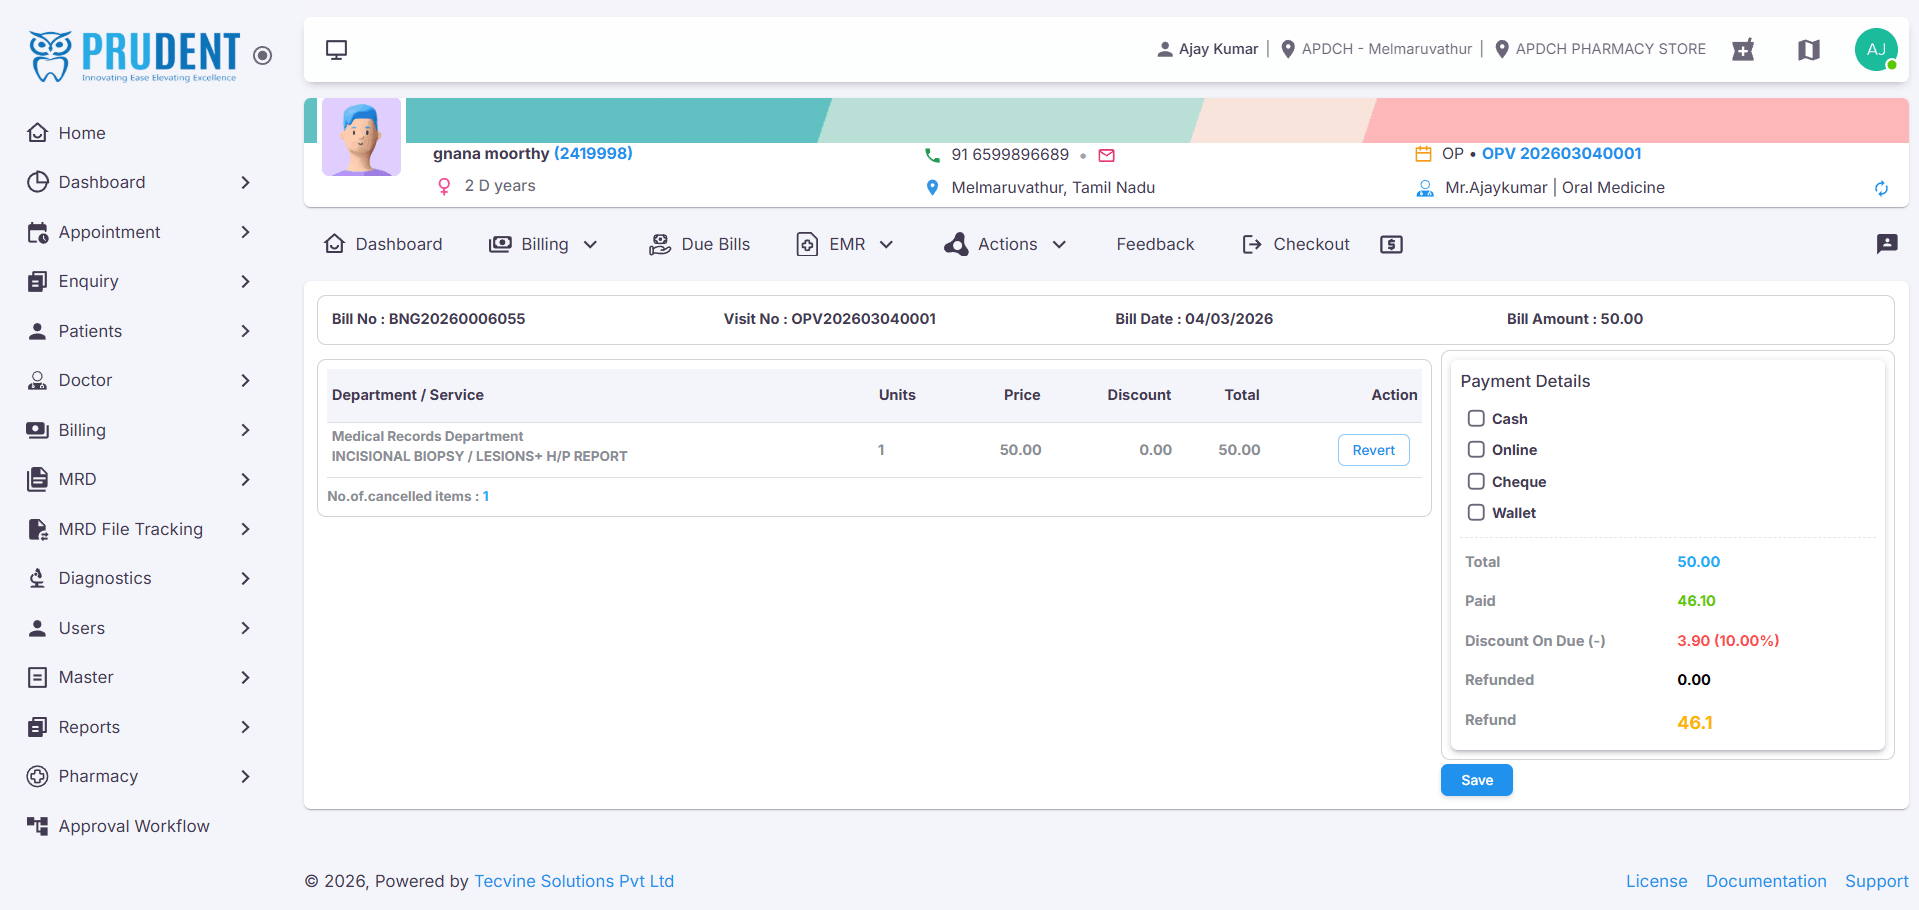
¶ Cancel Bill
If a bill needs to be cancelled, follow the steps below.
¶ Initiate Bill Cancellation
To cancel a bill:
- Click the Cancel Bill option.
- The Cancel Screen will open.
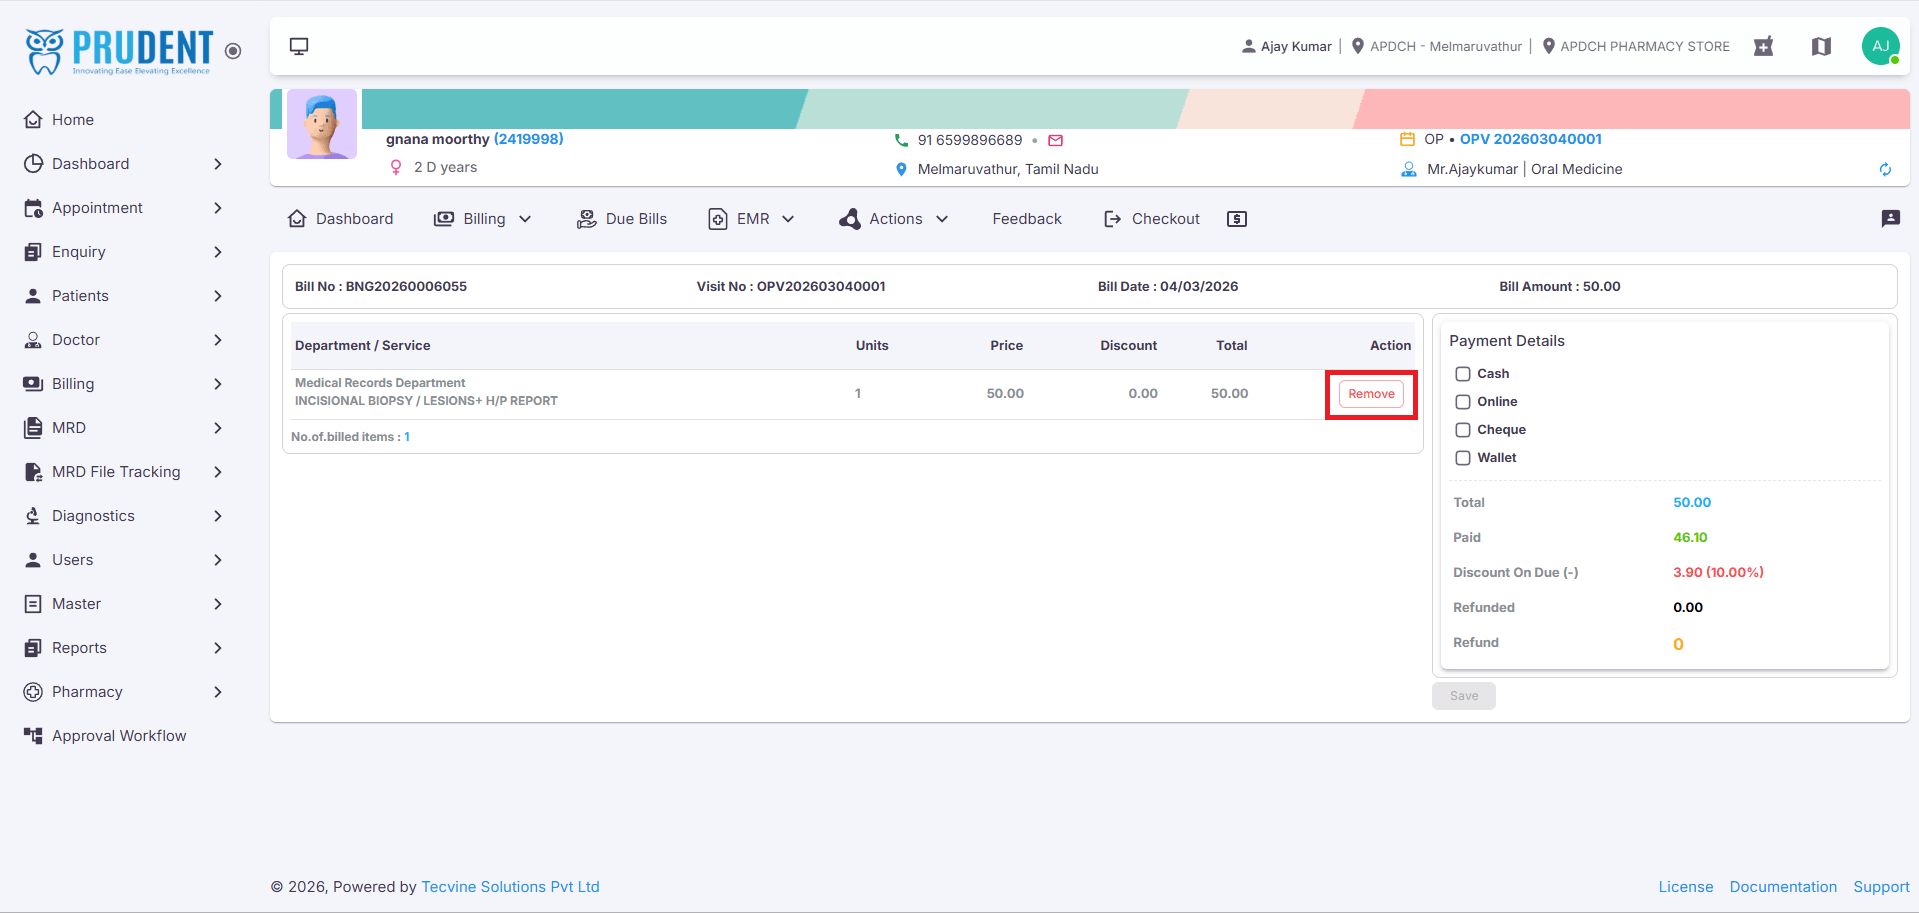
¶ Remove and Save
Complete the cancellation process:
- Click the Remove option (it will change to Revert).
- Choose the Payment Mode.
- Click Save.
- A "Bill Cancelled Successfully" message will be displayed.
¶ Video Tutorial
Watch this step-by-step video guide to learn how to create a visit in the system.