¶ OP Appointment
¶ Overview
The OP Appointment module allows staff to book, manage, and track outpatient appointments against a doctor's schedule. It supports both Slab and Slot scheduling modes, which provides multiple views — Week, Month, and List for easy appointment tracking.
¶ How to Navigate to OP Appointment
- From the left-hand side navigation bar, click Appointment to expand the sub-menu.
- Click OP Appointment to navigate to the OP Appointment page.
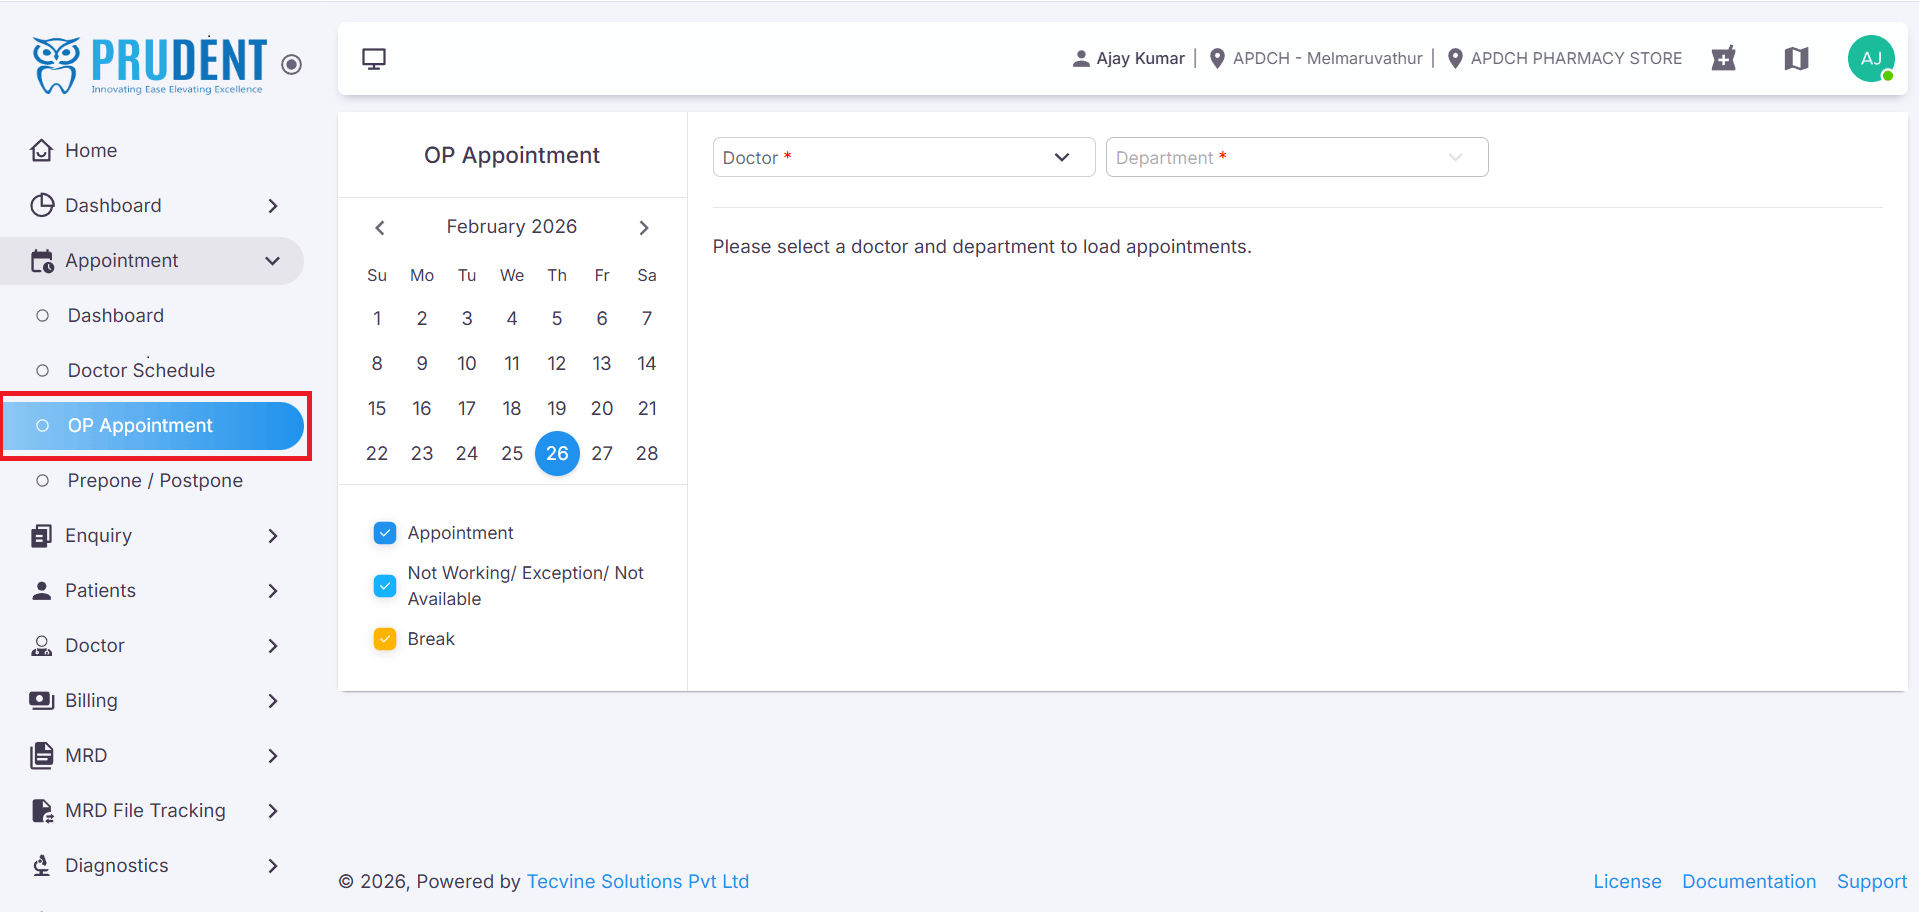
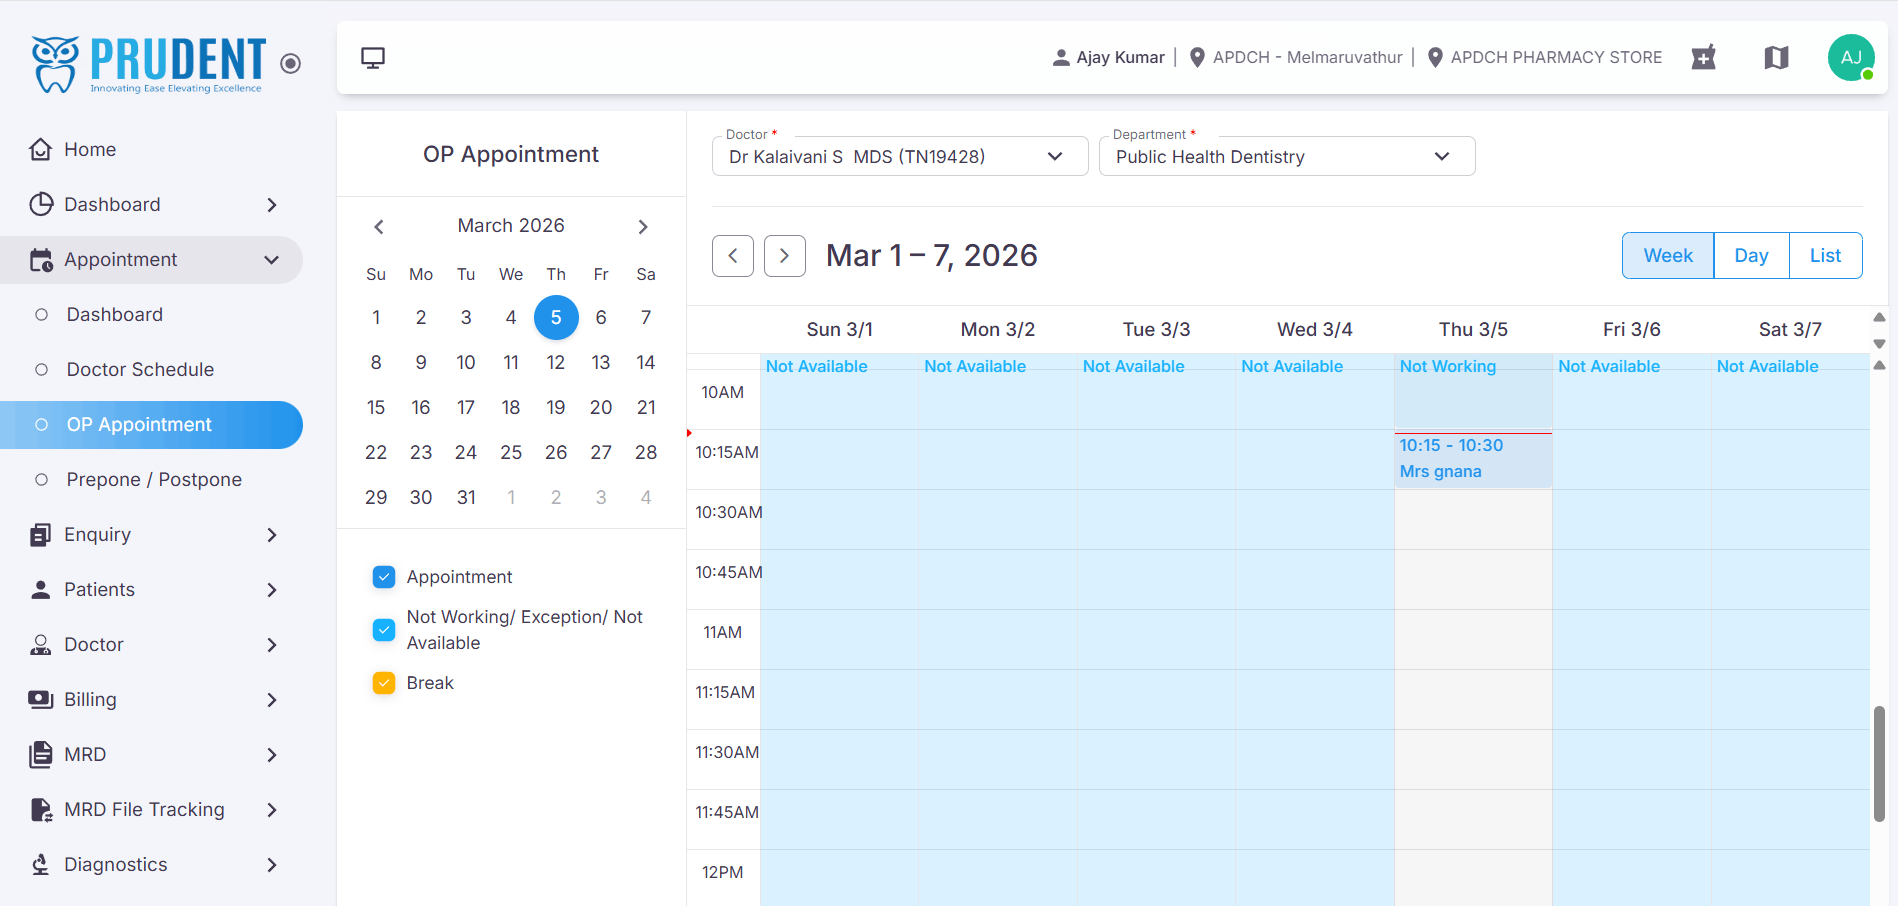
¶ Filters & Doctor Selection
Use the filters at the top of the OP Appointment page to locate the relevant schedule before booking an appointment.
¶ Date Filter
Use the Date Filter to view doctor appointments for a specific date. Select the desired date to load the corresponding schedule on the page.
¶ Doctor Dropdown
Select the doctor from the dropdown for whom you want to book an appointment. Once selected:
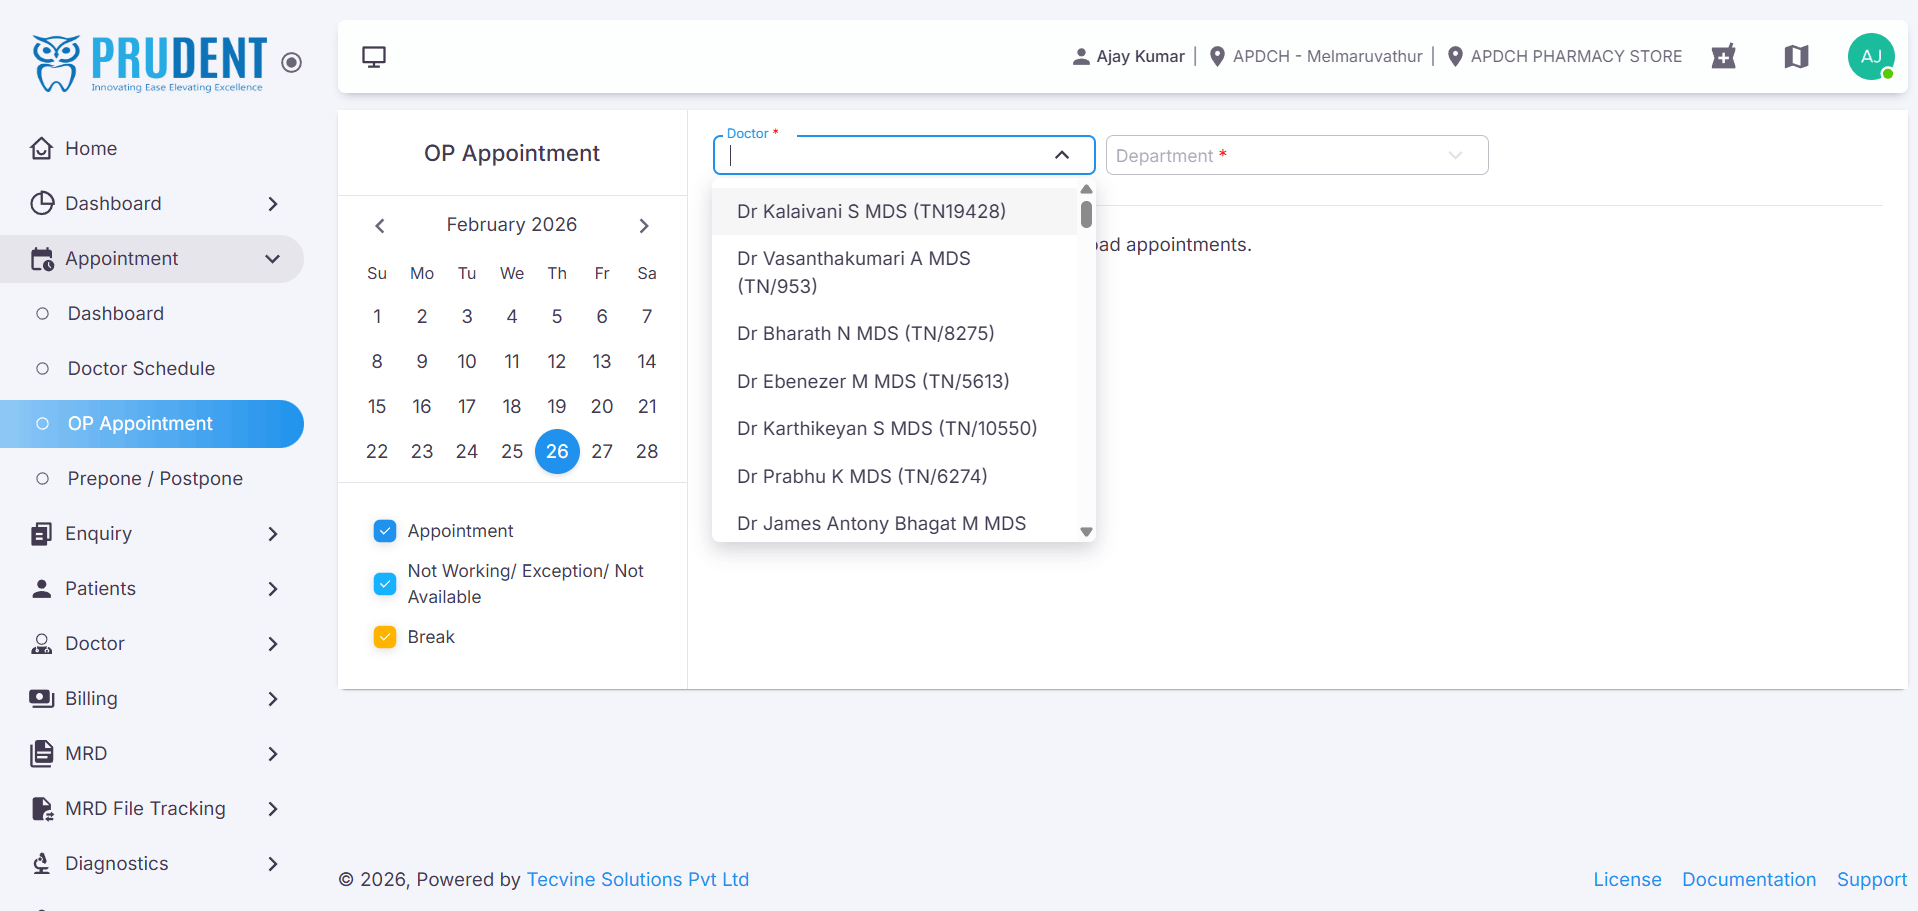
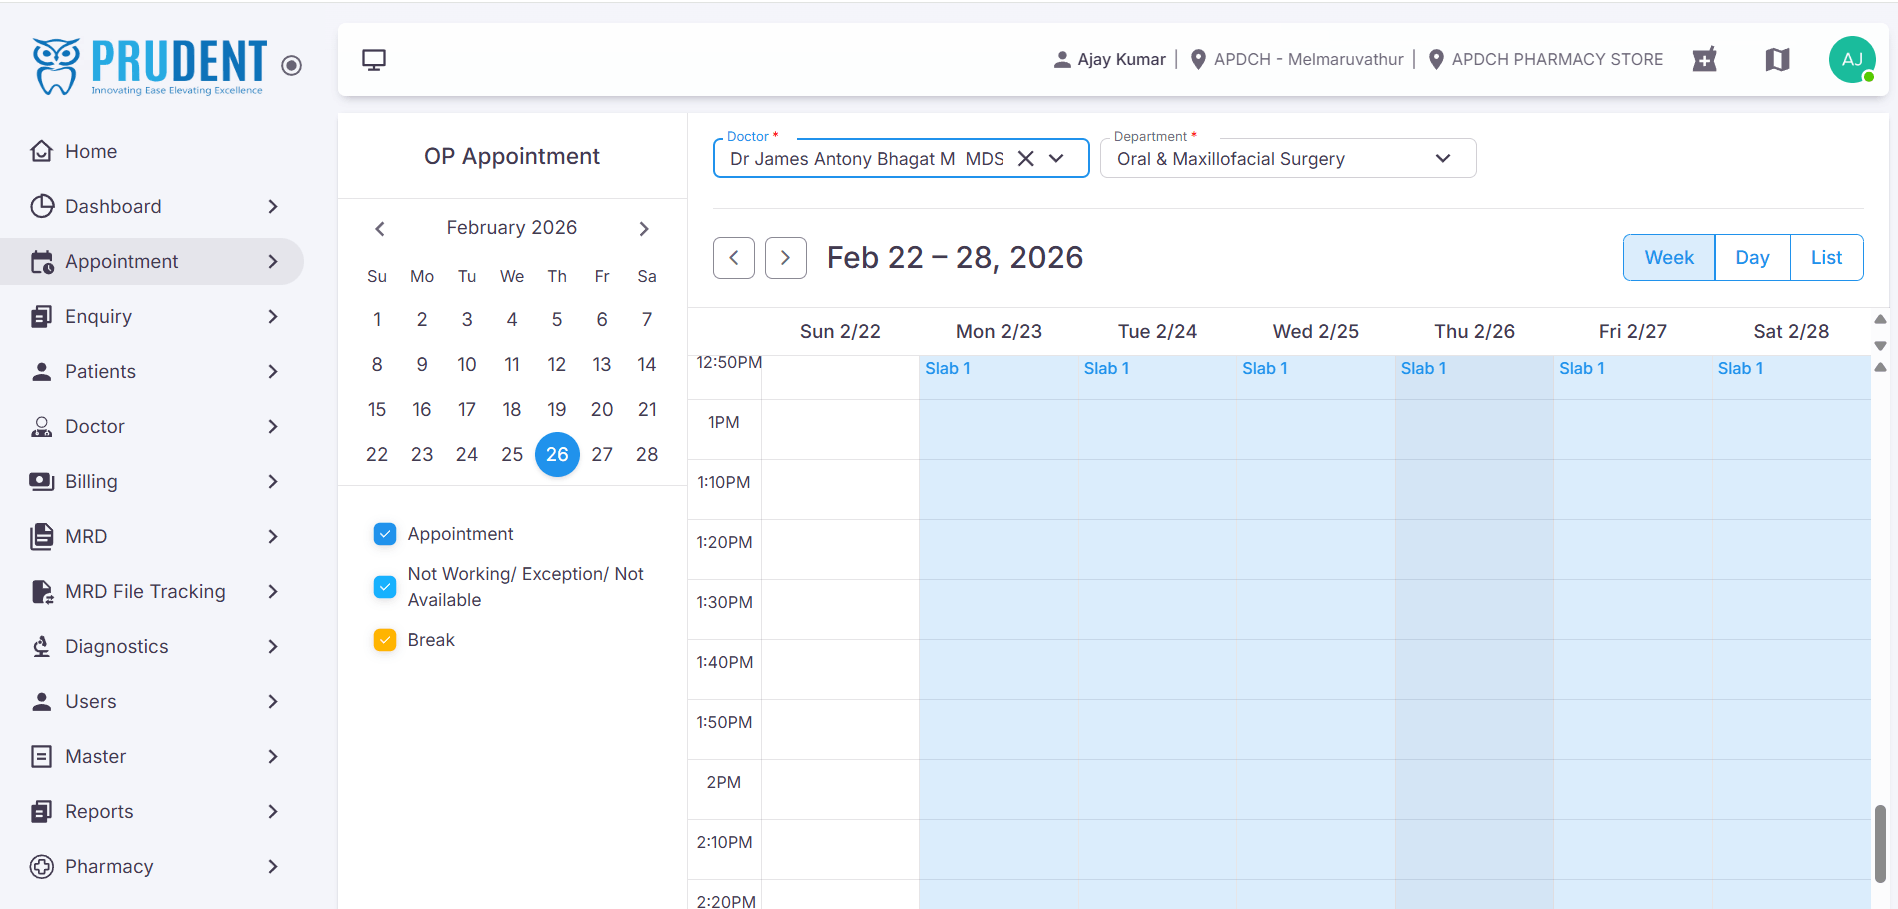
- The Department is automatically fetched and populated.
- The OP Appointment page updates to display the doctor's schedule.
- Available slots or slabs are shown based on the doctor's scheduling mode.
¶ 📆 Appointment View Options
Use the view toggle buttons on the screen to switch between different appointment views:
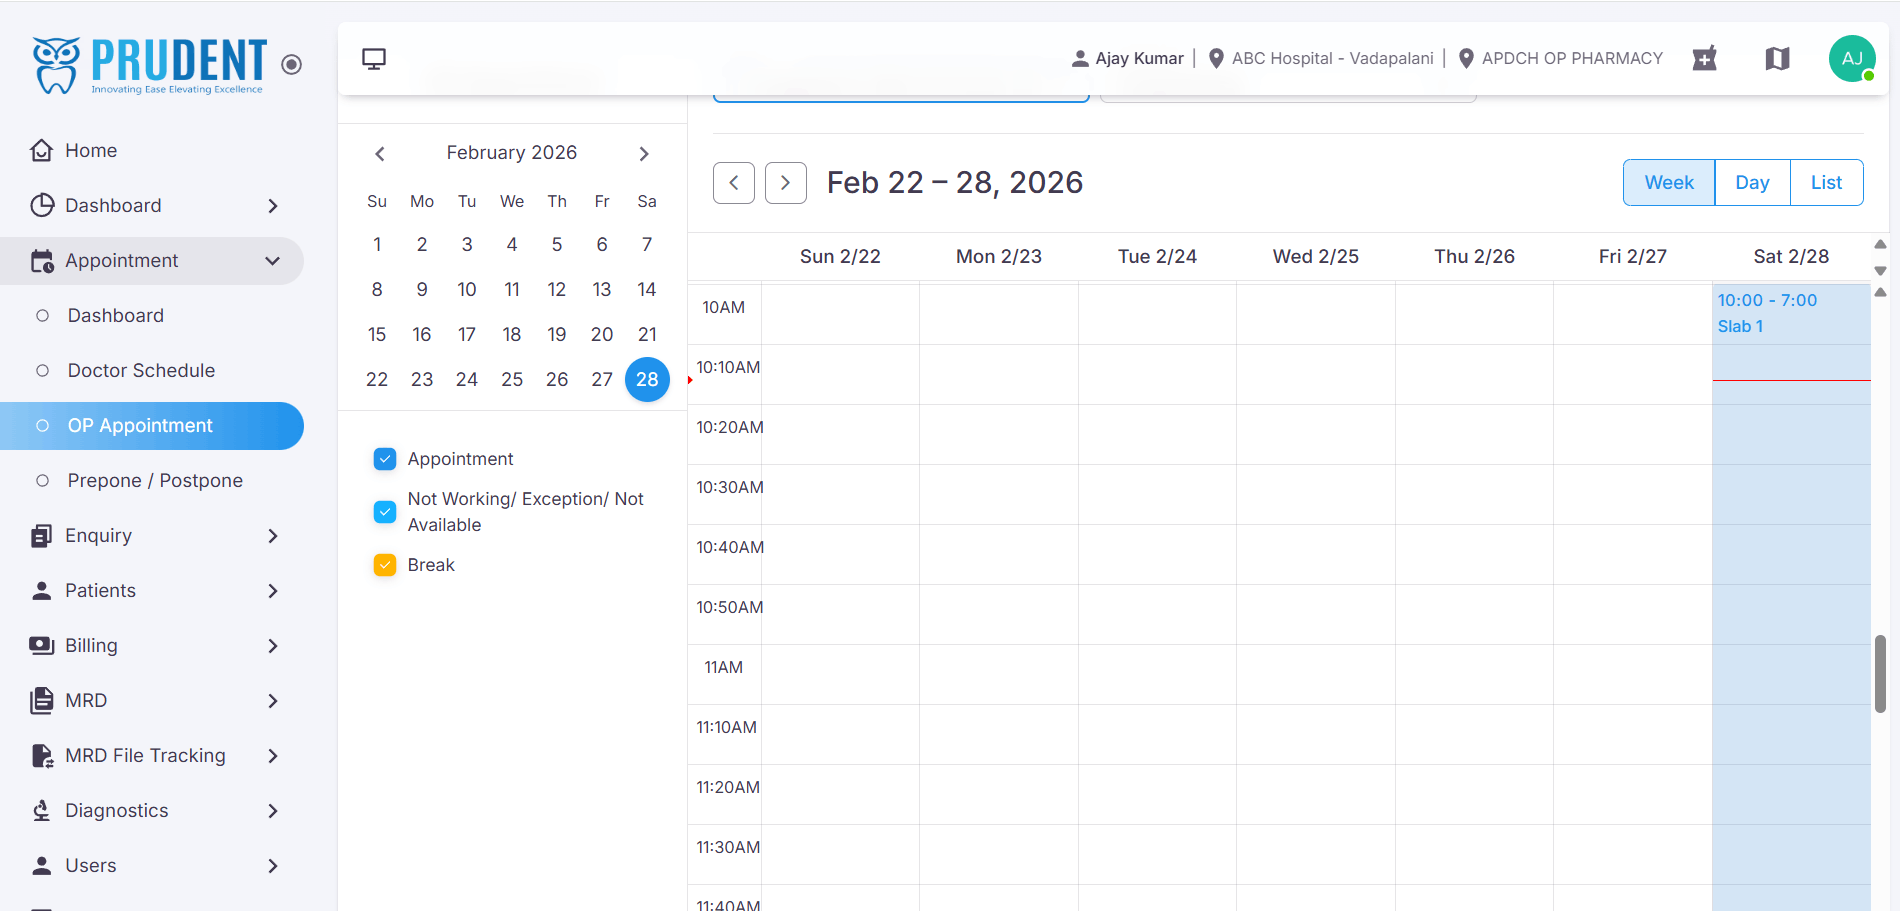
¶ Booking an Appointment – Slab Mode
When the selected doctor has a Slab-based schedule, appointments are booked within a defined time range. The slab view displays the doctor's available time periods for the selected date.
¶ Open the Slab Details
Click on an available slab time displayed on the page. The Slab Details Drawer will slide open from the right side of the screen, showing the slab information and any existing appointments within that slab.
- Click on the available slab time on the schedule.
- The Slab Details Drawer will open on the right side of the screen.
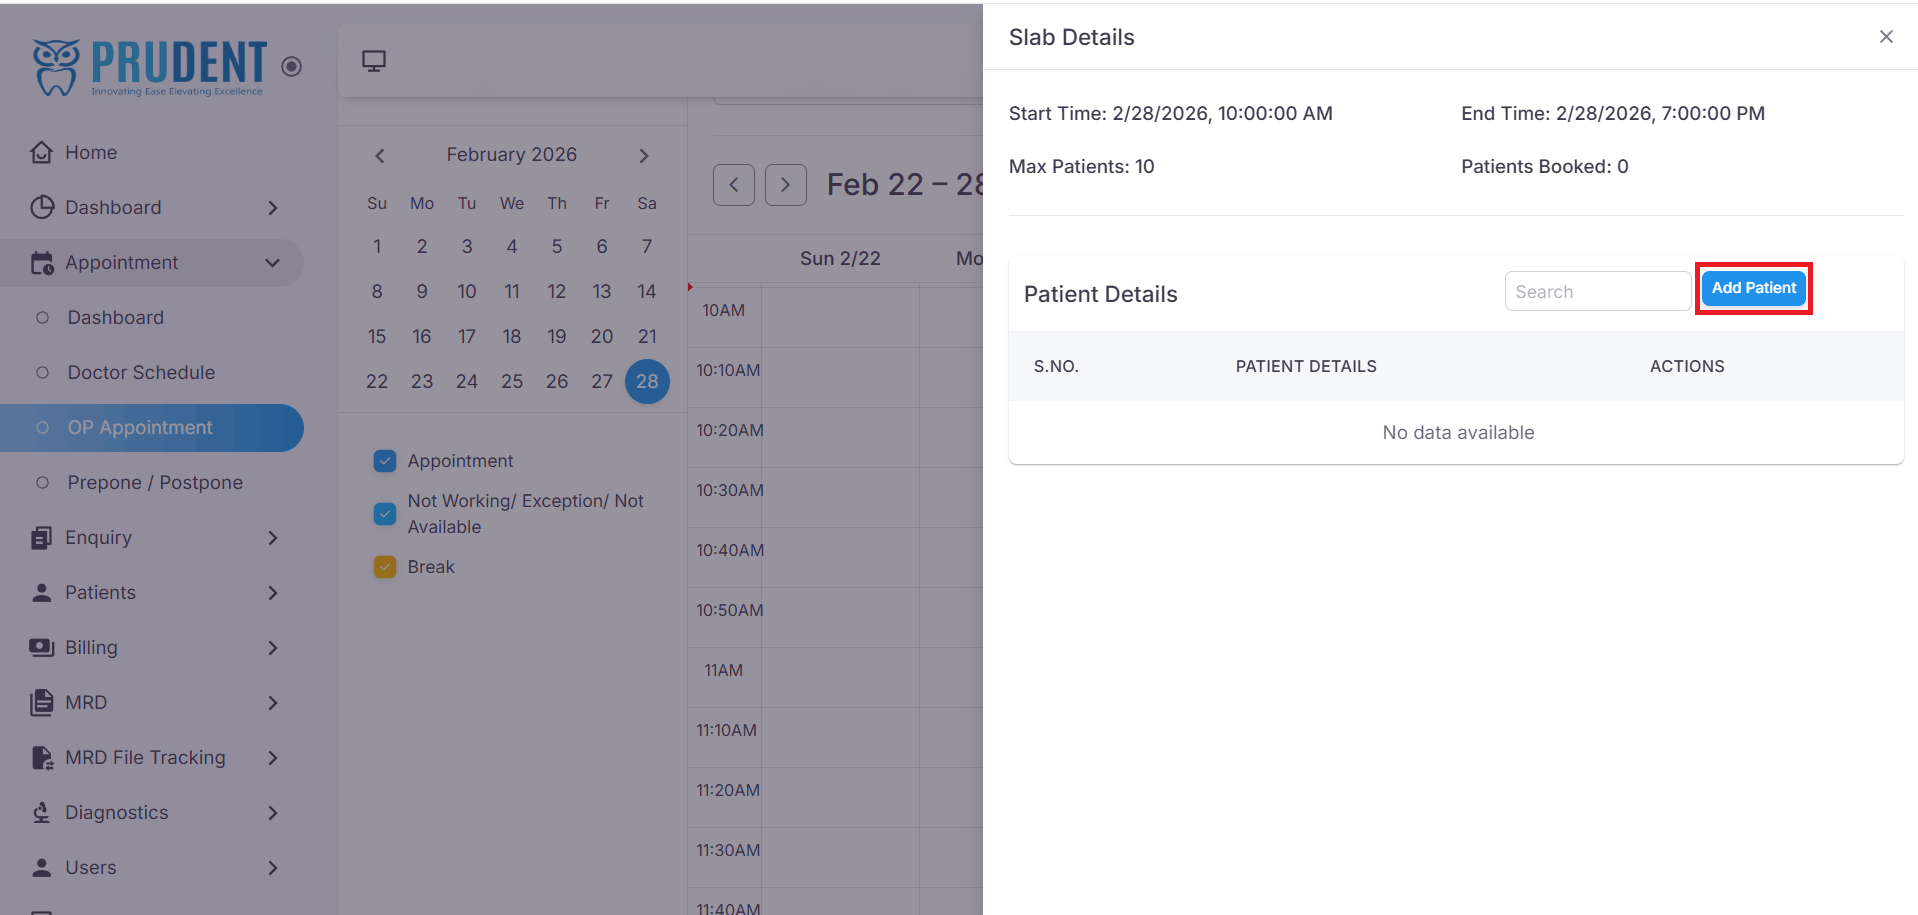
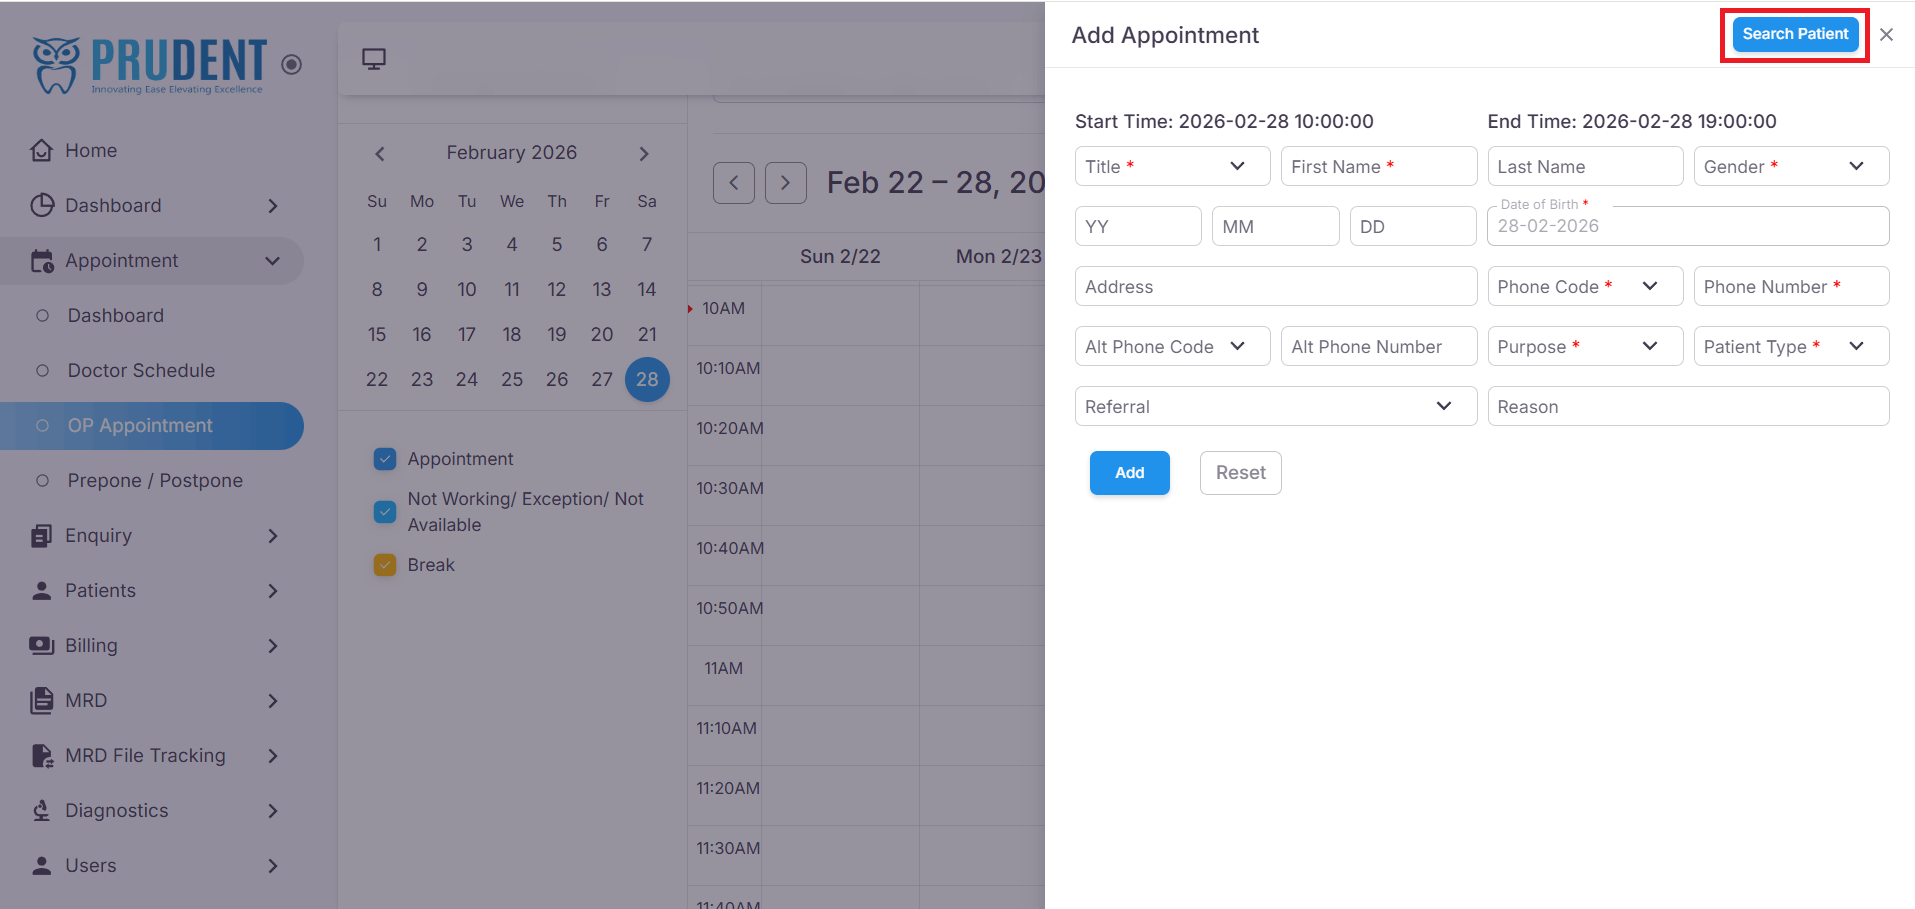
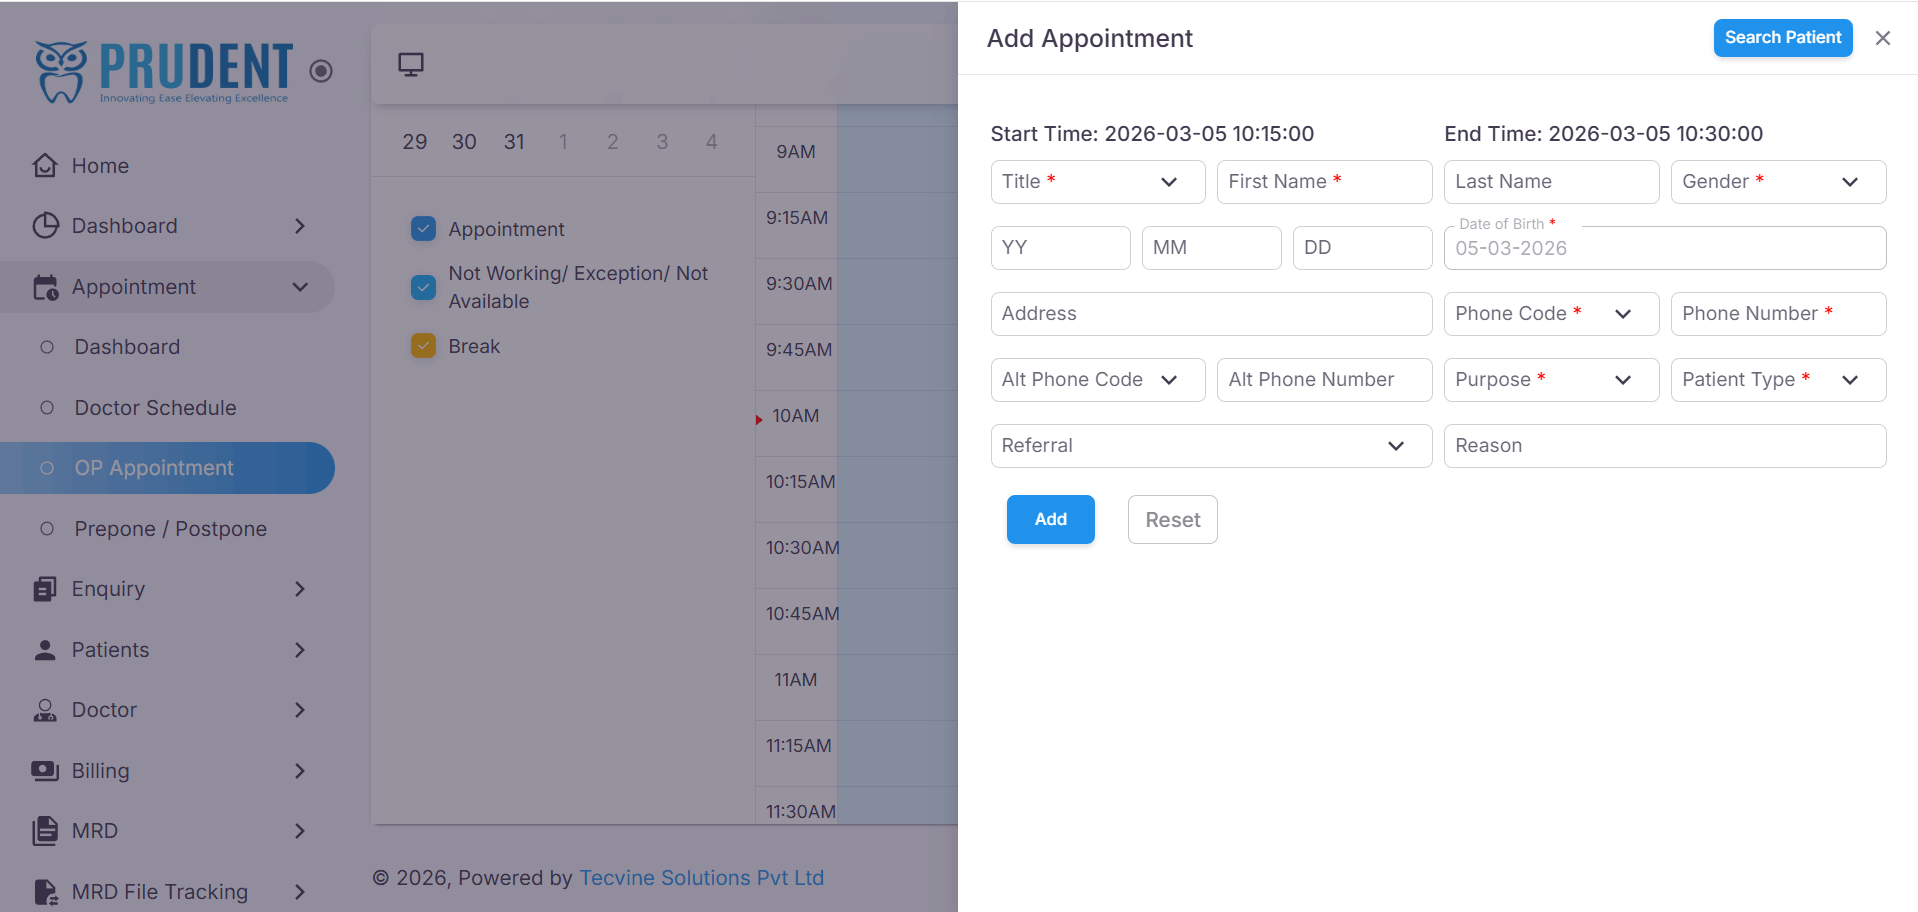
¶ Add a Patient
Click the Add Patient button to open the Add Appointment Drawer. For an already-visited patient, use the search option to retrieve their details automatically.
- Click the Add Patient button in the Slab Details Drawer.
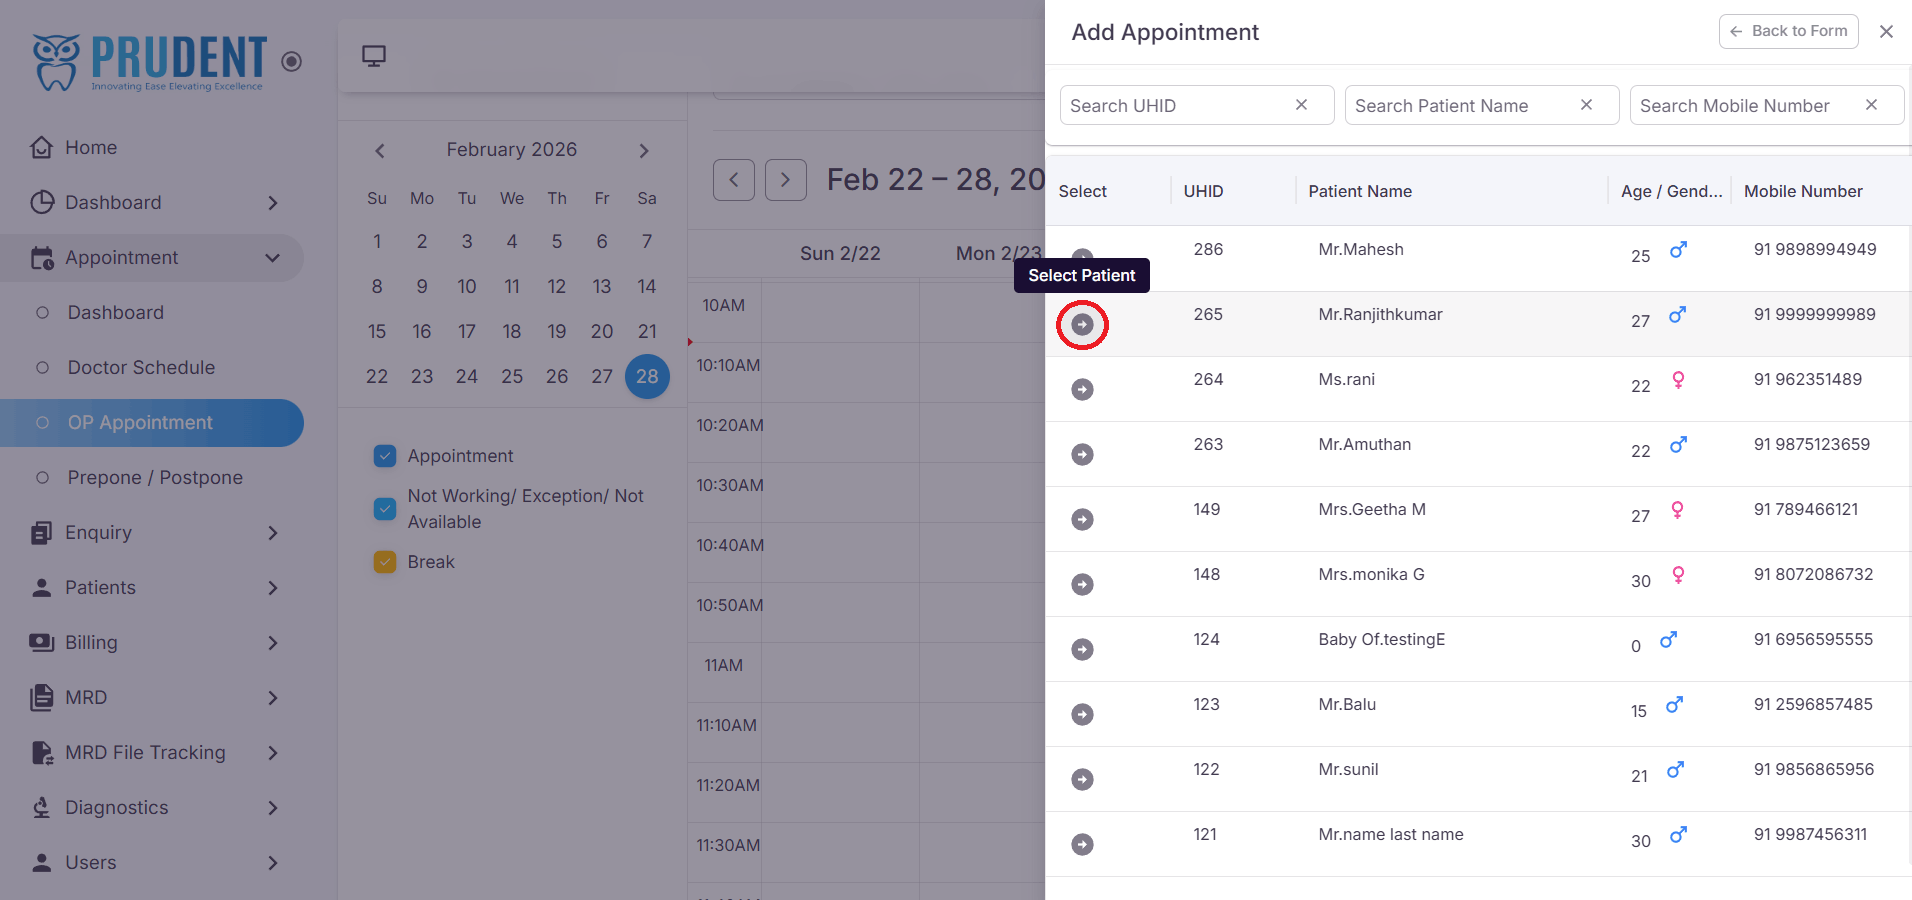
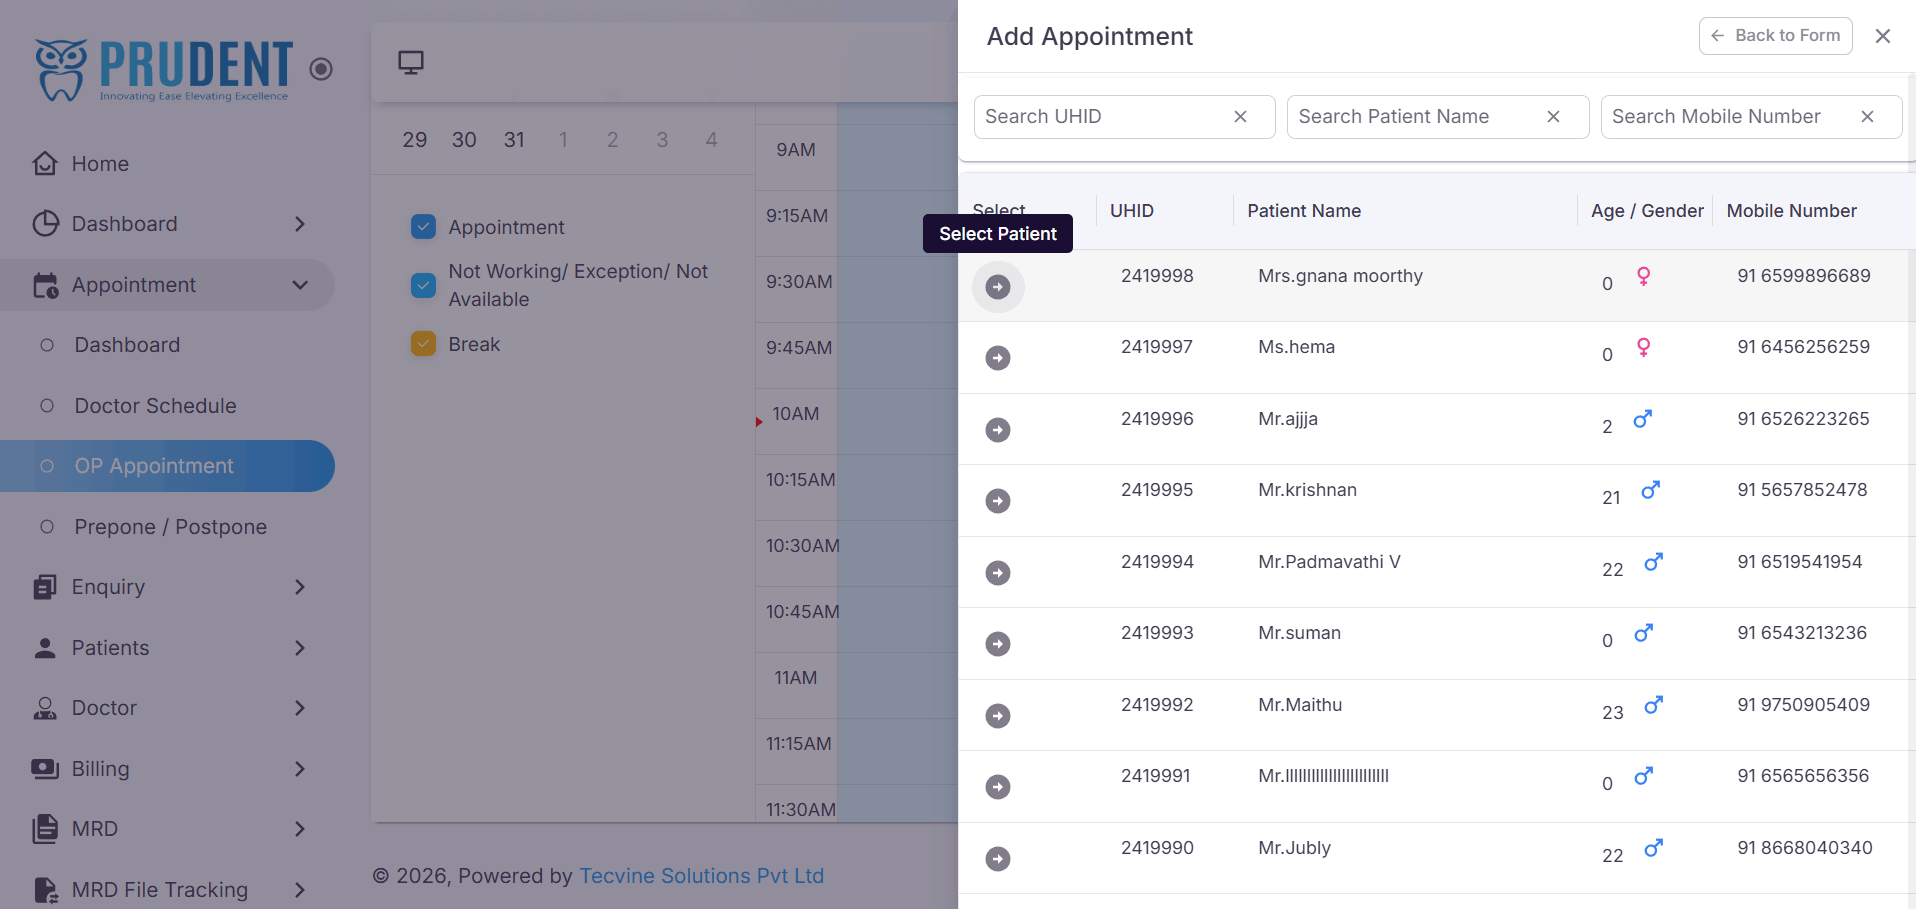
- Click the Search Patient button to look up an existing patient.
- The list of previously visited patients will be displayed. Search using UHID, Name, or Mobile Number.
- Click the Select Patient button next to the desired patient.
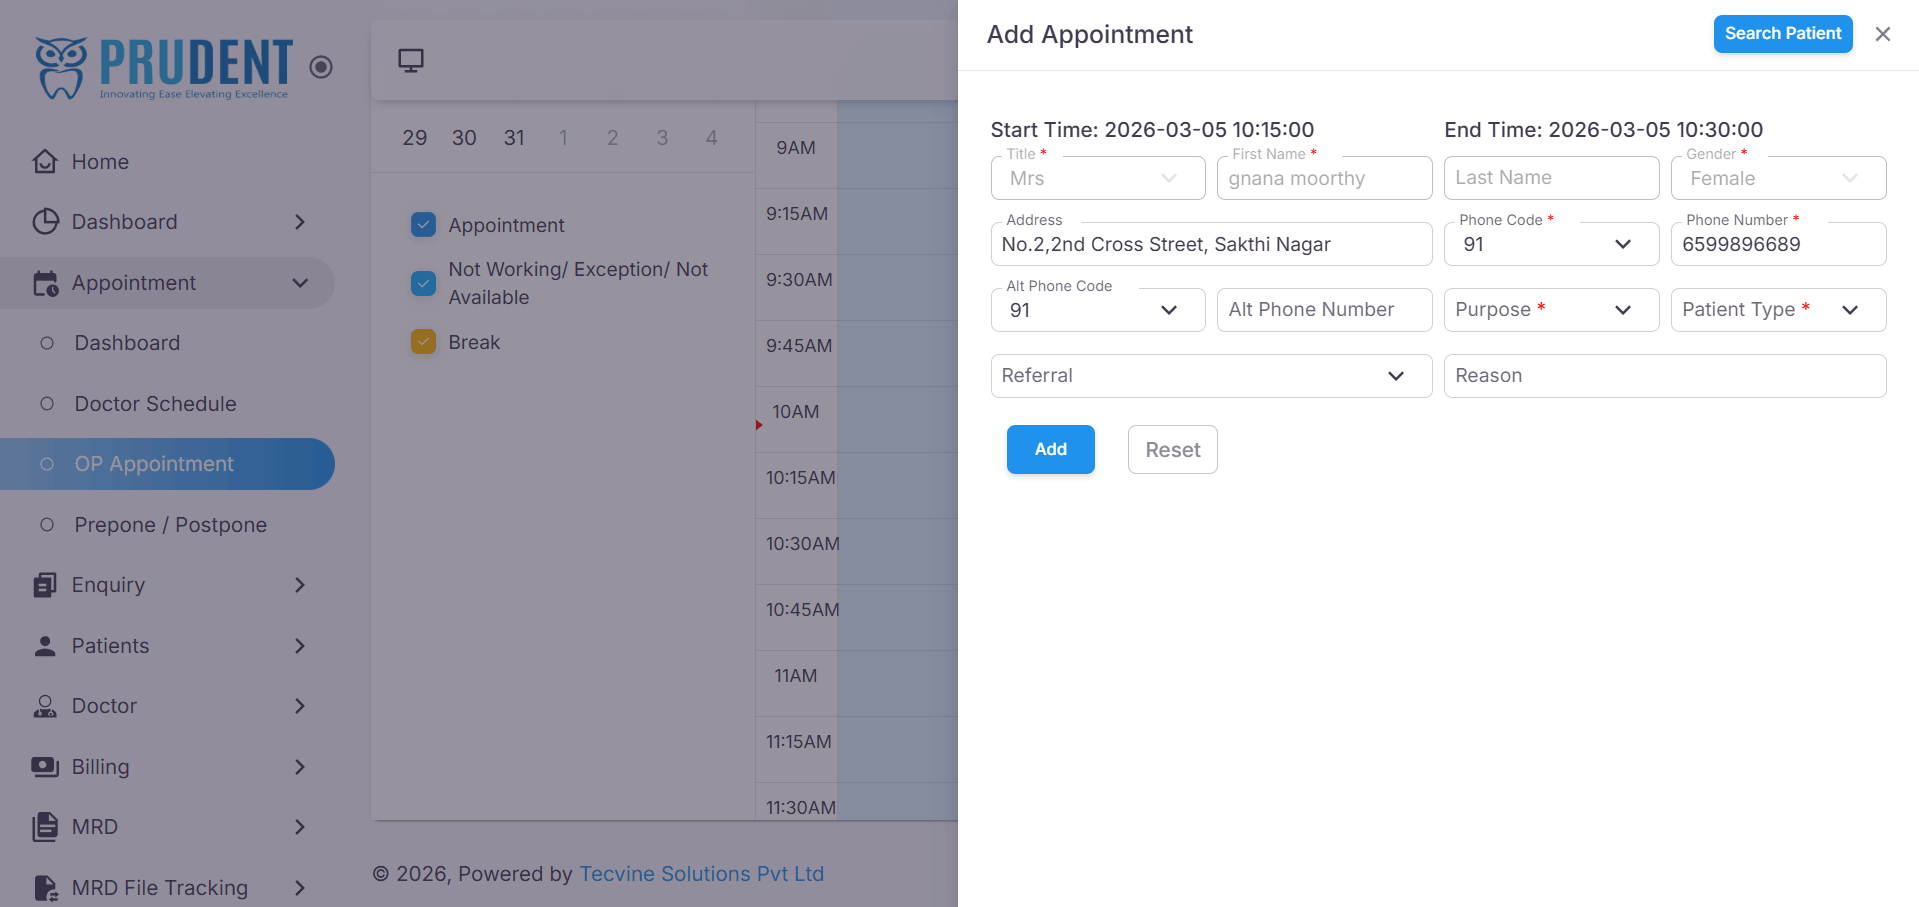
- The patient details will be auto-filled in the Add Appointment Drawer.
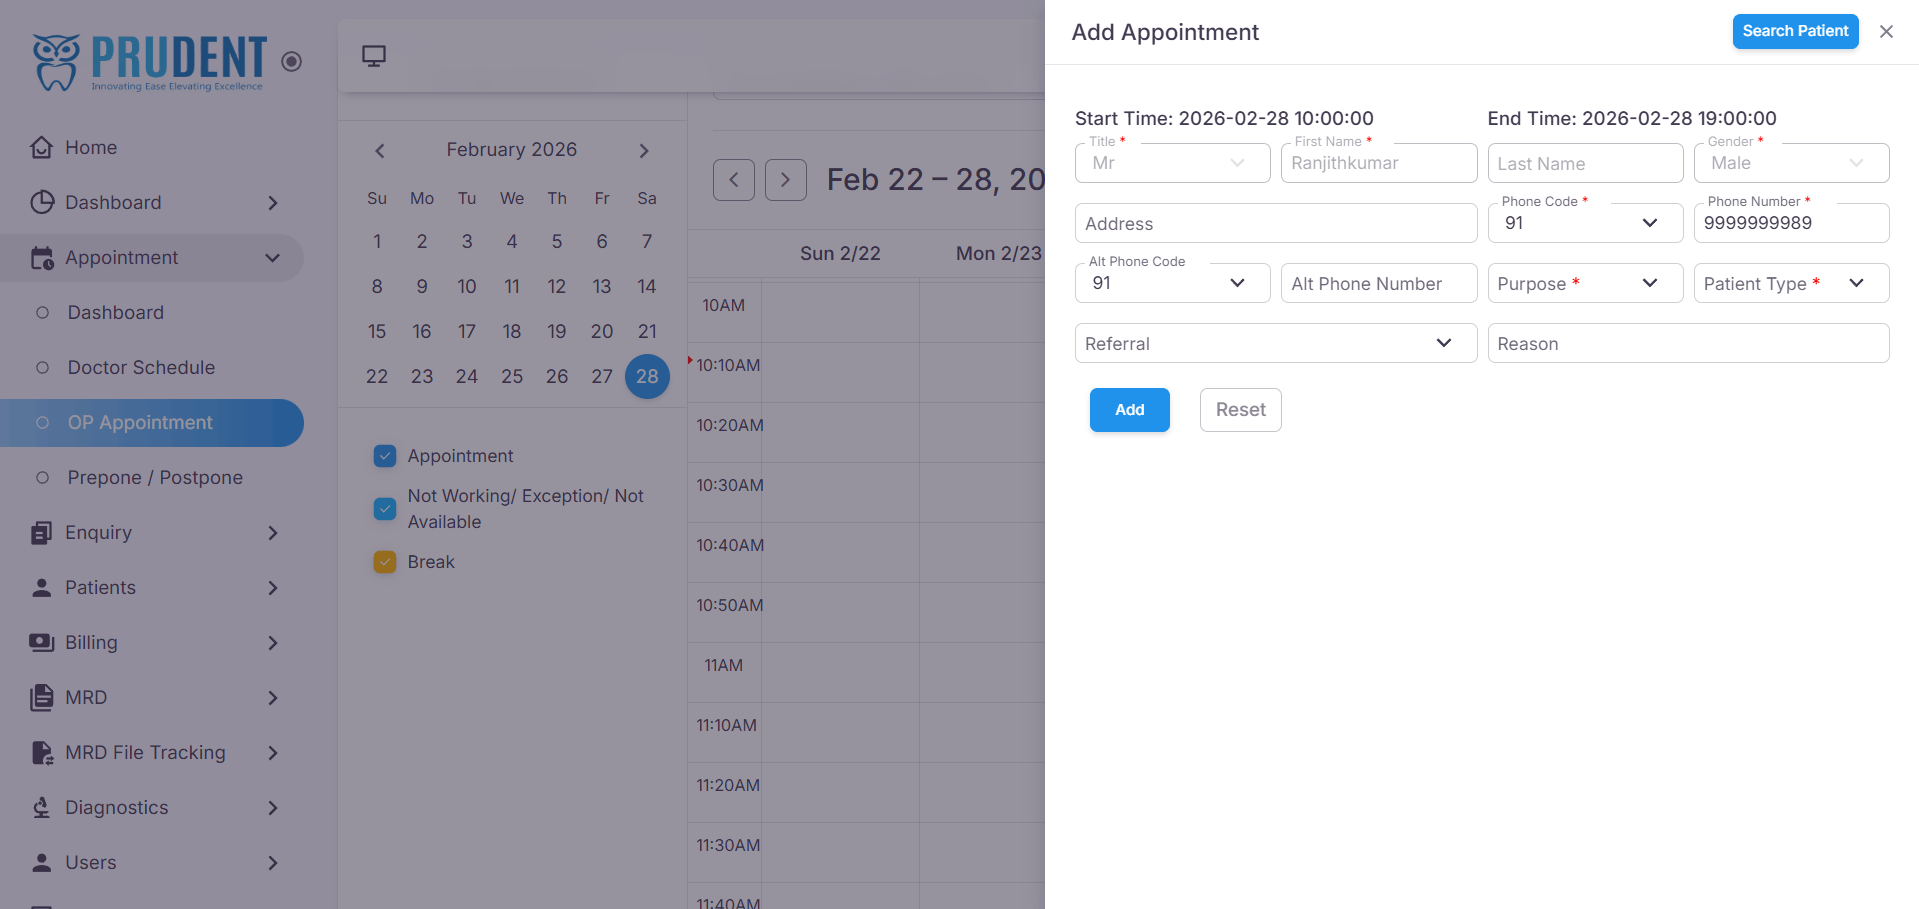
¶ Confirm the Appointment
Click the Add button to book the appointment against the selected doctor.
Success: An "Appointment Created Successfully" message will be displayed on the screen.
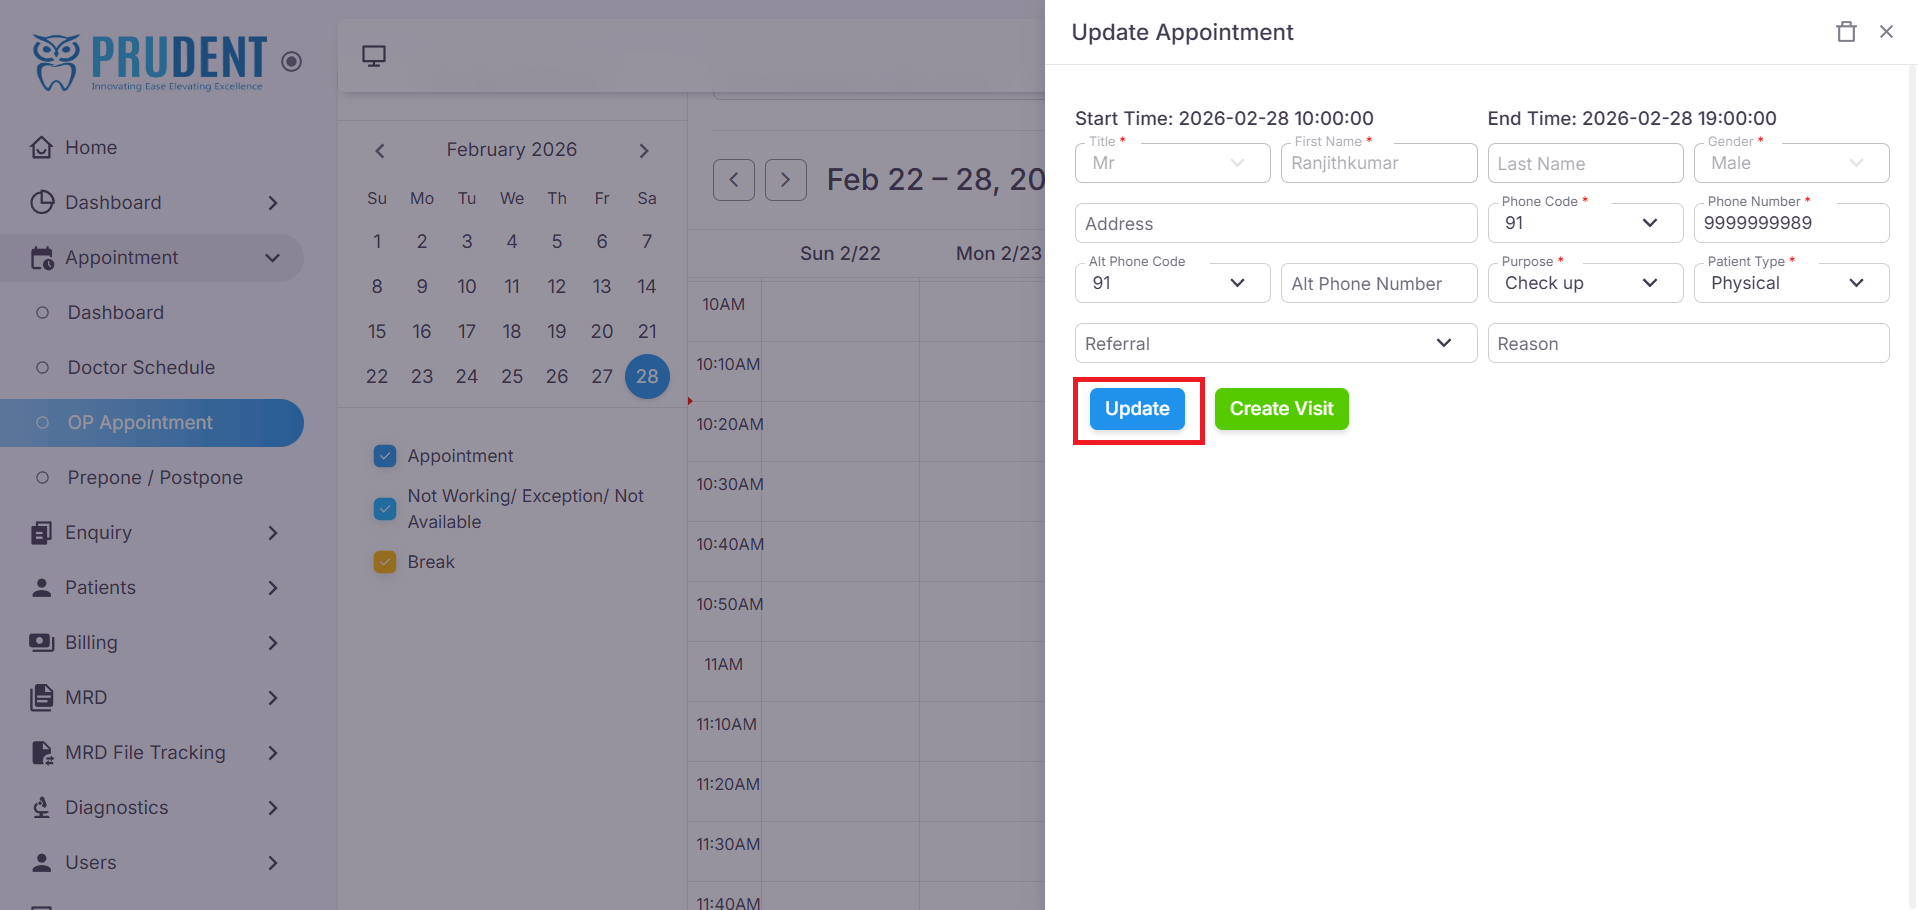
¶ View, Edit & Delete Appointments
Once an appointment slab is created, click on the booked appointment slab to open the Update Appointment drawer. The drawer will display the patient's appointment details.
- Update Appointment – Modify the patient details if required. After making the changes, click the Update button to save.
- Delete Icon (🗑️) – Click the delete icon in the drawer to remove the appointment from the selected slab.
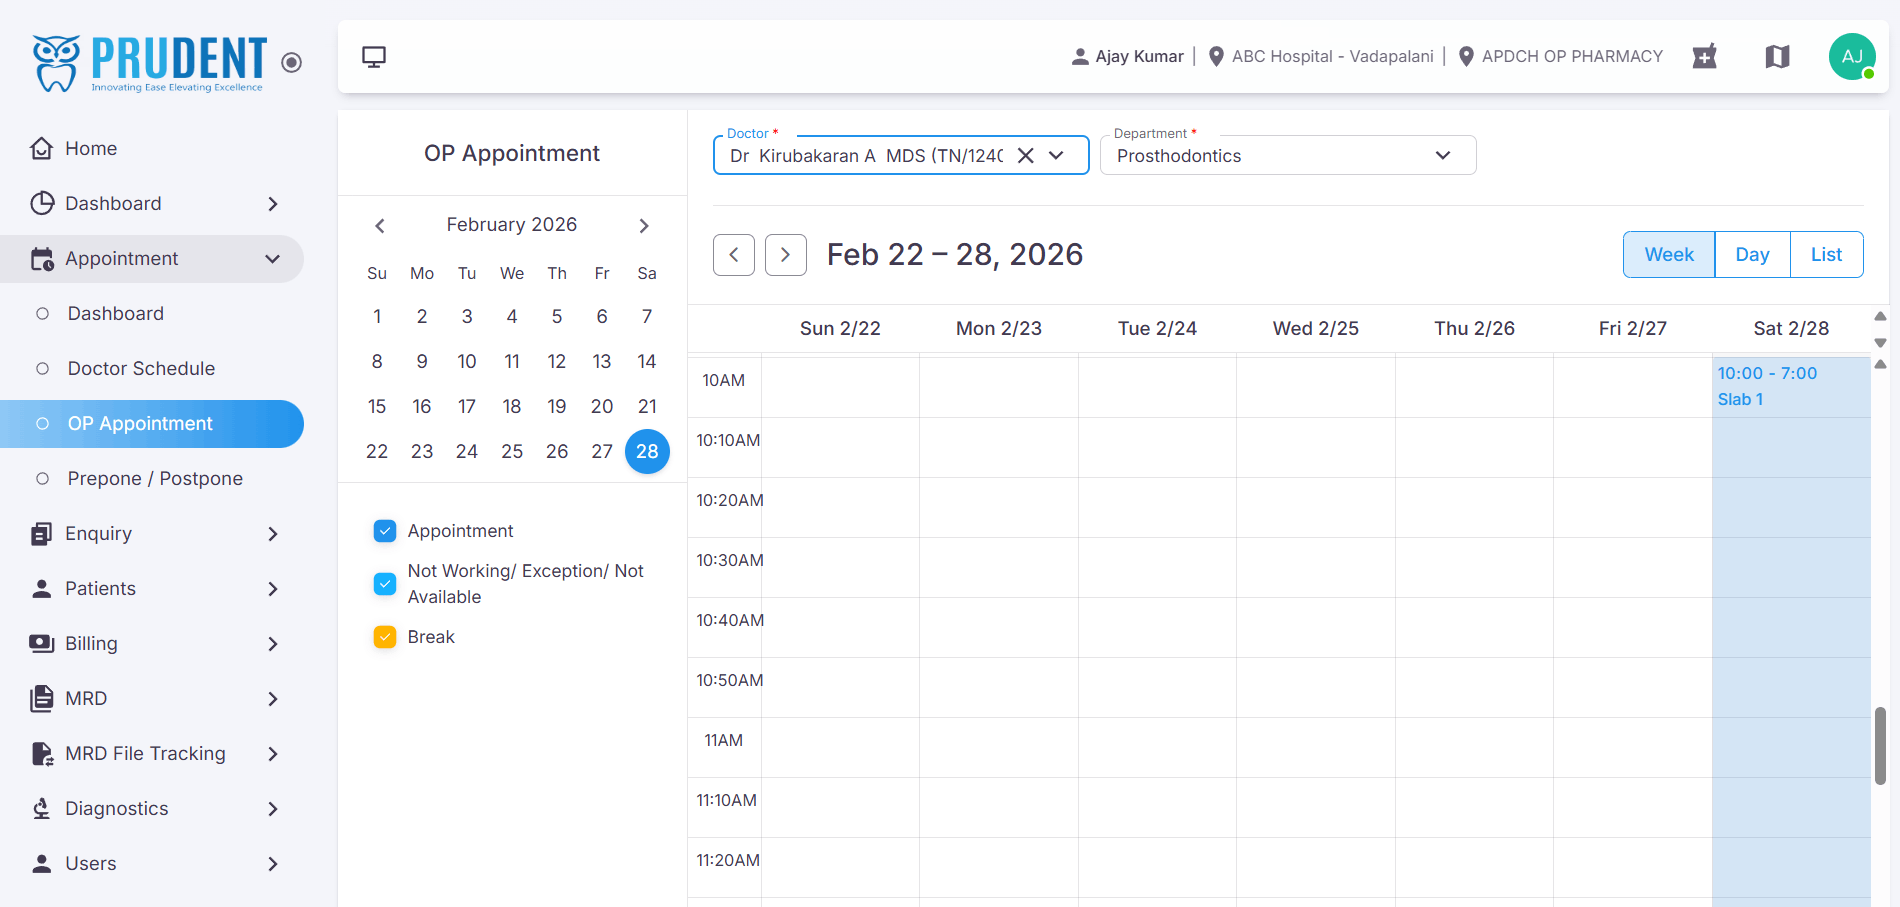
¶ Booking an Appointment – Slot Mode
When the selected doctor has a Slot-based schedule, appointments are booked into individual fixed time slots. Each slot on the schedule is colour-coded to indicate its availability.
¶ Slot Colour Legend
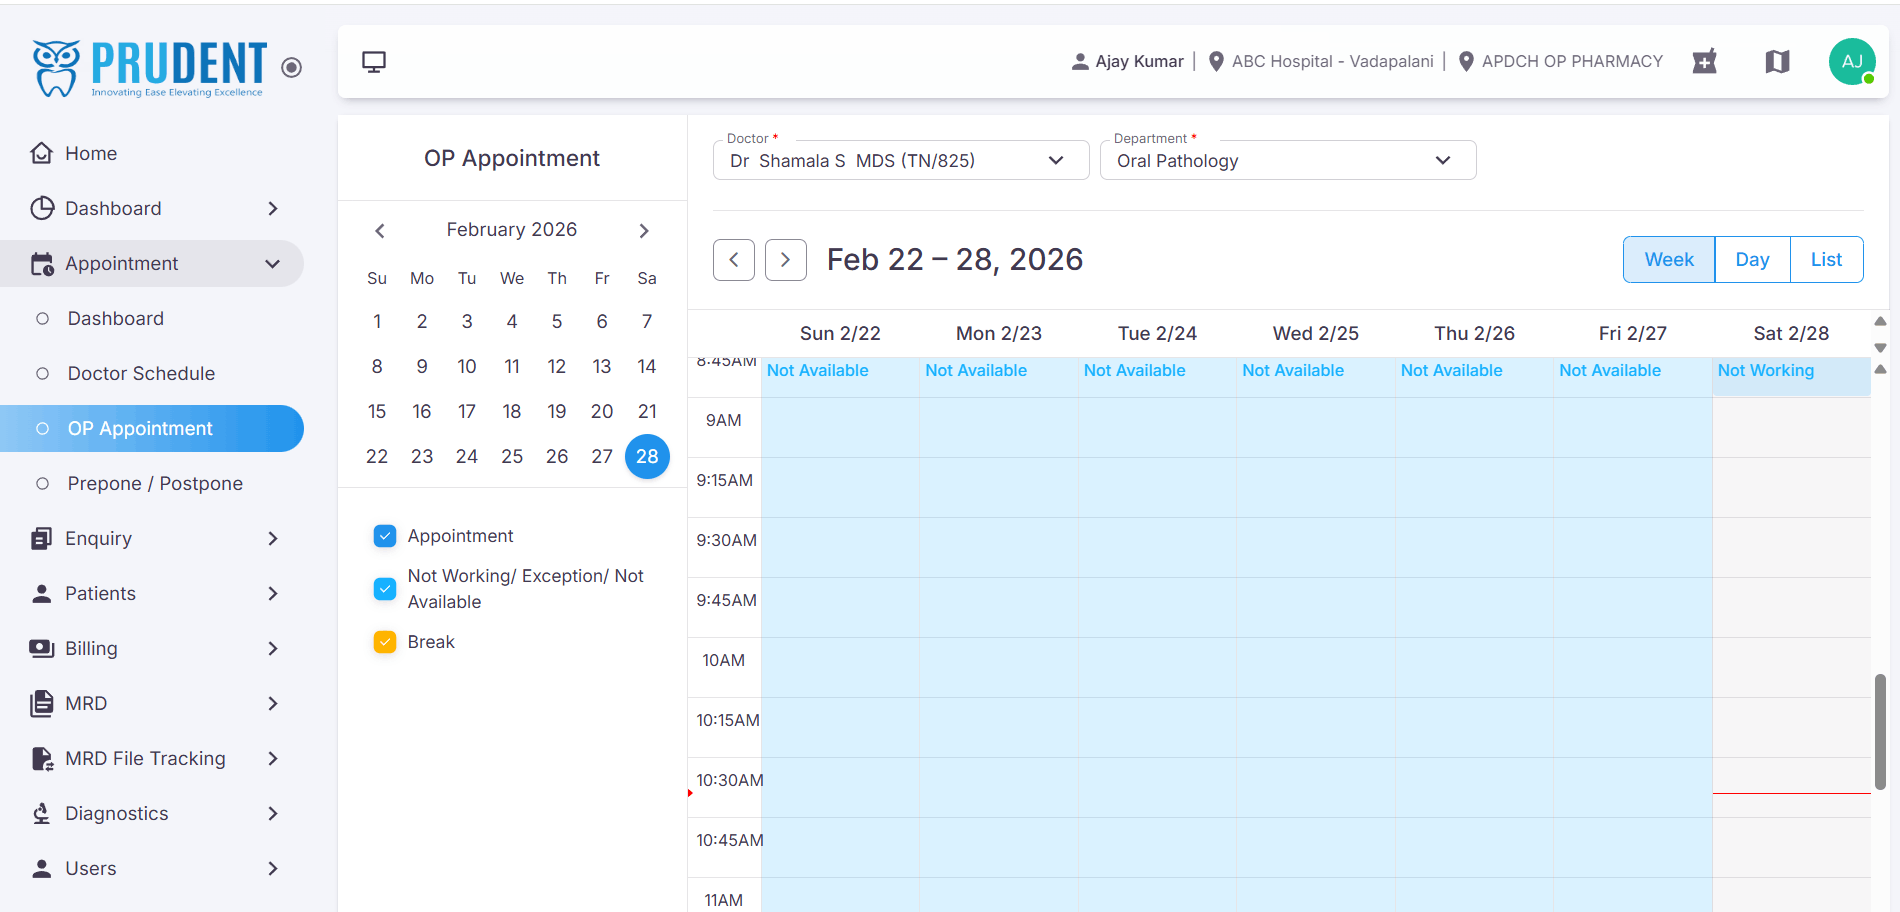
¶ Select an Available Slot
Click on a white (available) time slot on the schedule. The Add Appointment drawer will slide open from the right side of the screen.
- View the available slots on the schedule.
- Click on a white (available) time slot to open the Add Appointment drawer.

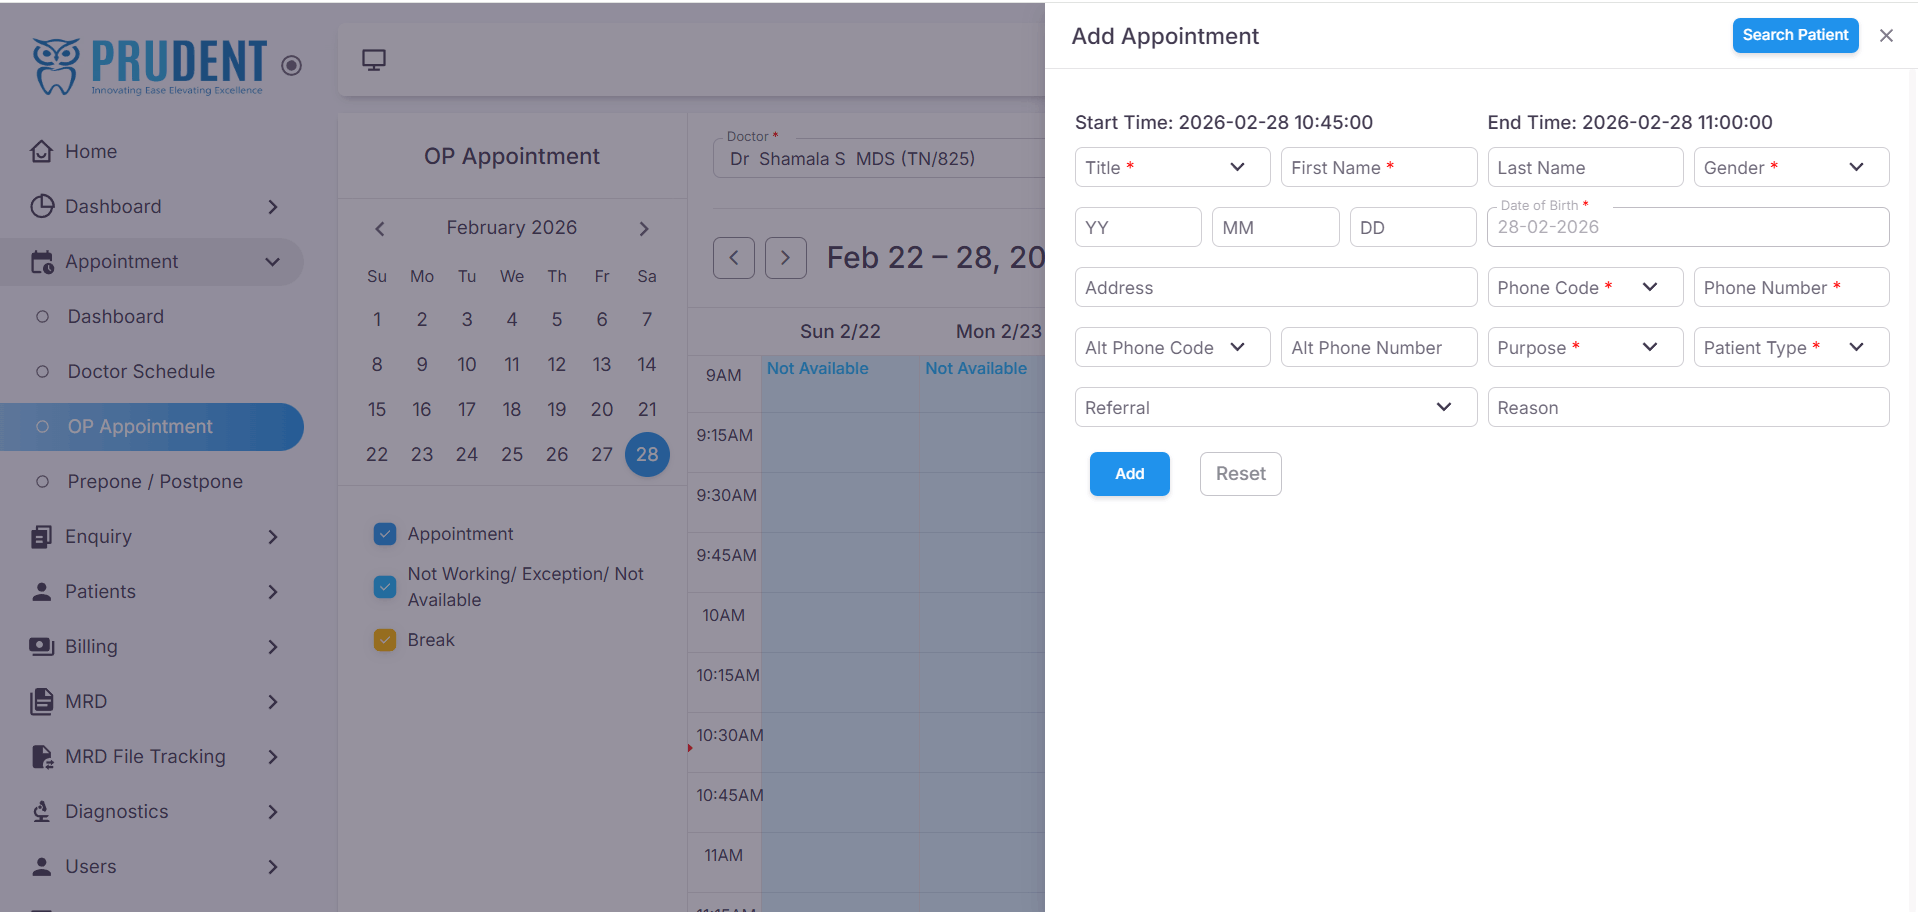
¶ Add a Patient
Enter the patient details in the Add Appointment drawer. For an already-visited patient, use the search option to retrieve their details automatically.
- Click the Search Patient button to look up an existing patient.
- The list of previously visited patients will be displayed. Search using UHID, Name, or Mobile Number.
- Click Select Patient next to the desired patient.
- The patient details will be auto-filled in the Add Appointment drawer.
¶ Confirm the Appointment
Click the Add button to book the appointment. The slot on the schedule will update to reflect the appointed patient and their time.
- Click the Add button to confirm the booking.
- The slot will be updated on the schedule to show the patient's name and appointment time.
Success: The patient's name and appointment time will be displayed on the booked slot in the schedule view.
¶ View, Edit & Delete Appointments
Once an appointment slot is created, click on the booked slot to open the Update Appointment drawer. The drawer will display the patient's appointment details.
- The booked appointments can also be viewed using the List View.
- Update Appointment – Modify the patient details if required. After making the changes, click the Update button to save.
- Delete Icon (🗑️) – Click the delete icon in the drawer to remove the appointment from the selected time slot.

Note: Deleted appointments will be removed from the schedule immediately and the slot will revert to available (white) status.
¶ Video Tutorial
Watch this step-by-step video guide to learn how to create a visit in the system.