¶ Patient Registration
¶ Overview
Patient Registration is the process of creating and maintaining a patient record in the system before providing medical services. It securely stores patient personal details, contact information, and medical history in one central system, ensuring consistency and continuity of care throughout the hospital.
¶ How to Navigate to Patient Registration
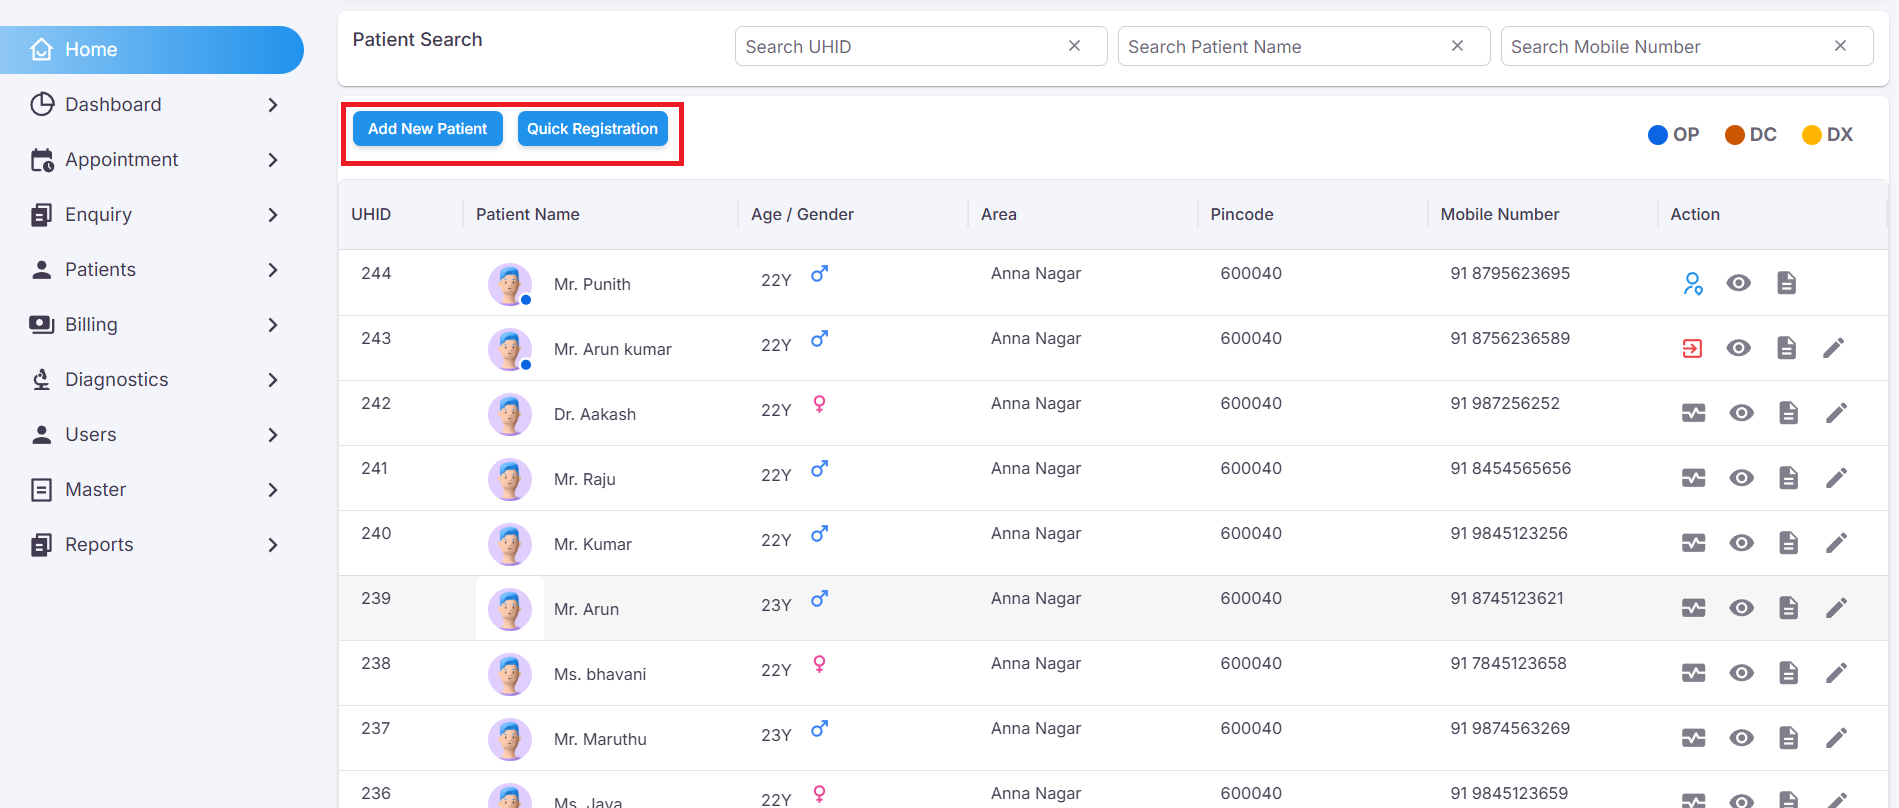
When you log in, you will land on the Home screen which displays the list of all registered patients. To register a new patient, locate the buttons at the top of the patient list:
- Click Add New Patient — to do a complete registration with full details (3-step process).
- Click Quick Registration — to register quickly with minimal details.
- Go to Appointment in the left sidebar — to register a patient via a scheduled appointment booking.
Before adding a new patient, use the search boxes at the top (Search UHID / Search Patient Name / Search Mobile Number) to check if the patient is already registered in the system.
¶ Registration Types
¶ New Patient Registration
The New Patient page is used to register a new patient in the system by entering their personal, contact, and relationship details. This is the first step before booking appointments, consultations, or diagnostics for a new visitor.
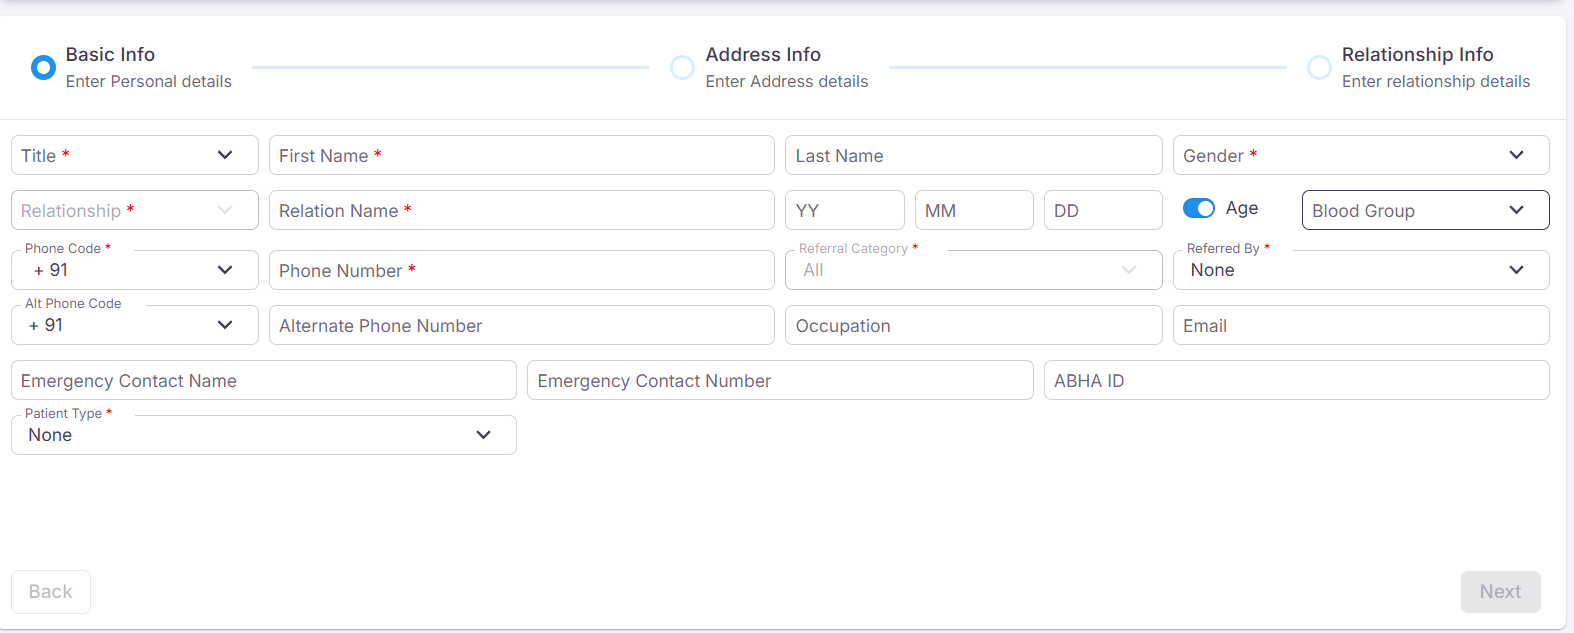
¶ Basic Info Section
In this section, you enter the patient's personal details.
| Field Name | Description |
|---|---|
| Title* |
Select the title:Baby of / Dr. / Mr. / Ms. / Mrs.
|
| First Name* | Enter the patient's first name. |
| Last Name |
Enter the patient's last name. (Optional, but recommended) |
| Gender* |
Select the patient's gender:Male / Female / Transgender
|
| Relationship* |
Select the relationship:Father / Mother / Spouse / Guardian
|
| Relation Name* | Enter the relation name. |
| Date of Birth* |
Select the date through calendar OR enter DOB in this format:DD-MM-YYYY
|
| Age (Toggle) | If enabled, age gets auto-calculated when DOB is entered. |
| Blood Group |
Select from available blood groups:AB+ / AB- / A+ / A- / B+ / B- / O+ / O-
|
| Phone Code* |
Select from available codes:America +1 / India +91
|
| Phone Number* | Enter the patient's phone number. |
| Referral Category* |
Select the referral category:Business Partner / Family / Friends / Others / Social Media
|
| Referred By | Select doctor name from the dropdown. |
| Alternative Phone Code |
Select from available codes:America +1 / India +91
|
| Alternative Phone No. | Enter alternative phone number. |
| Occupation | Enter the patient's occupation. |
|
Enter valid email ID. Example: abcd@gmail.com |
|
| Emergency Contact Name | Enter the emergency contact person's name. |
| Emergency Contact No. | Enter emergency contact number. |
| Marital Status |
Select the patient's marital status:Married / Unmarried / Divorced / Separated / Widowed
|
| ABHA ID | If patient has ABHA ID, enter it here. |
| Patient Type |
Select patient type:None / Safety First / Priority First
|
Note: Fields marked with * are mandatory and must be filled before proceeding.
Click Next to proceed to Address Info →
¶ Address Info
This step appears after clicking Next. Here you enter the patient's address details.
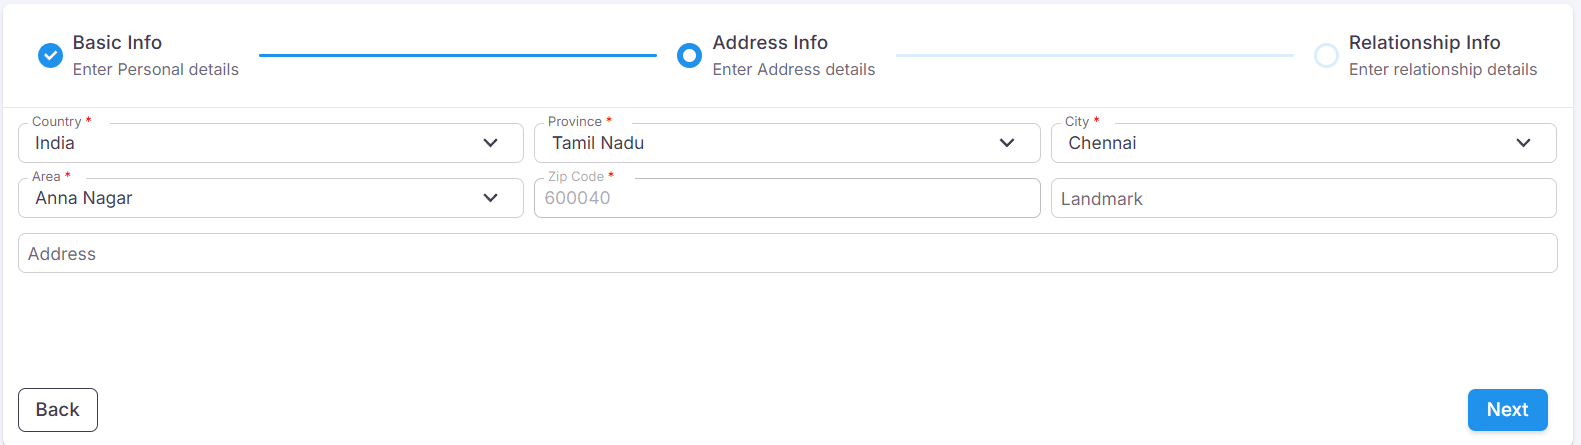
¶ Address Fields:
- Country
- Province/State
- City
- Area
- Zip Code
- Landmark
- Address
Click Next to proceed to Relationship Info or Back to return →
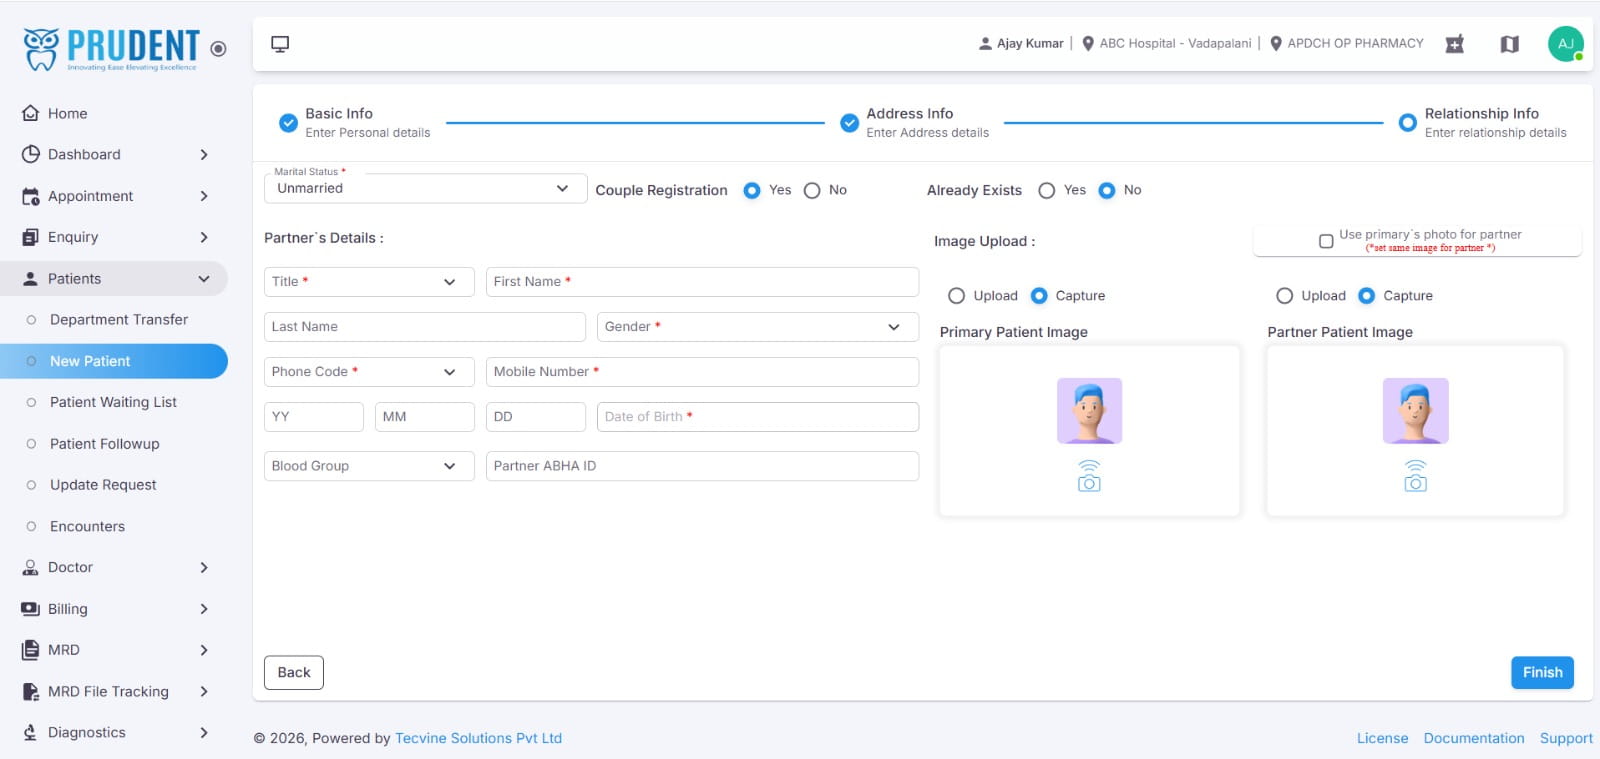
¶ Relationship Info
The Relationship Info page is the final step of patient registration.
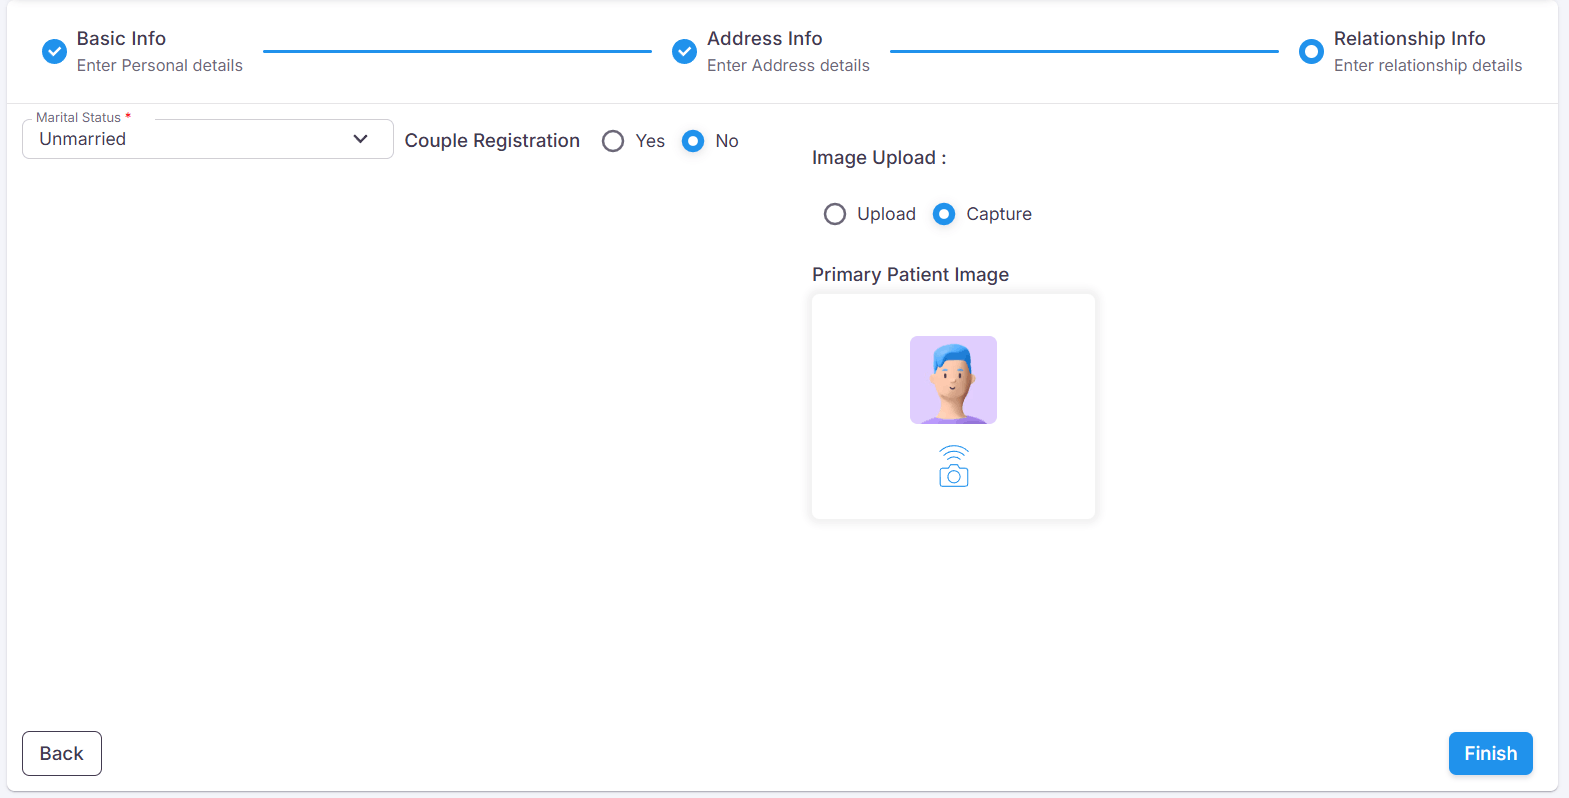
¶ Complete the following:
- Select patient's Marital Status
- Choose whether it is a Couple Registration
- Upload Patient Image by either uploading a file or capturing a photo
¶ Couple Registration
In Step 3 (Relationship Info), if Couple Registration was set to Yes, this allows you to enter the partner's personal information and upload their photo as part of the same registration flow.
¶ Already Exists
At the top of this section, an Already Exists option (Yes / No) determines whether the partner is a new or existing patient in the system:
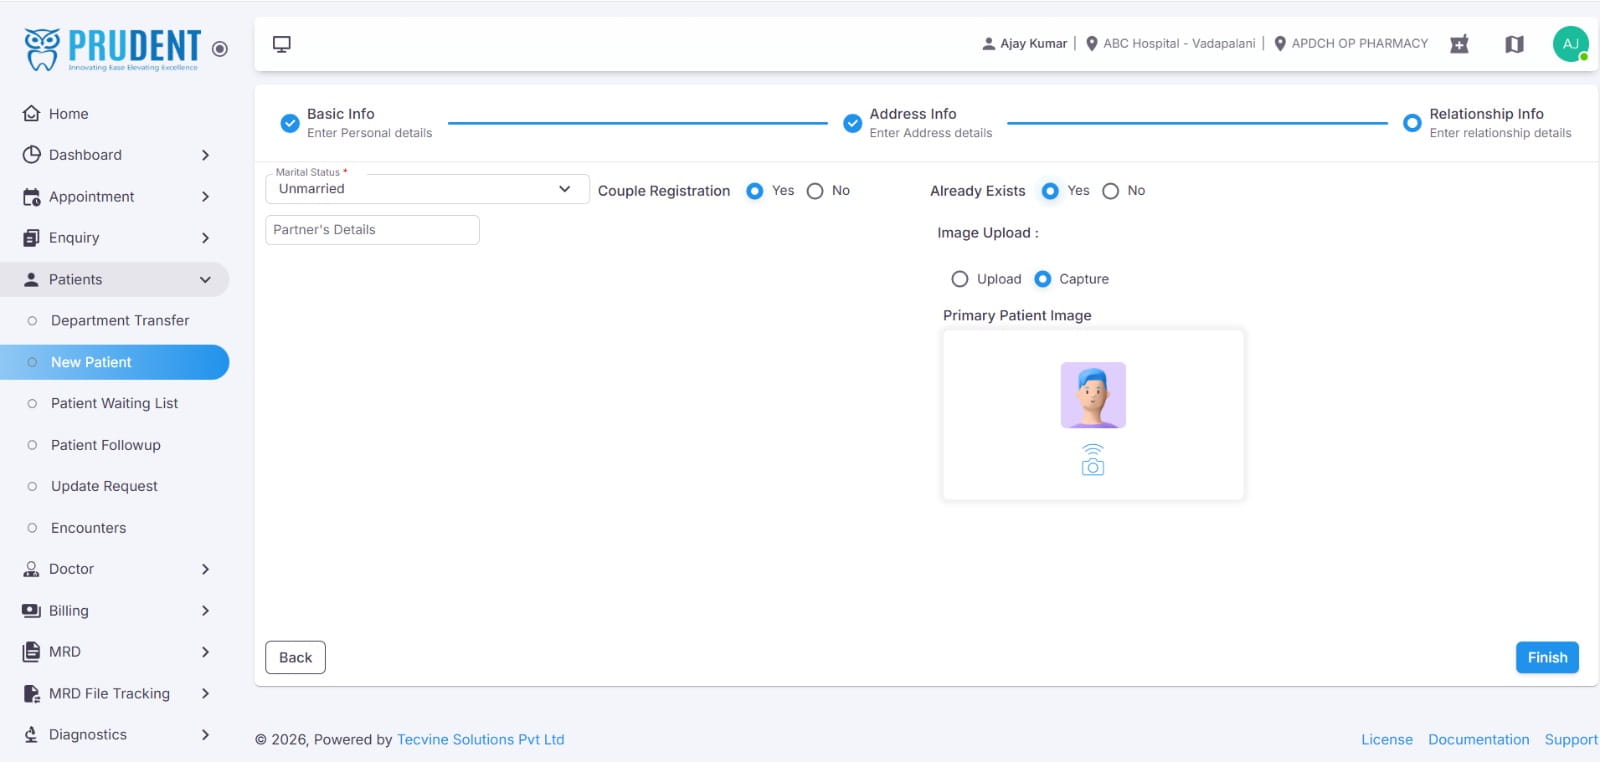
✅ Once all partner details are filled in, click Finish to complete the couple registration. Both patients will be registered simultaneously and linked to each other in the system.
¶ Video Tutorial
Watch this step-by-step video guide to learn how to create a visit in the system.
¶ ✓ Registration Complete
After clicking Finish, a popup message will appear saying "Patient registered successfully", indicating that the new patient has been added to the system.